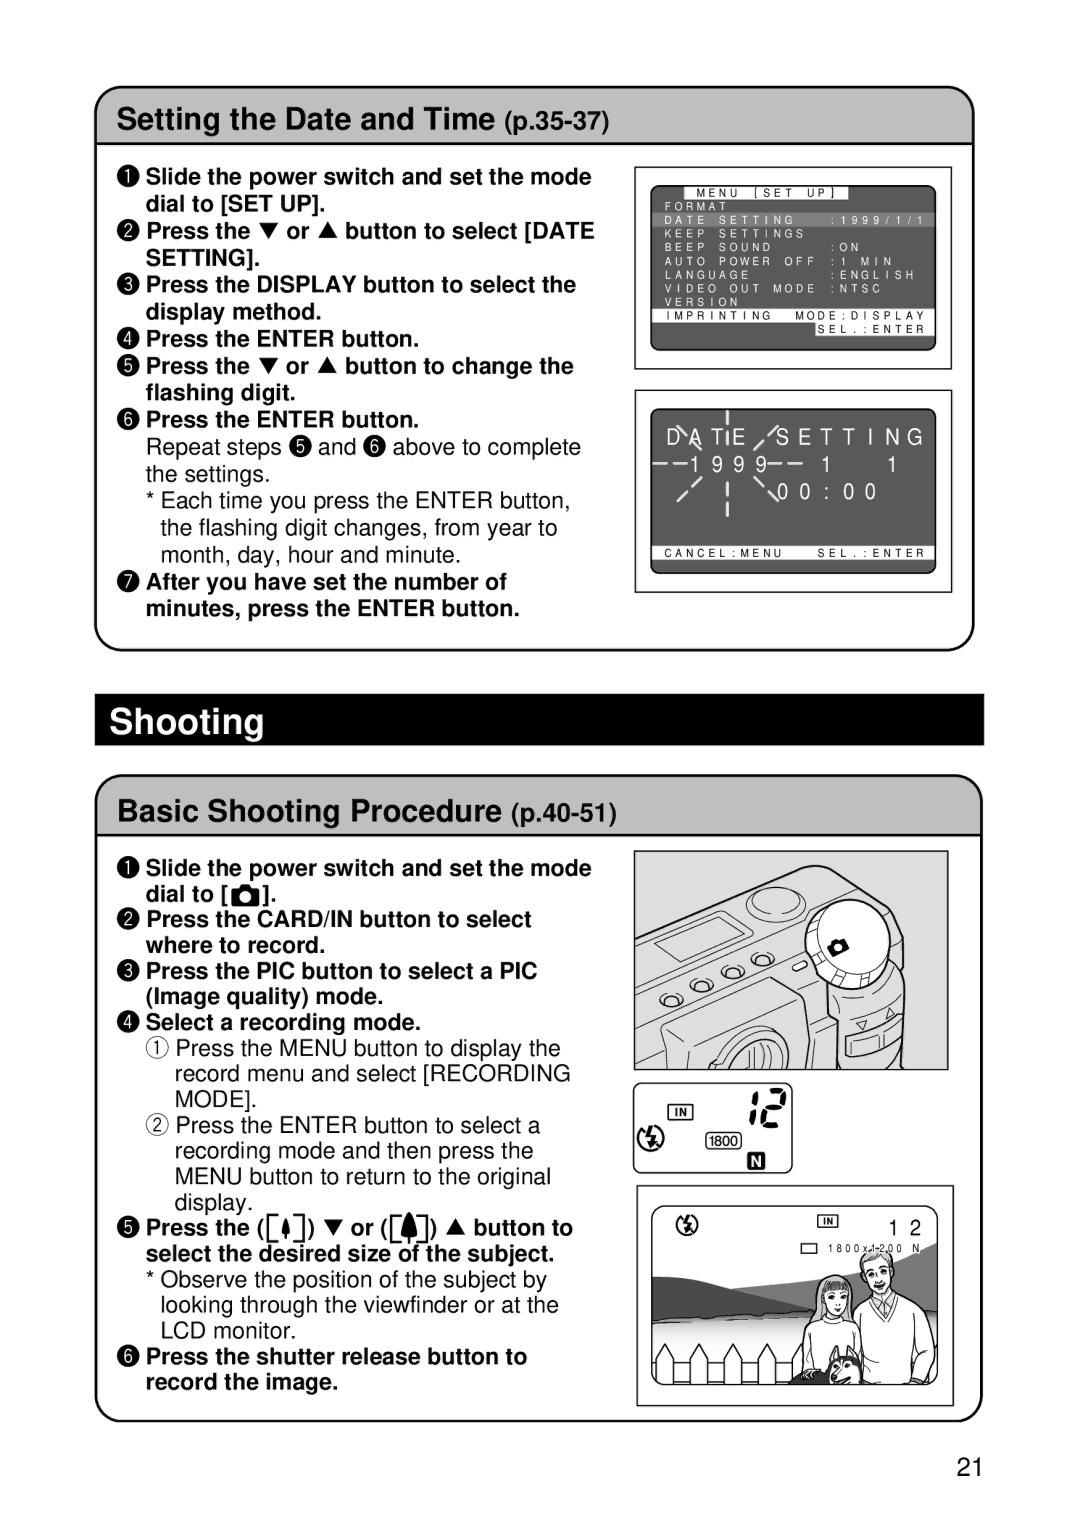
Setting the Date and Time (p.35-37)
q Slide the power switch and set the mode dial to [SET UP].
w Press the ▼ or ▲ button to select [DATE
SETTING].
e Press the DISPLAY button to select the display method.
r Press the ENTER button.
t Press the ▼ or ▲ button to change the flashing digit.
y Press the ENTER button.
Repeat steps t and y above to complete the settings.
*Each time you press the ENTER button, the flashing digit changes, from year to month, day, hour and minute.
u After you have set the number of minutes, press the ENTER button.
MENU [SET UP]
FORMAT |
|
| |
DATE | SETTING | :1999/1/1 | |
KEEP | SETTINGS |
| |
BEEP | SOUND |
| :ON |
AUTO | POWER | OFF | :1 MIN |
LANGUAGE |
| :ENGLISH | |
VIDEO | OUT | MODE | :NTSC |
VERSION |
|
| |
IMPRINTING | MODE:DISPLAY | ||
|
|
| SEL.:ENTER |
DATE | SETTING | ||
1999 |
| 1 | 1 |
| 00:00 |
| |
CANCEL:MENU | SEL.:ENTER | ||
Shooting
Basic Shooting Procedure (p.40-51)
q Slide the power switch and set the mode dial to [ ![]() ].
].
w Press the CARD/IN button to select where to record.
e Press the PIC button to select a PIC (Image quality) mode.
r Select a recording mode.
q ��
Press the MENU button to display the record menu and select [RECORDING MODE].
wPress the ENTER button to select a recording mode and then press the MENU button to return to the original
display.
t Press the ( ![]()
![]()
![]() ) ▼ or (
) ▼ or (![]()
![]()
![]() ) ▲ button to select the desired size of the subject.
) ▲ button to select the desired size of the subject.
*Observe the position of the subject by looking through the viewfinder or at the LCD monitor.
y Press the shutter release button to record the image.
12
1800x1200 N
21