Remote Commands to the Projector
Pointing the Remote to the reflective screen
Point the front of the Remote to the screen surface.
Ceiling
IR sensor
Screen
![]()
![]()
![]()
![]() Remote
Remote
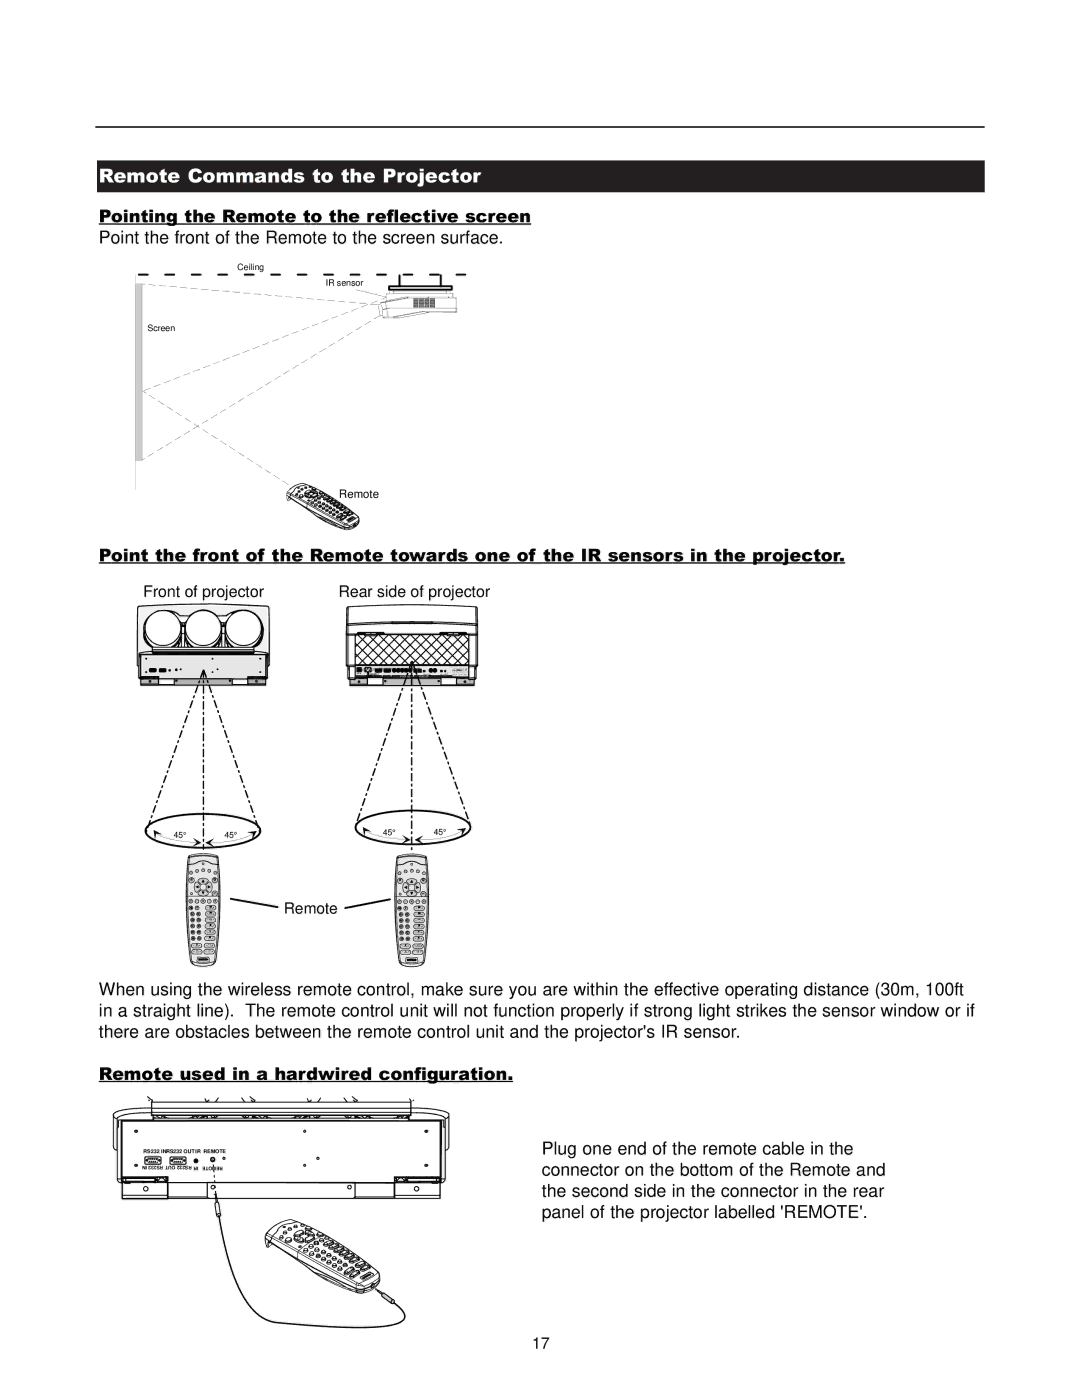
Point the front of the Remote towards one of the IR sensors in the projector.
Front of projector | Rear side of projector |
See installation instructions before connecting to the supply. | the FCCRules. 15 | ||
Voir la notice d'installation avant de raccorder au réseau. |
| ||
120/230 V |
| 75 Ohm | 75 Ohm |
7/5 Amp | PORT 4/5 | ||
50/60 Hz | PORT 2 |
| |
45° 45°
9 0
7 8
5 6
3 4
1 2
Remote
45° 45°
9 0
7 8
5 6
3 4
1 2
When using the wireless remote control, make sure you are within the effective operating distance (30m, 100ft in a straight line). The remote control unit will not function properly if strong light strikes the sensor window or if there are obstacles between the remote control unit and the projector's IR sensor.
Remote used in a hardwired configuration.
RS232 INRS232 OUT IR REMOTE
IN RS232 OUT RS232 IR ER
Plug one end of the remote cable in the connector on the bottom of the Remote and the second side in the connector in the rear panel of the projector labelled 'REMOTE'.
17