Personnel Programming
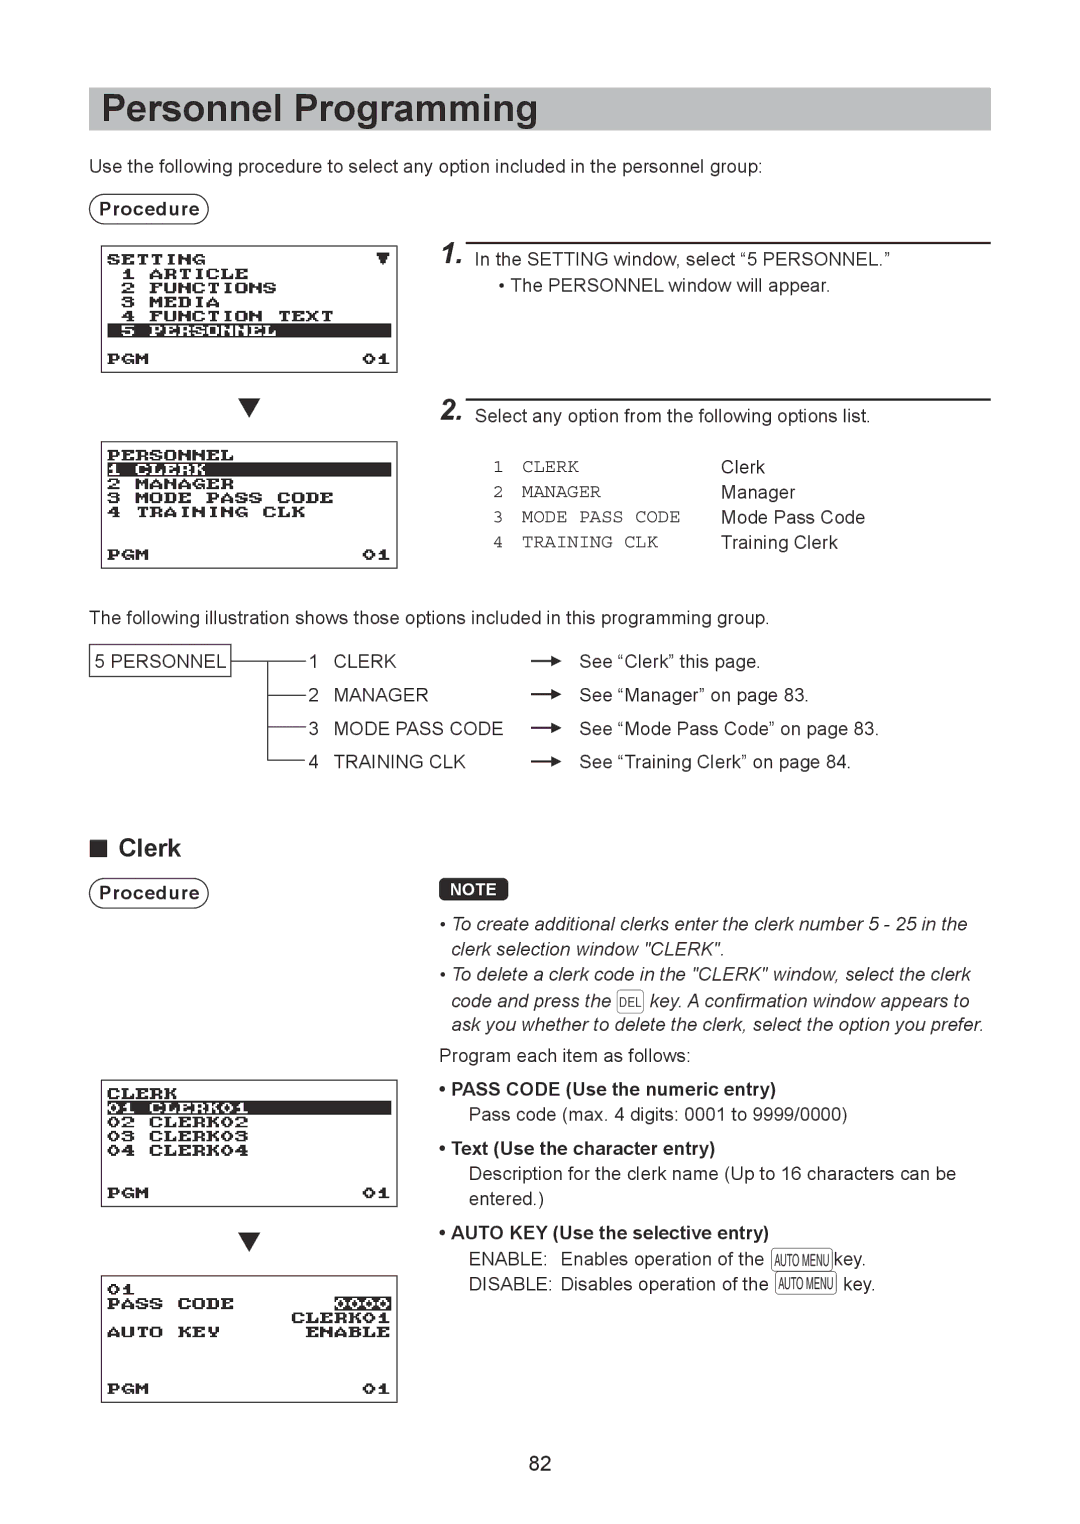
Use the following procedure to select any option included in the personnel group:
Procedure
1. In the SETTING window, select “5 PERSONNEL.”
• The PERSONNEL window will appear.
2. Select any option from the following options list.
1 | CLERK | Clerk |
2 | MANAGER | Manager |
3 | MODE PASS CODE | Mode Pass Code |
4 | TRAINING CLK | Training Clerk |
The following illustration shows those options included in this programming group.
5 PERSONNEL |
|
|
|
| 1 | CLERK | l See “Clerk” this page. |
|
|
|
| ||||
|
|
| 2 | MANAGER | l See “Manager” on page 83. | ||
|
|
| |||||
|
|
| 3 | MODE PASS CODE | l See “Mode Pass Code” on page 83. | ||
|
|
| |||||
|
|
| 4 | TRAINING CLK | l See “Training Clerk” on page 84. | ||
|
|
| |||||
■■ Clerk
Procedure
NOTE
•To create additional clerks enter the clerk number 5 - 25 in the clerk selection window "CLERK".
•To delete a clerk code in the "CLERK" window, select the clerk
code and press the lkey. A confirmation window appears to ask you whether to delete the clerk, select the option you prefer.
Program each item as follows:
• PASS CODE (Use the numeric entry)
Pass code (max. 4 digits: 0001 to 9999/0000)
• Text (Use the character entry)
Description for the clerk name (Up to 16 characters can be entered.)
• AUTO KEY (Use the selective entry)
ENABLE: Enables operation of the Vkey.
DISABLE: Disables operation of the Vkey.
82
