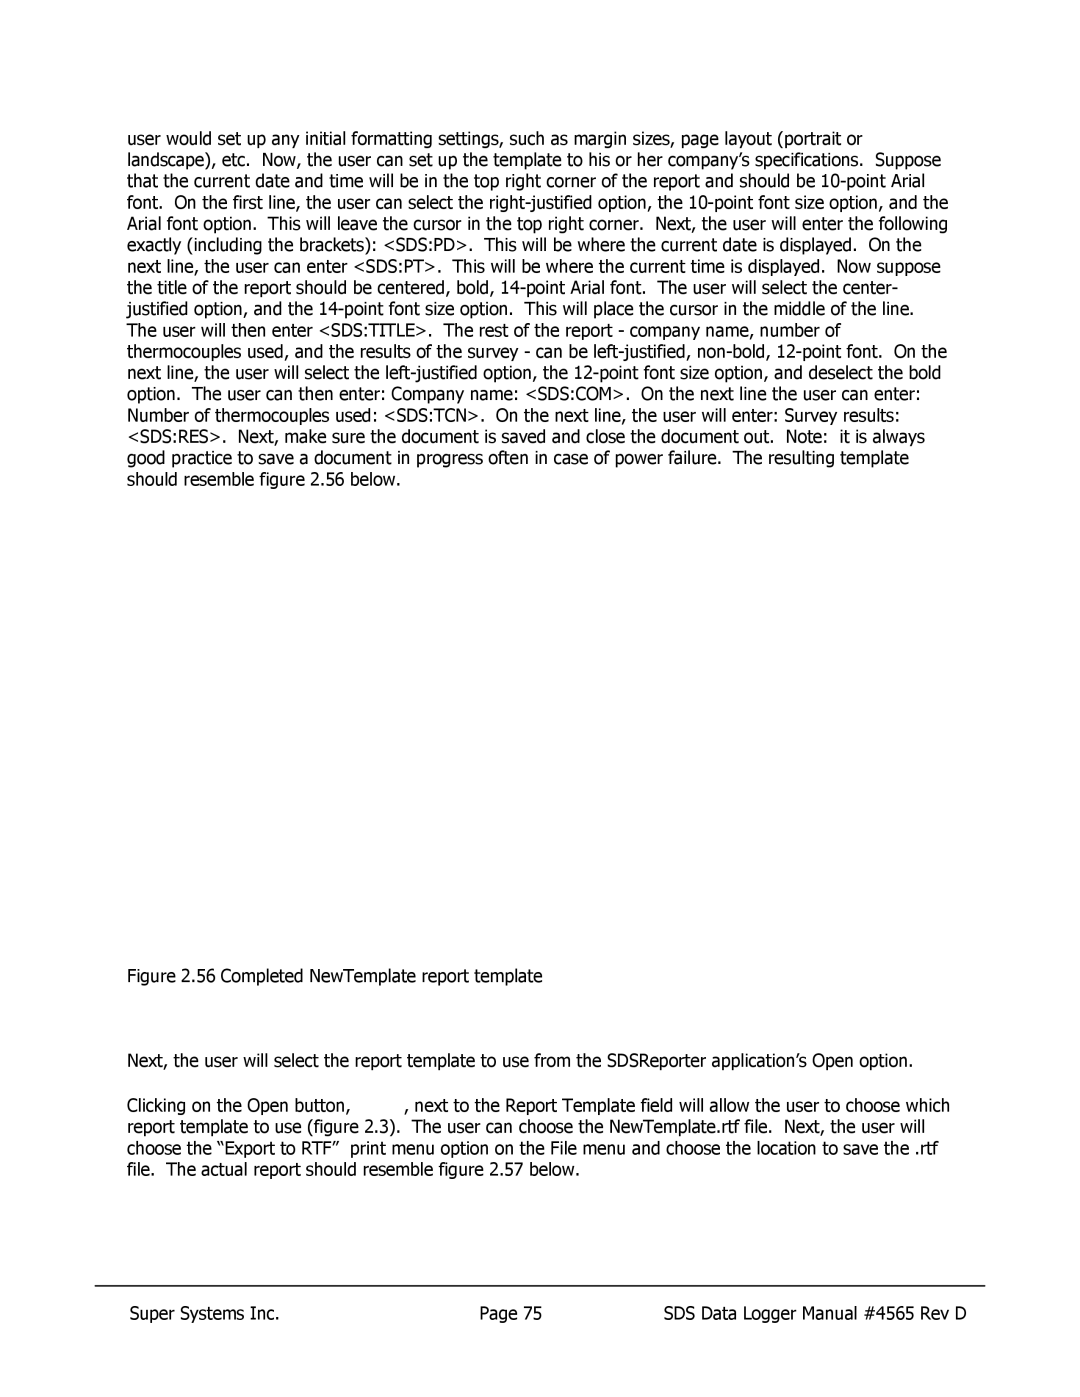
user would set up any initial formatting settings, such as margin sizes, page layout (portrait or landscape), etc. Now, the user can set up the template to his or her company’s specifications. Suppose that the current date and time will be in the top right corner of the report and should be
Figure 2.56 Completed NewTemplate report template
Next, the user will select the report template to use from the SDSReporter application’s Open option.
Clicking on the Open button,  , next to the Report Template field will allow the user to choose which report template to use (figure 2.3). The user can choose the NewTemplate.rtf file. Next, the user will choose the “Export to RTF” print menu option on the File menu and choose the location to save the .rtf file. The actual report should resemble figure 2.57 below.
Super Systems Inc. | Page 75 | SDS Data Logger Manual #4565 Rev D |