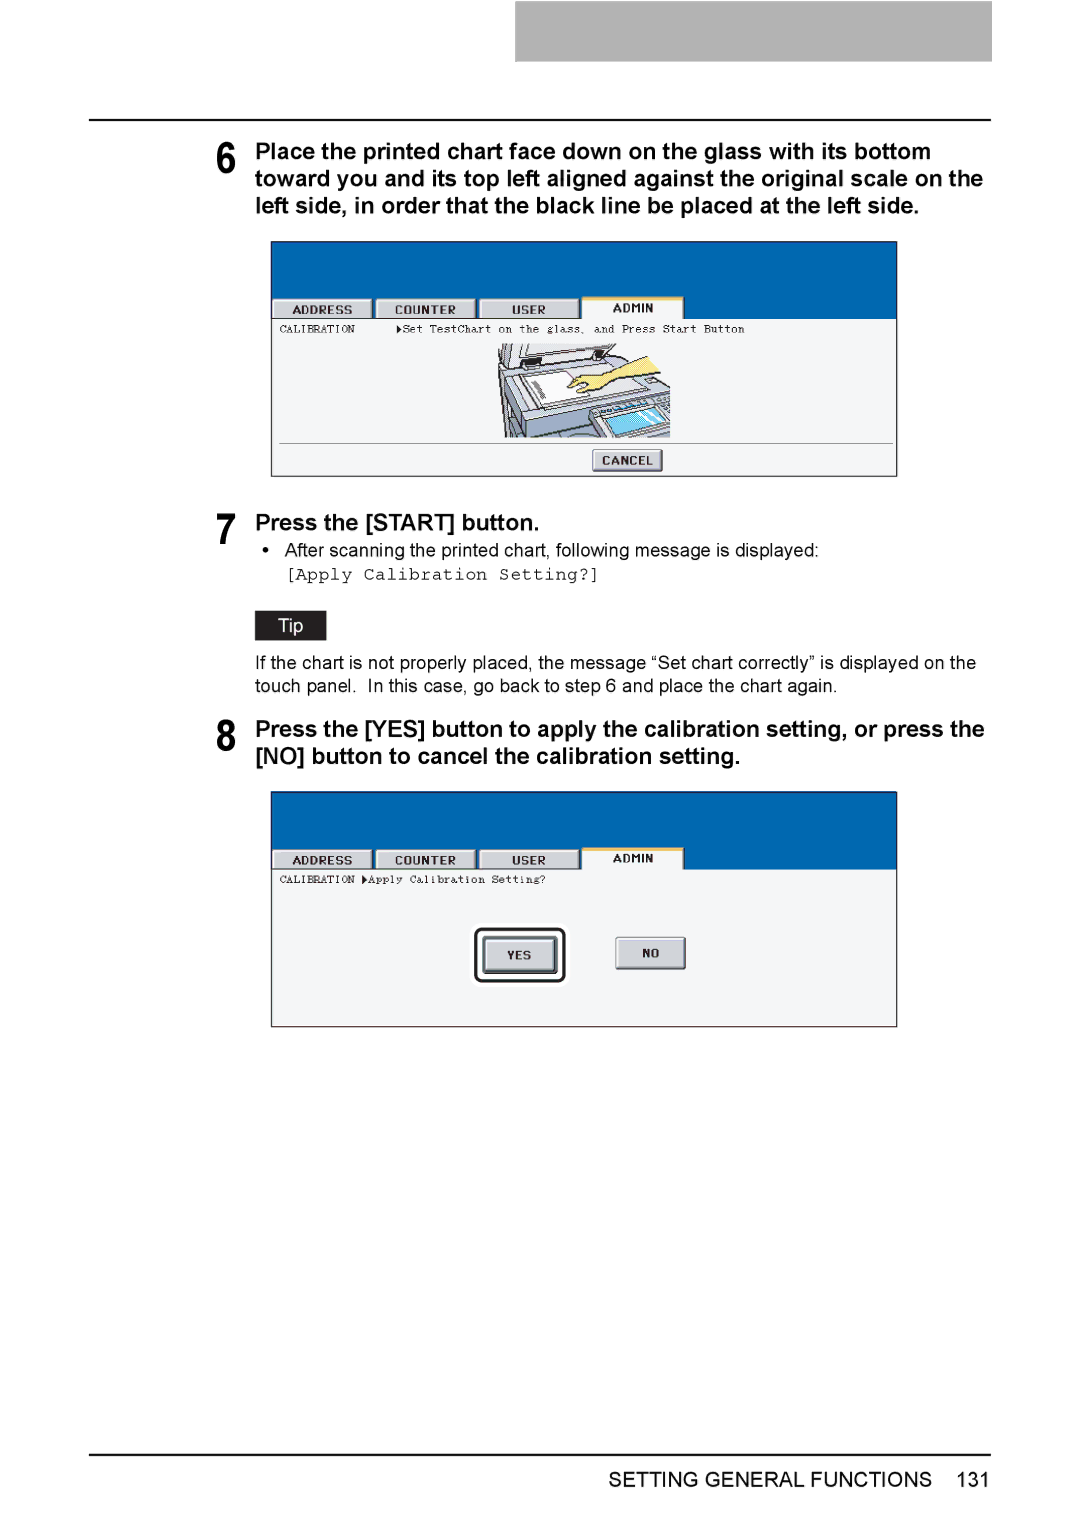
6 Place the printed chart face down on the glass with its bottom toward you and its top left aligned against the original scale on the left side, in order that the black line be placed at the left side.
7 | Press the [START] button. | ||||
| y After scanning the printed chart, following message is displayed: | ||||
|
|
| [Apply Calibration Setting?] | ||
|
|
|
| ||
|
|
|
|
|
|
| If the chart is not properly placed, the message “Set chart correctly” is displayed on the | ||||
| touch panel. In this case, go back to step 6 and place the chart again. | ||||
8 | Press the [YES] button to apply the calibration setting, or press the | ||||
[NO] button to cancel the calibration setting. | |||||
|
|
|
|
|
|
|
|
|
|
|
|