2. PRINTER SETUP | |
| 2.7 Loading the Media |
|
|
2.7 Loading the Media | This section escribes in detail how to load the media. |
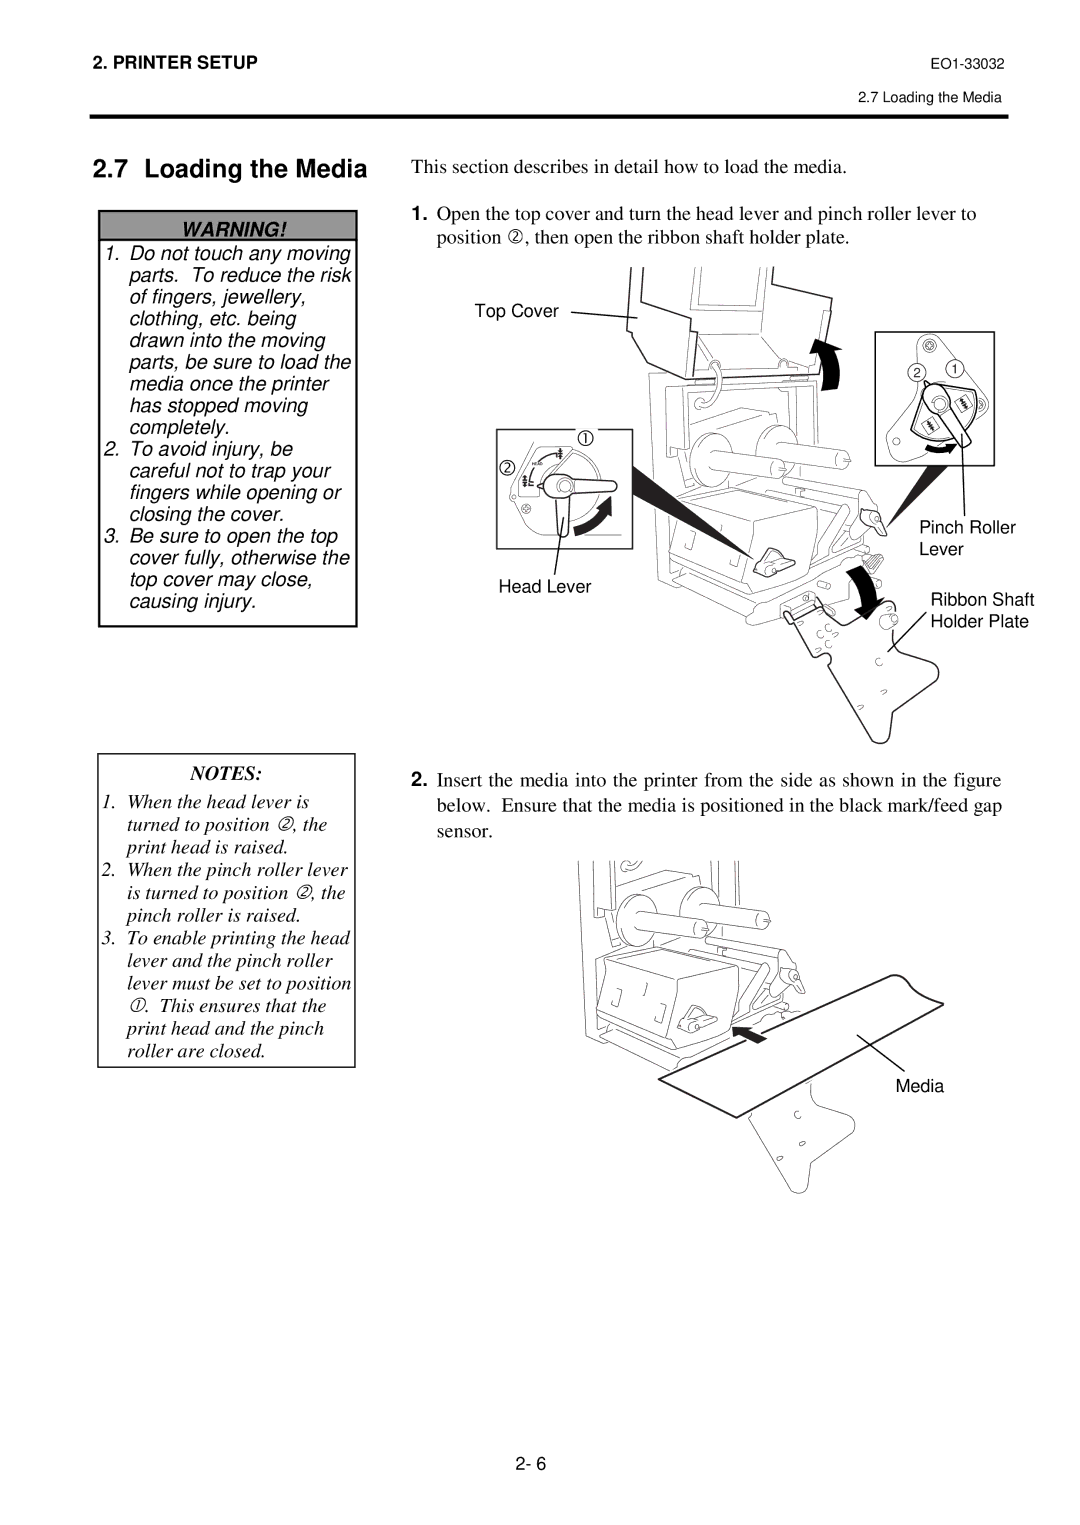
1.Open the top cover and turn the head lever and pinch roller lever to
WARNING! | position d, then open the ribbon shaft holder plate. |
|
1. Do not touch any moving |
|
| |
parts. To reduce the risk |
|
| |
of fingers, jewellery, | Top Cover |
| |
clothing, etc. being |
| ||
|
| ||
drawn into the moving |
|
| |
parts, be sure to load the | 2 | 1 | |
media once the printer | |||
|
| ||
has stopped moving |
|
| |
completely. | c |
| |
2. To avoid injury, be |
| ||
|
| ||
careful not to trap your | d HEAD |
| |
fingers while opening or |
|
| |
closing the cover. | Pinch Roller | ||
3. Be sure to open the top | |||
Lever | |||
cover fully, otherwise the | |||
|
| ||
top cover may close, | Head Lever | Ribbon Shaft | |
causing injury. | |||
| |||
|
| Holder Plate | |
NOTES:
1.When the head lever is turned to position @, the print head is raised.
2.When the pinch roller lever is turned to position @, the pinch roller is raised.
3.To enable printing the head lever and the pinch roller lever?must be set to position
. This ensures that the print head and the pinch roller are closed.
2.Insert the media into the printer from the side as shown in the figure below. Ensure that the media is positioned in the black mark/feed gap sensor.
Media
2- 6
