Phaser 3100MFP/X
according to the following table:
Parameter | Description | Icon |
|
|
|
|
|
|
AUTO | Low resolution. | none |
|
|
|
| Standard resolution for |
|
TEXT | documents containing text and |
|
| graphics. |
|
|
|
|
| Optimal resolution for |
|
PHOTO | documents containing |
|
| photographies. |
|
|
|
|
QUALITY | Optimal resolution for |
|
TEXT | documents containing text. |
|
|
|
|
3Confirm your choice by pressing the OK button.
4Exit this menu by pressing the ![]() button.
button.
You can also change the resolution by
Note | button. |
pressing the |
Zoom setup
The ZOOM parameter allows you to reduce or enlarge an area of a document by choosing the origin and the zoom level to apply to the document, from 25 to 400 %.
| 842 - ADVANCED FCT/COPY/ZOOMING |
1 | Press , enter 842 using the keypad. |
2 | Enter the desired zoom level with the |
| alphanumerical keypad or choose among |
| predefined values with the buttons and . |
3Confirm your choice by pressing the OK button.
4Exit this menu by pressing the ![]() button.
button.
Collated copy setup
The COLLATED parameter gives you the option of having your output collated or uncollated.
| 843 - ADVANCED FCT/COPY/COLLATED | ||
1 | Press , enter 843 using the keypad. | ||
2 | Select the desired option with the buttons and | ||
| according to the following table: | ||
| Parameter |
| Description |
|
| ||
|
|
|
|
|
|
|
|
|
|
| The printer assembles the copies of |
|
|
| the original document. |
COLLATED |
| E.g.: Select collated for output | |
| stacked in sets to match the | ||
|
|
| |
|
|
| sequence of the originals, i.e. (1,2,3/ |
|
|
| 1,2,3). |
|
|
|
|
|
|
| The printer does not assemble the |
|
|
| copies of the original document. |
UNCOLLATED |
| E.g.: Select uncollated for output | |
|
|
| sorted into stacks of individual |
|
|
| pages, i.e. (1,1,1/2,2,2/3,3,3). |
|
|
|
|
3 | Confirm your choice by pressing the OK button. | Copy- | ||
4 | Exit this menu by pressing the | button. | ||
| ||||
Scanned original setup |
| 3 | ||
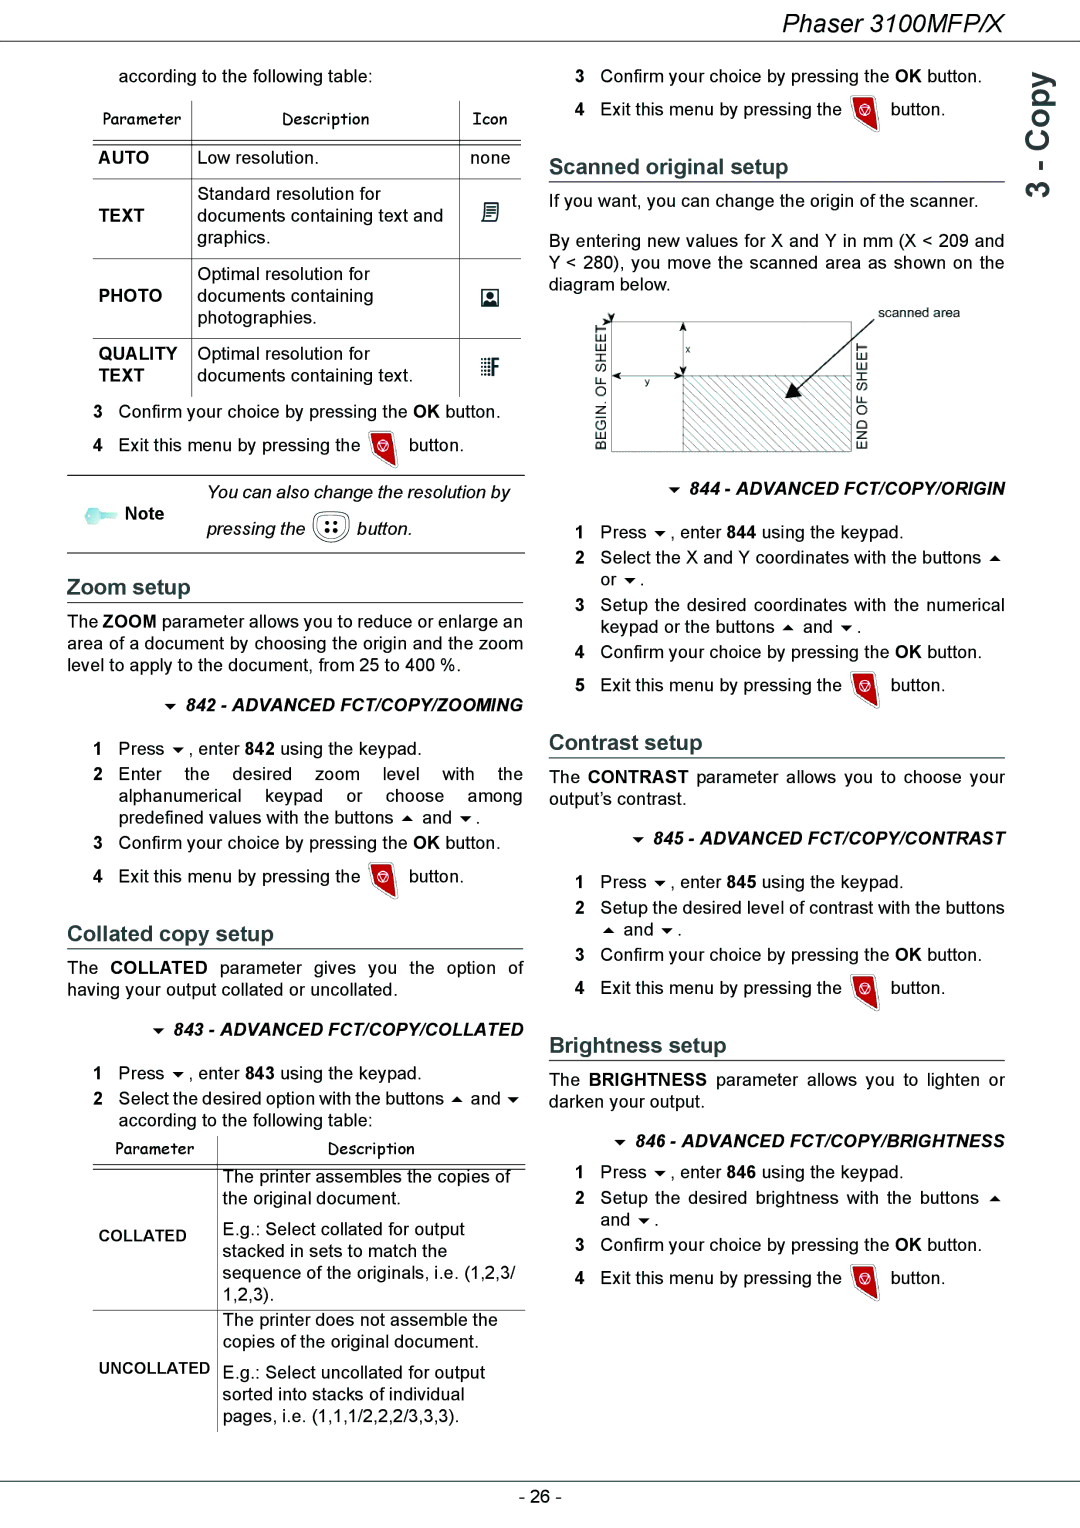
If you want, you can change the origin of the scanner. | ||||
| ||||
By entering new values for X and Y in mm (X < 209 and Y < 280), you move the scanned area as shown on the diagram below.
844 - ADVANCED FCT/COPY/ORIGIN
1 Press , enter 844 using the keypad.
2Select the X and Y coordinates with the buttons or .
3Setup the desired coordinates with the numerical
keypad or the buttons and .
4Confirm your choice by pressing the OK button.
5 Exit this menu by pressing the ![]() button.
button.
Contrast setup
The CONTRAST parameter allows you to choose your output’s contrast.
845 - ADVANCED FCT/COPY/CONTRAST
1 Press , enter 845 using the keypad.
2Setup the desired level of contrast with the buttons and .
3Confirm your choice by pressing the OK button.
4 Exit this menu by pressing the ![]() button.
button.
Brightness setup
The BRIGHTNESS parameter allows you to lighten or darken your output.
846 - ADVANCED FCT/COPY/BRIGHTNESS
1 Press , enter 846 using the keypad.
2Setup the desired brightness with the buttons and .
3Confirm your choice by pressing the OK button.
4 Exit this menu by pressing the ![]() button.
button.
- 26 -