Installation and Setup
Installing the Cleaning Cartridge
Installing the Cleaning Cartridge
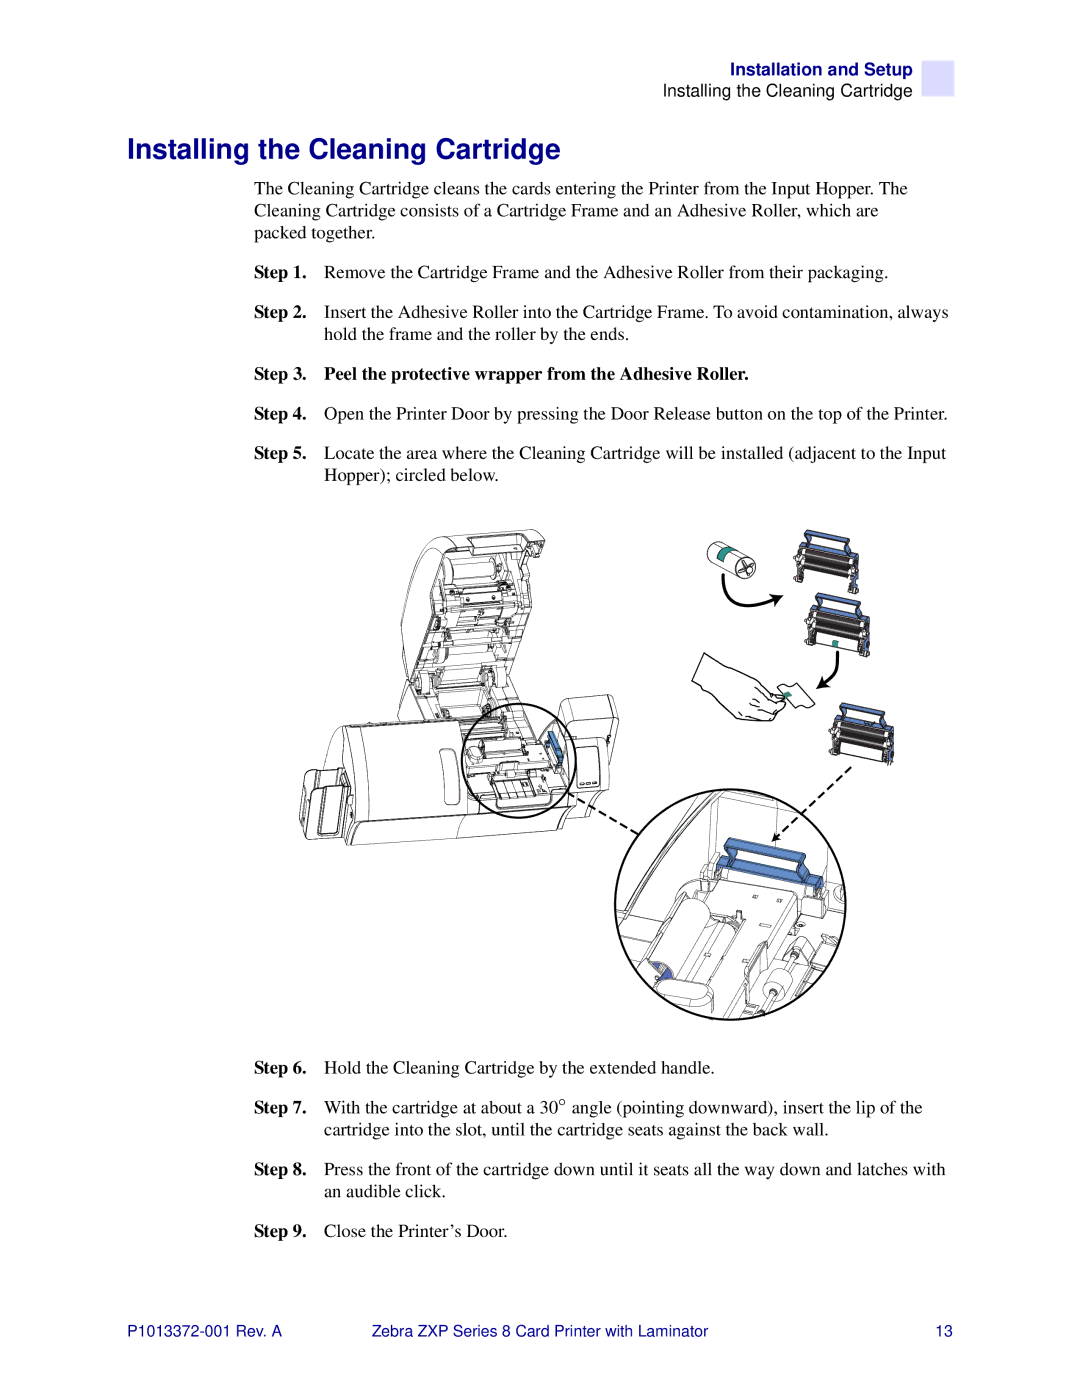
The Cleaning Cartridge cleans the cards entering the Printer from the Input Hopper. The Cleaning Cartridge consists of a Cartridge Frame and an Adhesive Roller, which are packed together.
Step 1. Remove the Cartridge Frame and the Adhesive Roller from their packaging.
Step 2. Insert the Adhesive Roller into the Cartridge Frame. To avoid contamination, always hold the frame and the roller by the ends.
Step 3. Peel the protective wrapper from the Adhesive Roller.
Step 4. Open the Printer Door by pressing the Door Release button on the top of the Printer.
Step 5. Locate the area where the Cleaning Cartridge will be installed (adjacent to the Input Hopper); circled below.
Step 6. Hold the Cleaning Cartridge by the extended handle.
Step 7. With the cartridge at about a 30° angle (pointing downward), insert the lip of the cartridge into the slot, until the cartridge seats against the back wall.
Step 8. Press the front of the cartridge down until it seats all the way down and latches with an audible click.
Step 9. Close the Printer’s Door.
Zebra ZXP Series 8 Card Printer with Laminator | 13 |