Installation and Setup
Installing the Windows Printer Driver
Installing the Ethernet Printer Driver
Note • To install the USB driver, see Page 35.
Important • The Ethernet Network must be configured correctly, with the Printer and the host computer on the same subnet mask. Use the printer’s
Step 1. | If not already done, connect power to the printer. Turn power ON ( |
| ). | ||
| |||||
Step 2. | Connect the Ethernet port on the rear of the printer to the Ethernet network | ||||
| connection or directly to the computer’s Ethernet port. | ||||
Step 3. | Ensure that the Printer’s power switch in the ON ( |
| ) position. | ||
| |||||
Step 4. Insert the User Documentation and Drivers CD into the CD drive of the host computer. The Main Menu will open.
Step 5. From the
Step 6. From the Main Menu, click Install Printer Driver.
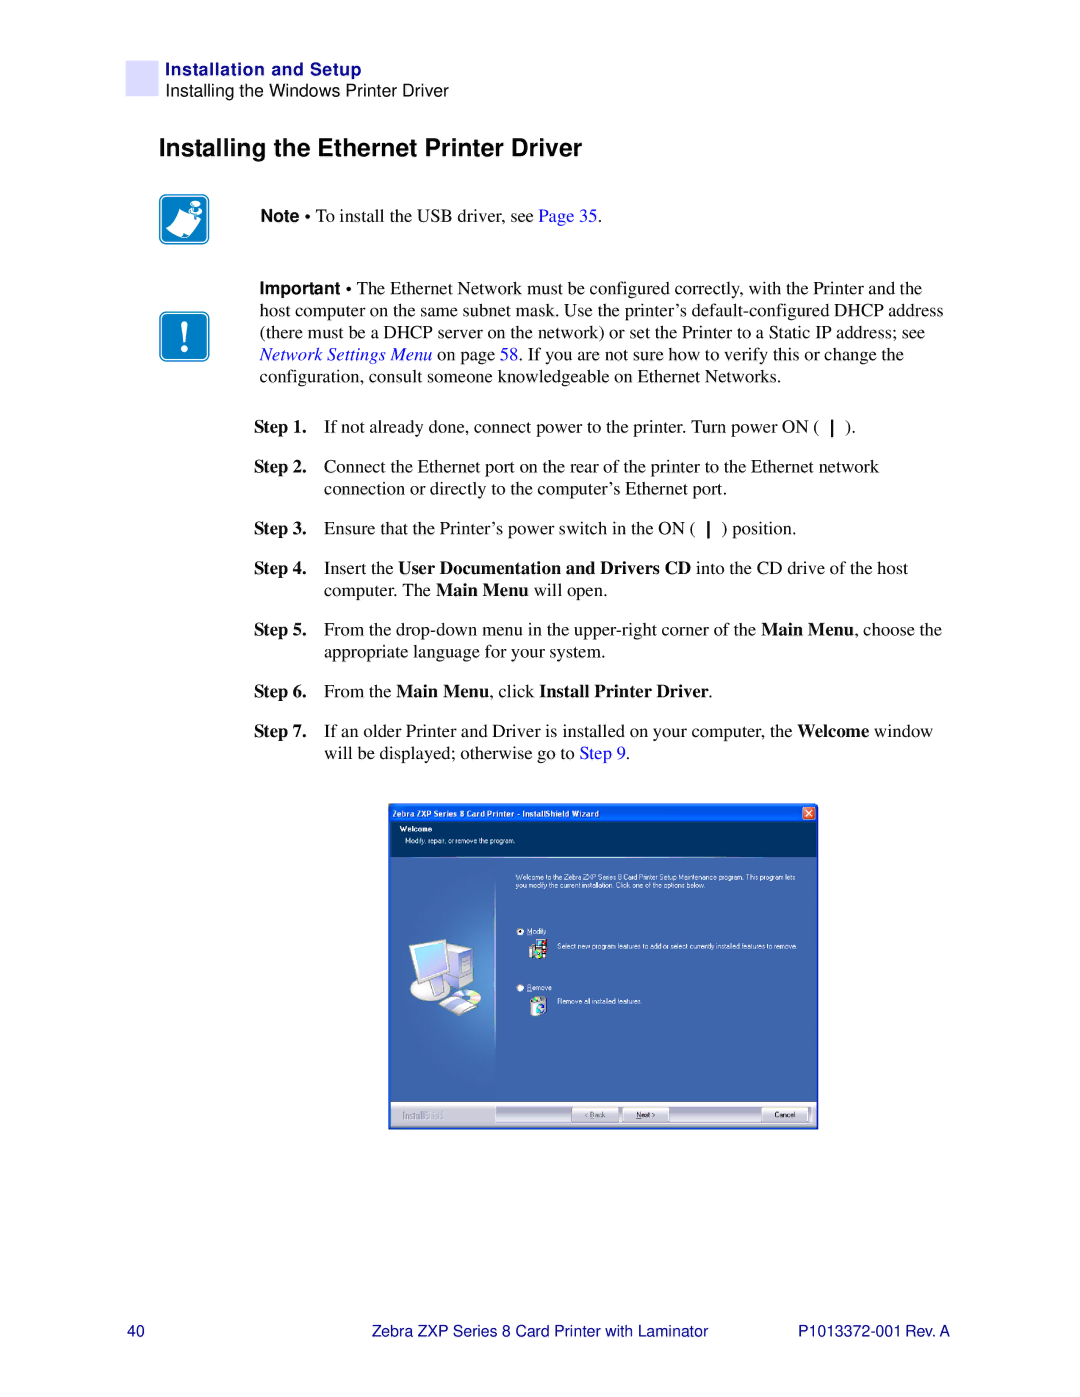
Step 7. If an older Printer and Driver is installed on your computer, the Welcome window will be displayed; otherwise go to Step 9.
40 | Zebra ZXP Series 8 Card Printer with Laminator |