2 When the Floppy Disk Maker dialog box appears, click Custom.
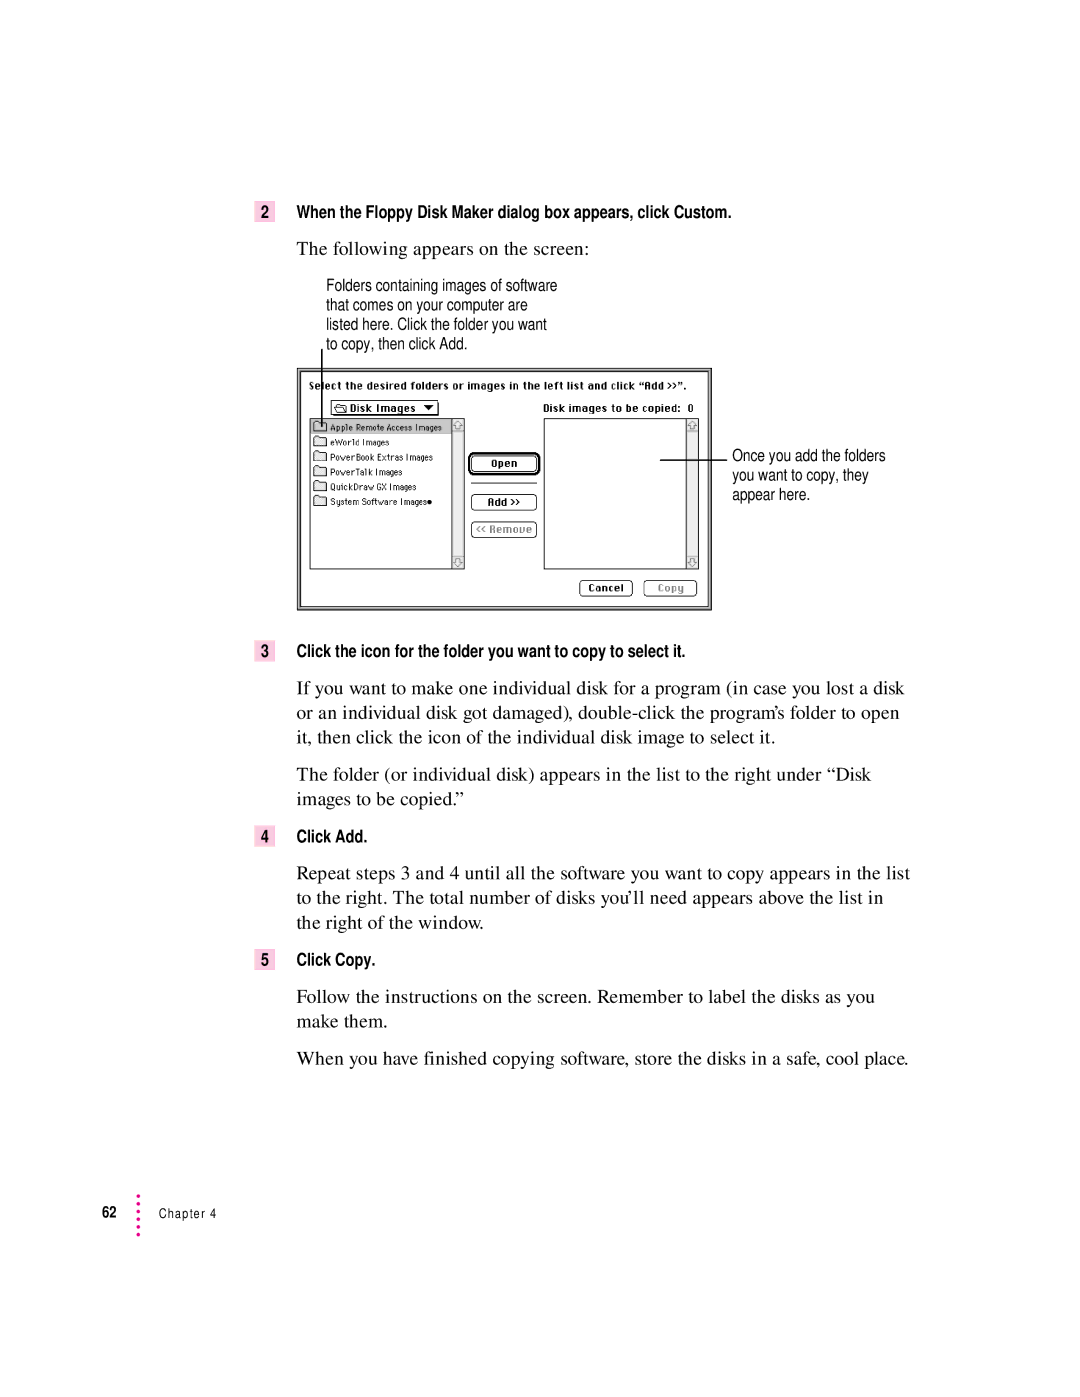
The following appears on the screen:
Folders containing images of software that comes on your computer are listed here. Click the folder you want to copy, then click Add.
Once you add the folders you want to copy, they appear here.
3Click the icon for the folder you want to copy to select it.
If you want to make one individual disk for a program (in case you lost a disk or an individual disk got damaged),
The folder (or individual disk) appears in the list to the right under “Disk images to be copied.”
4Click Add.
Repeat steps 3 and 4 until all the software you want to copy appears in the list to the right. The total number of disks you’ll need appears above the list in the right of the window.
5Click Copy.
Follow the instructions on the screen. Remember to label the disks as you make them.
When you have finished copying software, store the disks in a safe, cool place.
