Chapter 9 Maintenance
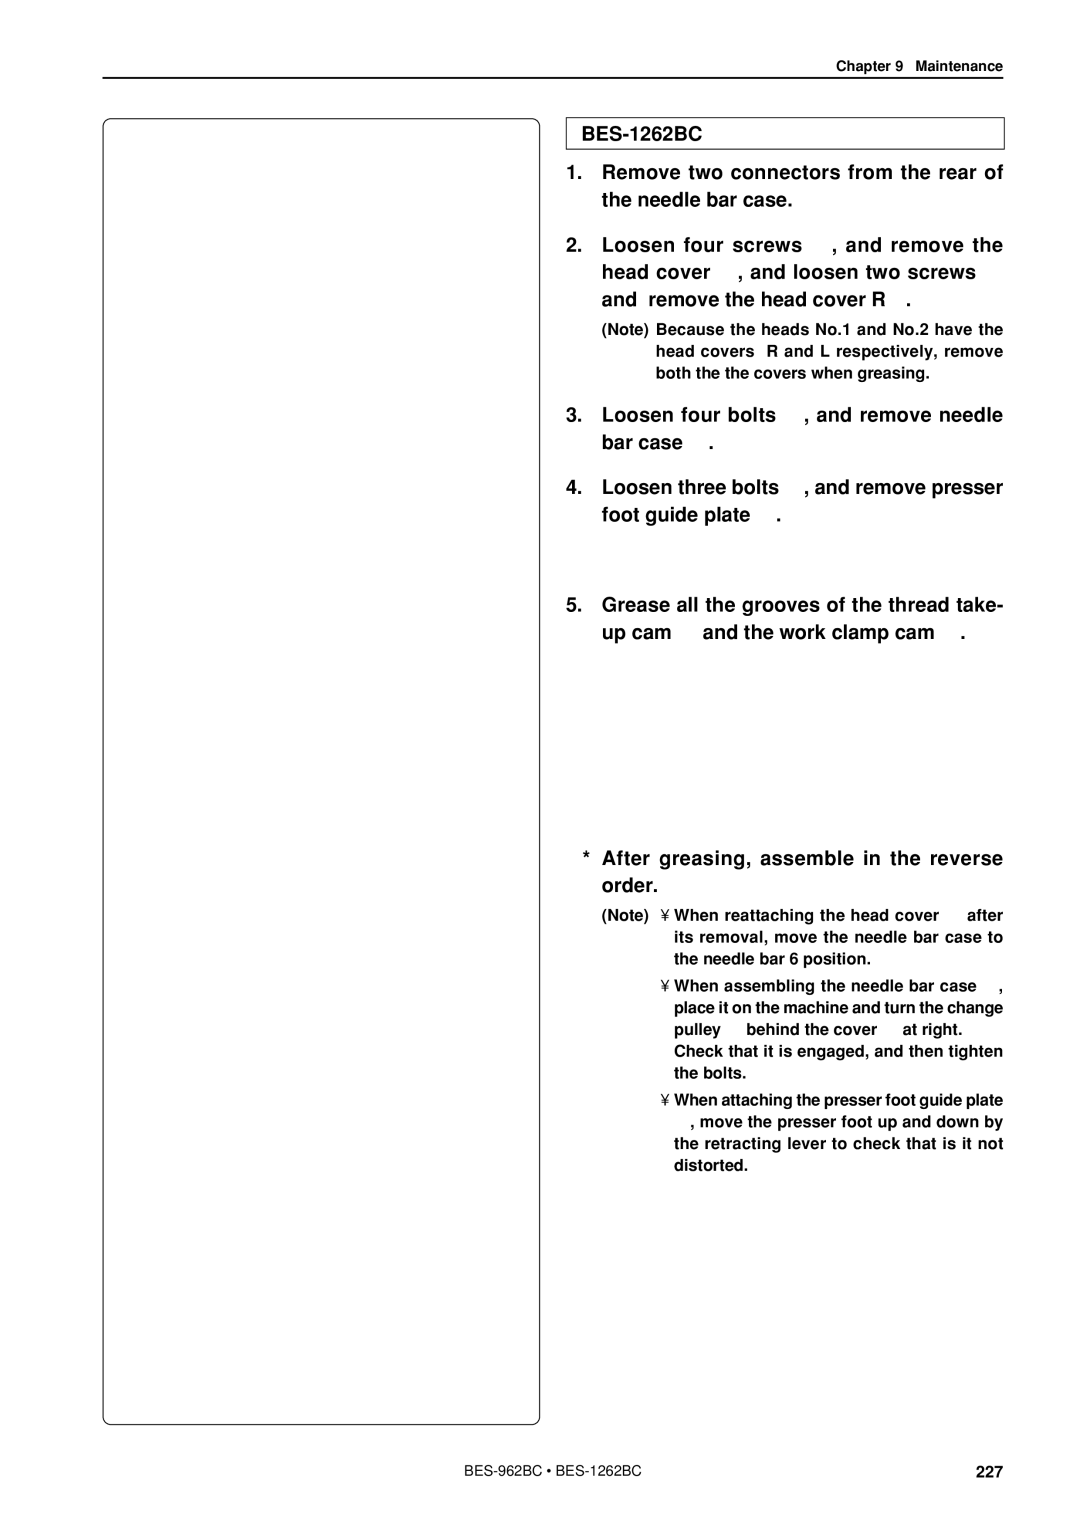
| 1. | Remove two connectors from the rear of | |
|
| the needle bar case. | |
| 2. | Loosen four screws q, and remove the | |
y |
| head cover w, and loosen two screws e | |
| and remove the head cover Rr. | ||
|
| ||
t |
| (Note) Because the heads No.1 and No.2 have the | |
| head covers R and L respectively, remove | ||
| i | ||
r | both the the covers when greasing. | ||
| |||
t | 3. | Loosen four bolts t, and remove needle | |
| |||
|
| bar case y. | |
| 4. | Loosen three bolts u, and remove presser | |
w | u | foot guide plate i. | |
| |||
e |
|
| |
q |
|
| |
| 5. | Grease all the grooves of the thread take- | |
|
| up cam o and the work clamp cam !0. |
!0
| * After greasing, assemble in the reverse |
o | order. |
| (Note) • When reattaching the head cover w after |
| its removal, move the needle bar case to |
y | the needle bar 6 position. |
| |
| • When assembling the needle bar case y, |
| place it on the machine and turn the change |
| pulley !2behind the cover !1at right. |
| Check that it is engaged, and then tighten |
| the bolts. |
!1 | • When attaching the presser foot guide plate |
| i, move the presser foot up and down by |
| the retracting lever to check that is it not |
!2 | distorted. |
i |
|
227 |