Chapter 2 Preparation of Embroidery Machine
2-3 Preparation of Needle Bar Case
![]()
w | q y | e i |
|
| o |
u |
|
|
r
t
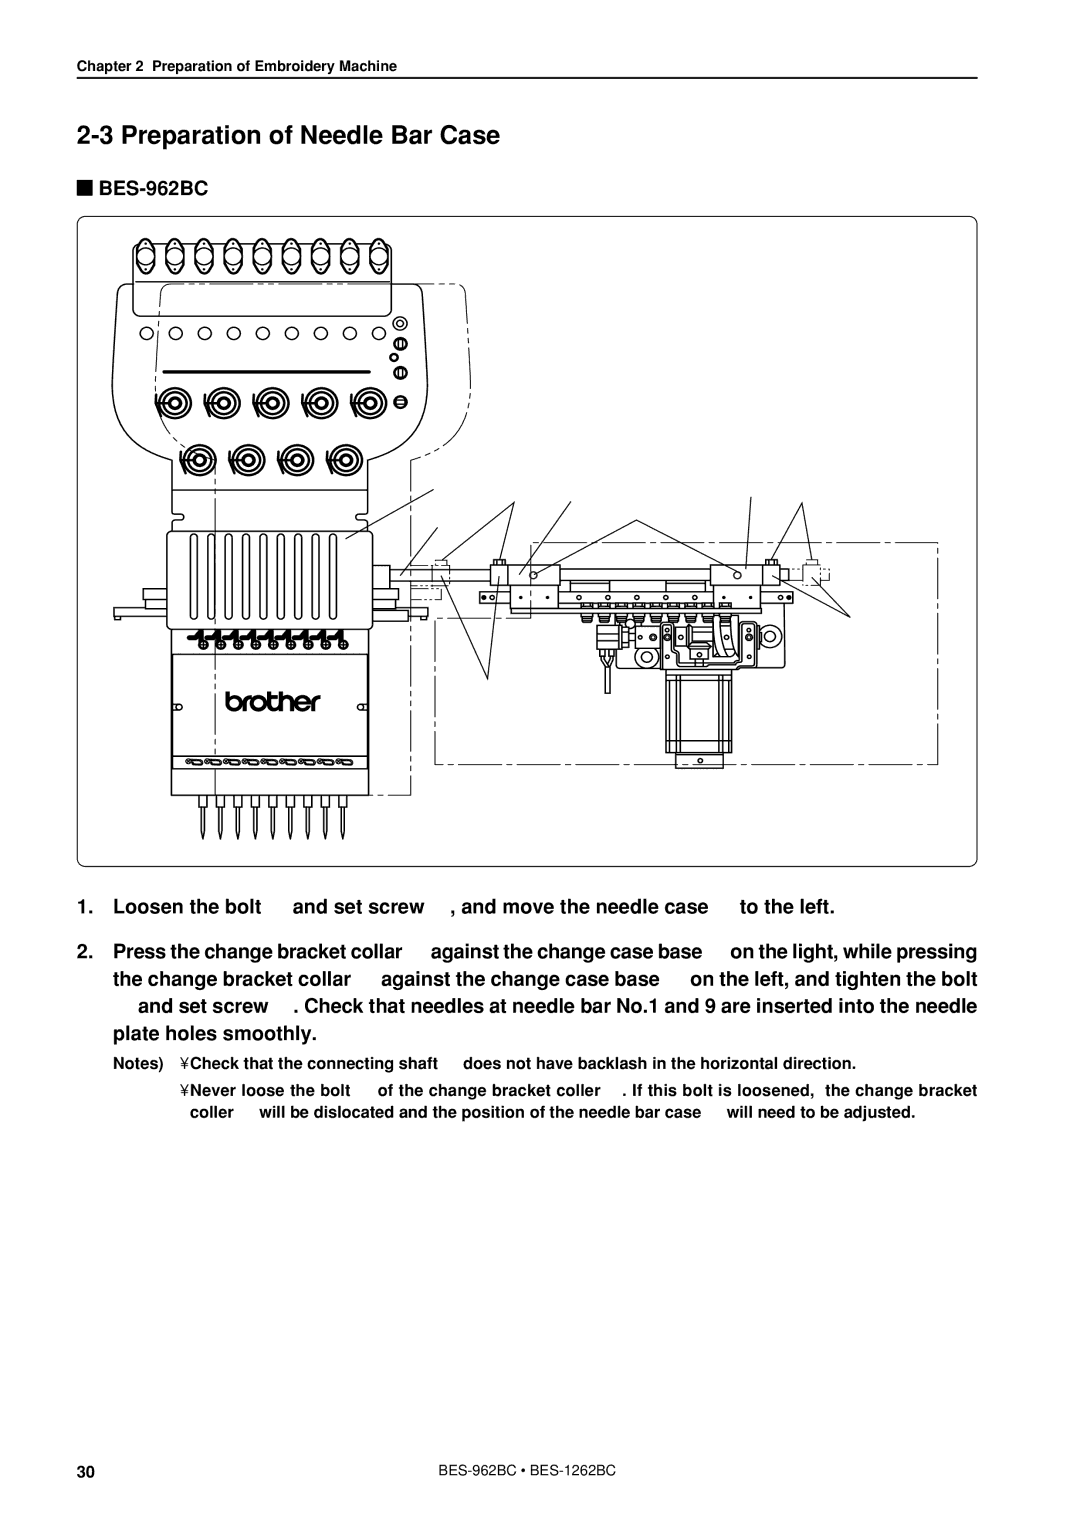
1.Loosen the bolt q and set screw o, and move the needle case w to the left.
2.Press the change bracket collar r against the change case base e on the light, while pressing the change bracket collar t against the change case base y on the left, and tighten the bolt q and set screw !0. Check that needles at needle bar No.1 and 9 are inserted into the needle plate holes smoothly.
Notes) • Check that the connecting shaft u does not have backlash in the horizontal direction.
•Never loose the bolt i of the change bracket coller r. If this bolt is loosened, the change bracket coller r will be dislocated and the position of the needle bar case w will need to be adjusted.
30 |