 Holder base (optional)
o y t
Chapter 2 Preparation of Embroidery Machine
i
y
![]() u
u
w ![]()
!2
!0
Felt
Table
o
q,e
!1
q |
|
| 1mm 1mm |
|
|
| |
|
| r | i |
|
|
| |
|
|
| !3 |
|
|
| Do not remove |
| w |
| these screws. |
|
|
|
e
!3
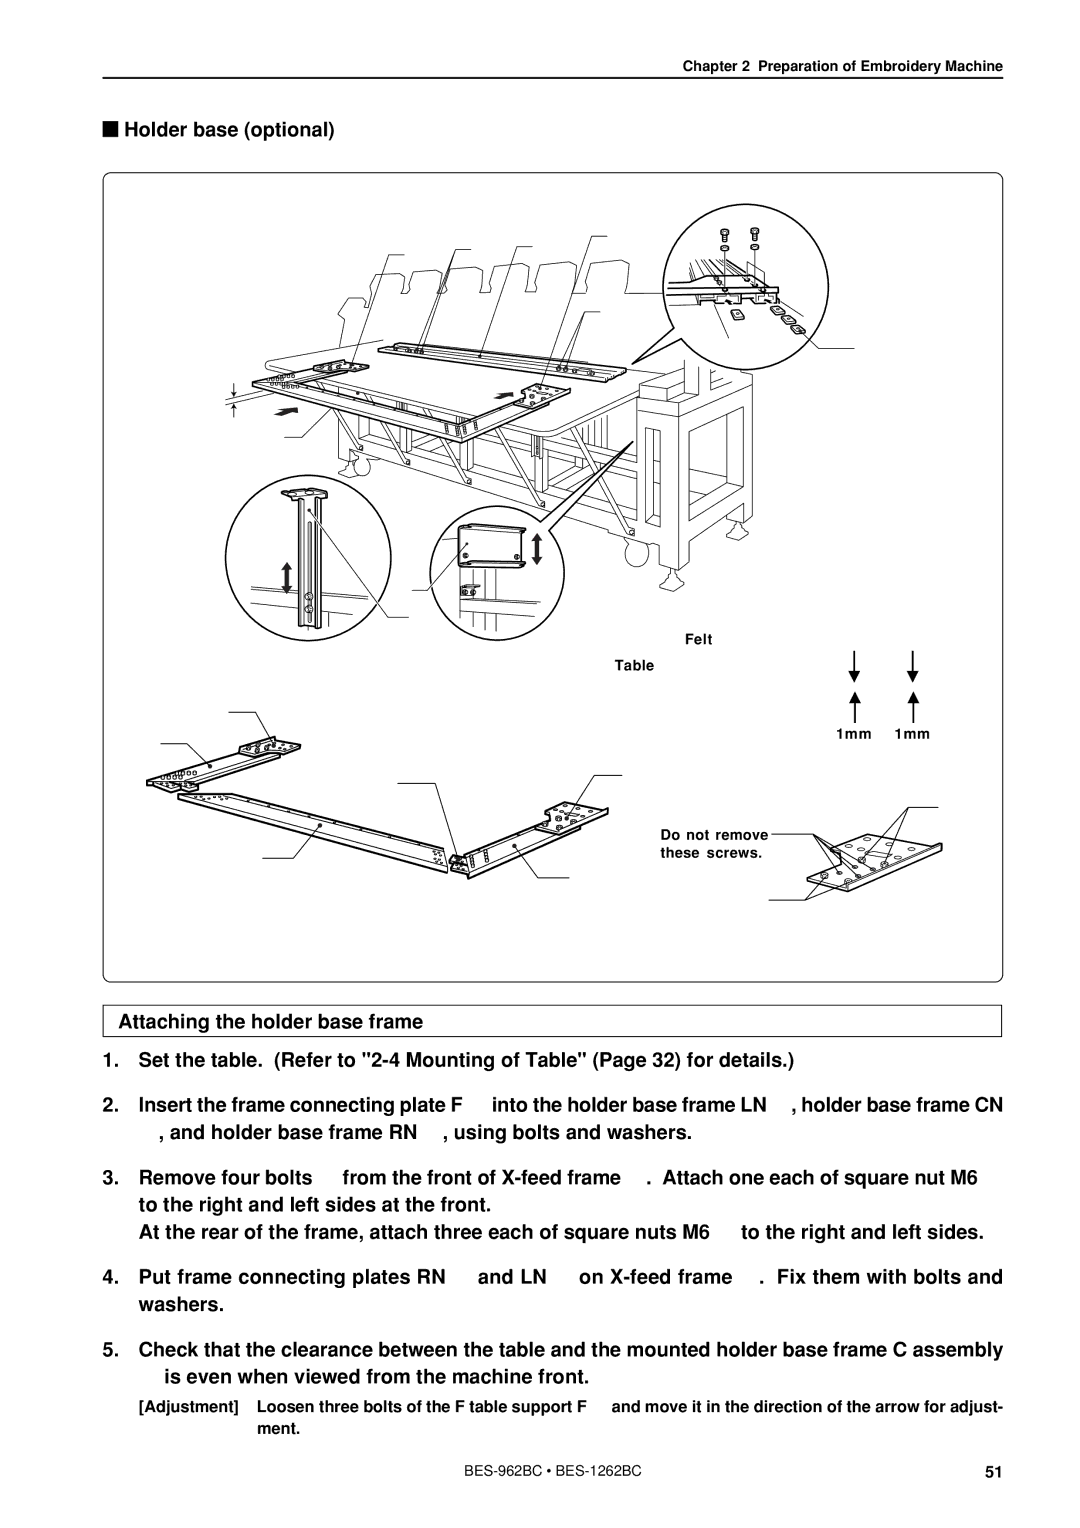
Attaching the holder base frame
1.Set the table. (Refer to
2.Insert the frame connecting plate F r into the holder base frame LN q, holder base frame CN w, and holder base frame RN e, using bolts and washers.
3.Remove four bolts y from the front of
At the rear of the frame, attach three each of square nuts M6 u to the right and left sides.
4.Put frame connecting plates RN i and LN o on
5.Check that the clearance between the table and the mounted holder base frame C assembly w is even when viewed from the machine front.
[Adjustment] Loosen three bolts of the F table support F !0and move it in the direction of the arrow for adjust- ment.
51 |
