Chapter 2 Preparation of Embroidery Machine

BES-1262BC
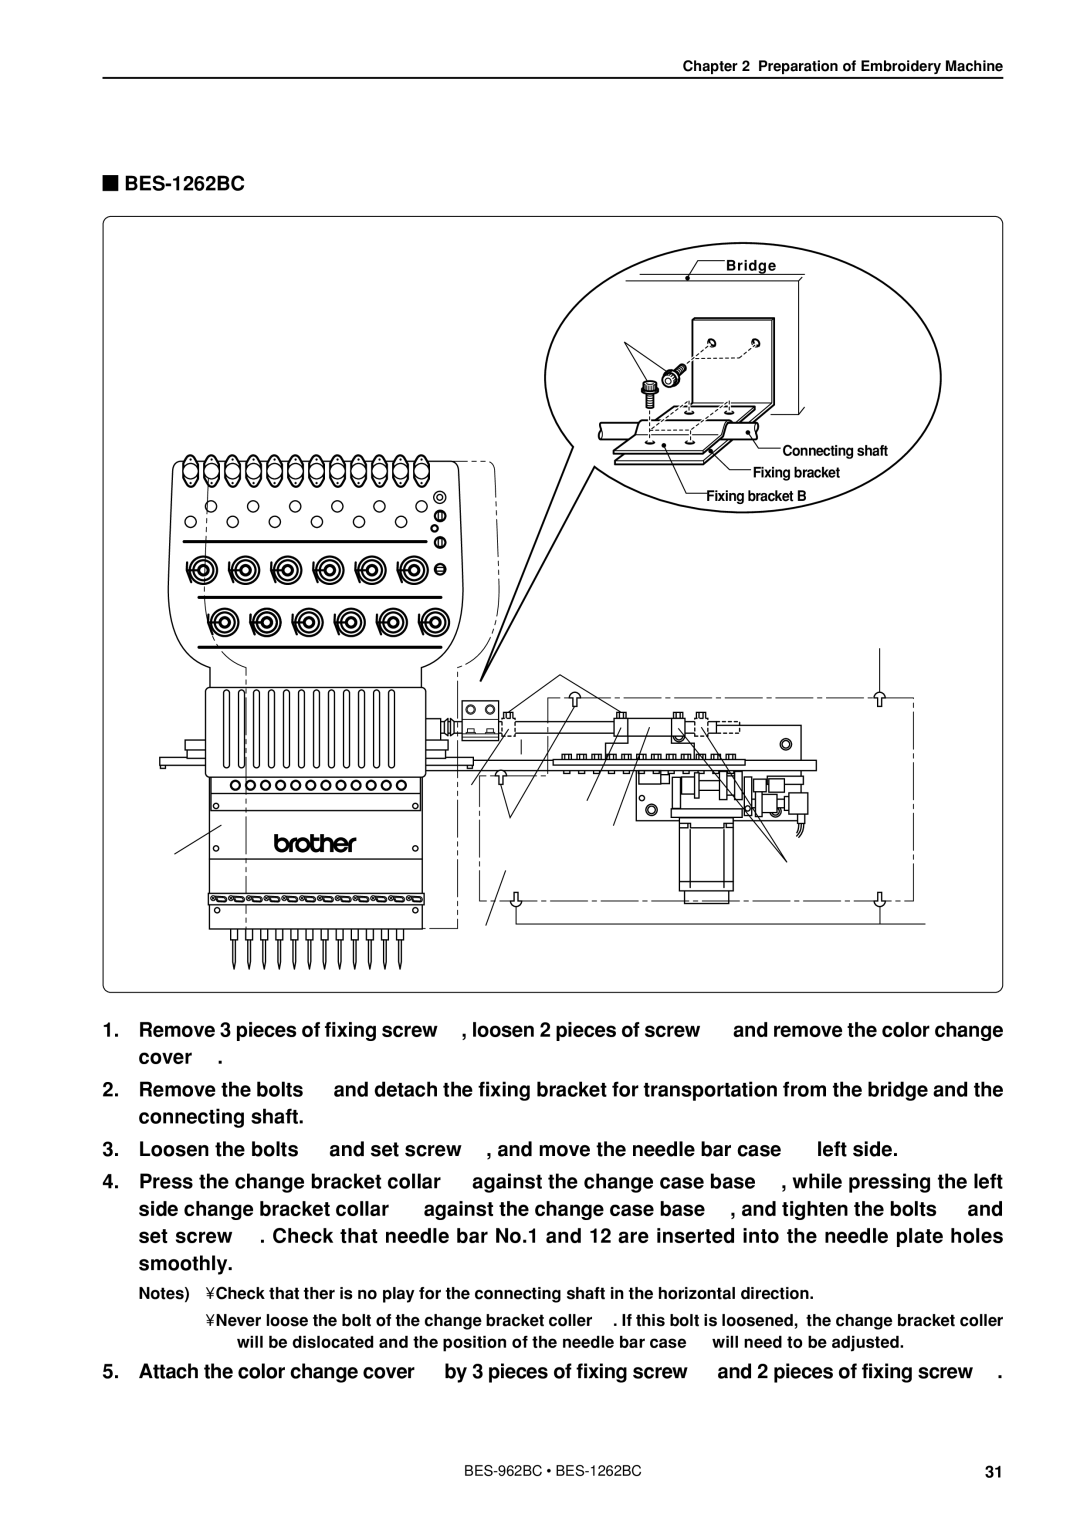
Bridge
r
Connecting shaft
Fixing bracket
Fixing bracket B
q
t
y
o
o
qu
e
i
w
1.Remove 3 pieces of fixing screw q, loosen 2 pieces of screw w and remove the color change cover e.
2.Remove the bolts r and detach the fixing bracket for transportation from the bridge and the connecting shaft.
3.Loosen the bolts t and set screw !0, and move the needle bar case y left side.
4.Press the change bracket collar i against the change case base u, while pressing the left side change bracket collar o against the change case base u, and tighten the bolts t and set screw !0. Check that needle bar No.1 and 12 are inserted into the needle plate holes smoothly.
Notes) • Check that ther is no play for the connecting shaft in the horizontal direction.
•Never loose the bolt of the change bracket coller i. If this bolt is loosened, the change bracket coller i will be dislocated and the position of the needle bar case y will need to be adjusted.
5.Attach the color change cover e by 3 pieces of fixing screw q and 2 pieces of fixing screw w.
31 |