Connection and Installation of Optional Equipment
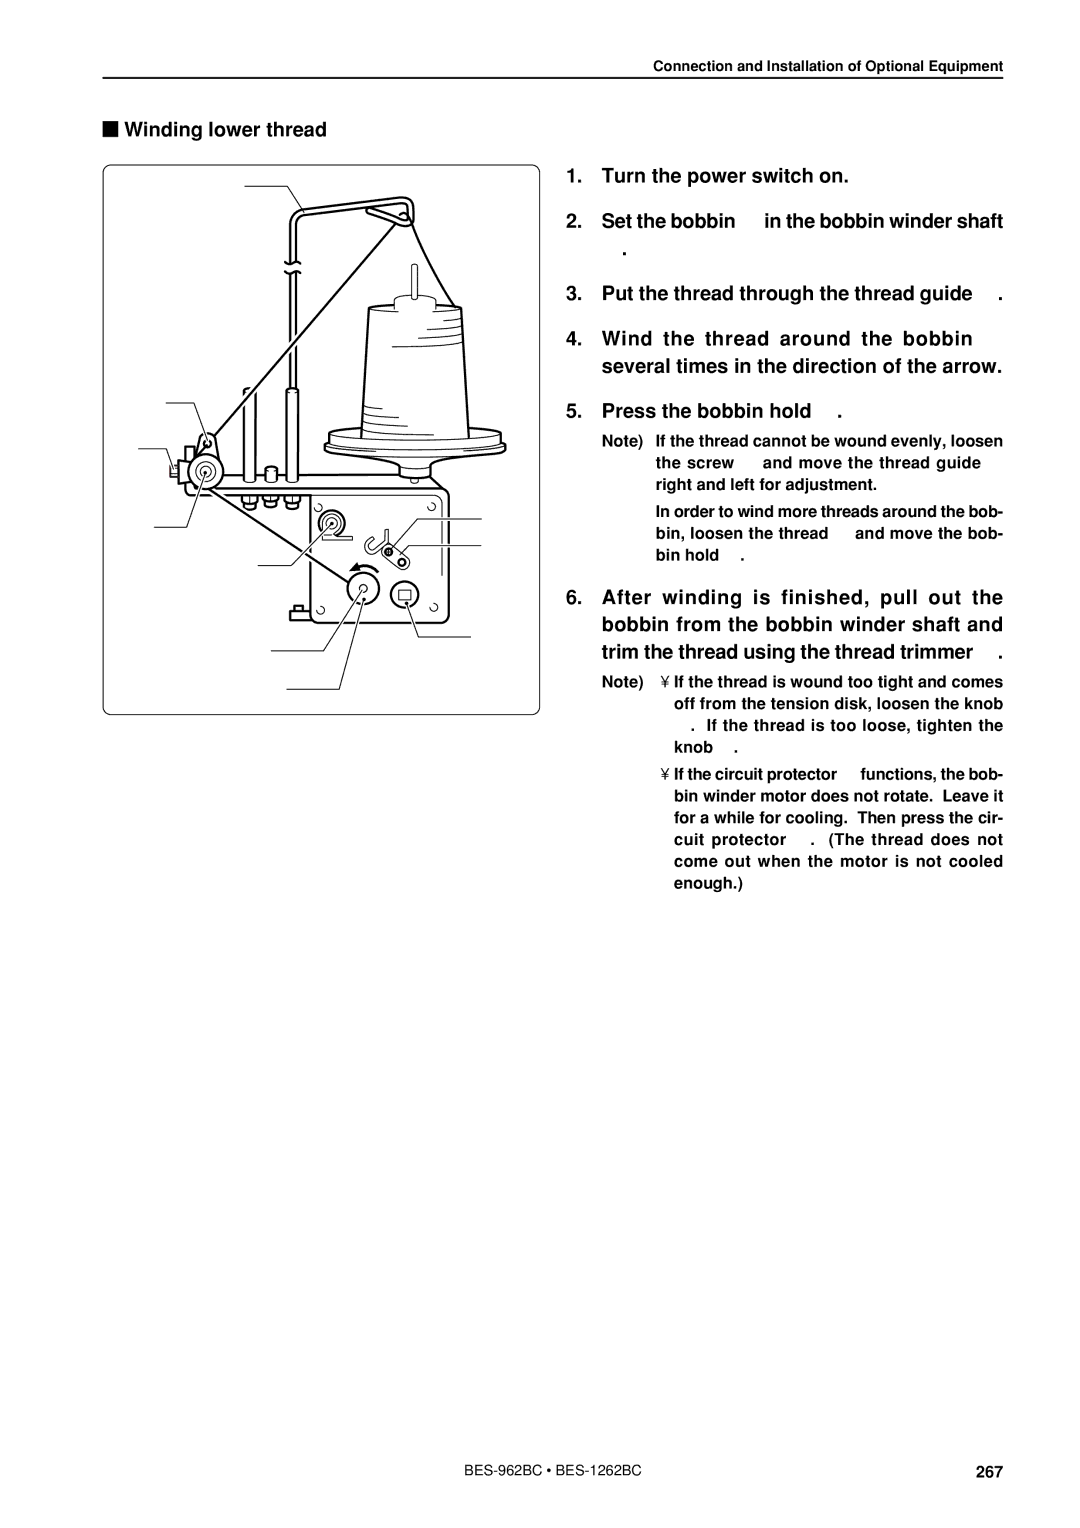
![]() Winding lower thread
Winding lower thread
e
1. Turn the power switch on.
2. Set the bobbin q in the bobbin winder shaft
w.
| 3. | Put the thread through the thread guide e. |
| 4. | Wind the thread around the bobbin q |
|
| several times in the direction of the arrow. |
e | 5. | Press the bobbin hold r. |
|
t | Note) | If the thread cannot be wound evenly, loosen | |
| the screw t and move the thread guide e | ||
|
| ||
|
| right and left for adjustment. | |
i | y | In order to wind more threads around the bob- | |
bin, loosen the thread y and move the bob- | |||
r | |||
| bin hold r. | ||
| u | ||
|
|
| 6. After winding is finished, pull out the | |
| bobbin from the bobbin winder shaft and | |
| o | |
w | trim the thread using the thread trimmer u. | |
q | Note) • If the thread is wound too tight and comes | |
off from the tension disk, loosen the knob | ||
| ||
| i. If the thread is too loose, tighten the | |
| knob i. | |
| • If the circuit protector o functions, the bob- | |
| bin winder motor does not rotate. Leave it | |
| for a while for cooling. Then press the cir- | |
| cuit protector o. (The thread does not | |
| come out when the motor is not cooled | |
| enough.) |
267 |
