Chapter 4 Installing or Replacing the Backup Battery
Installing a New Backup Battery
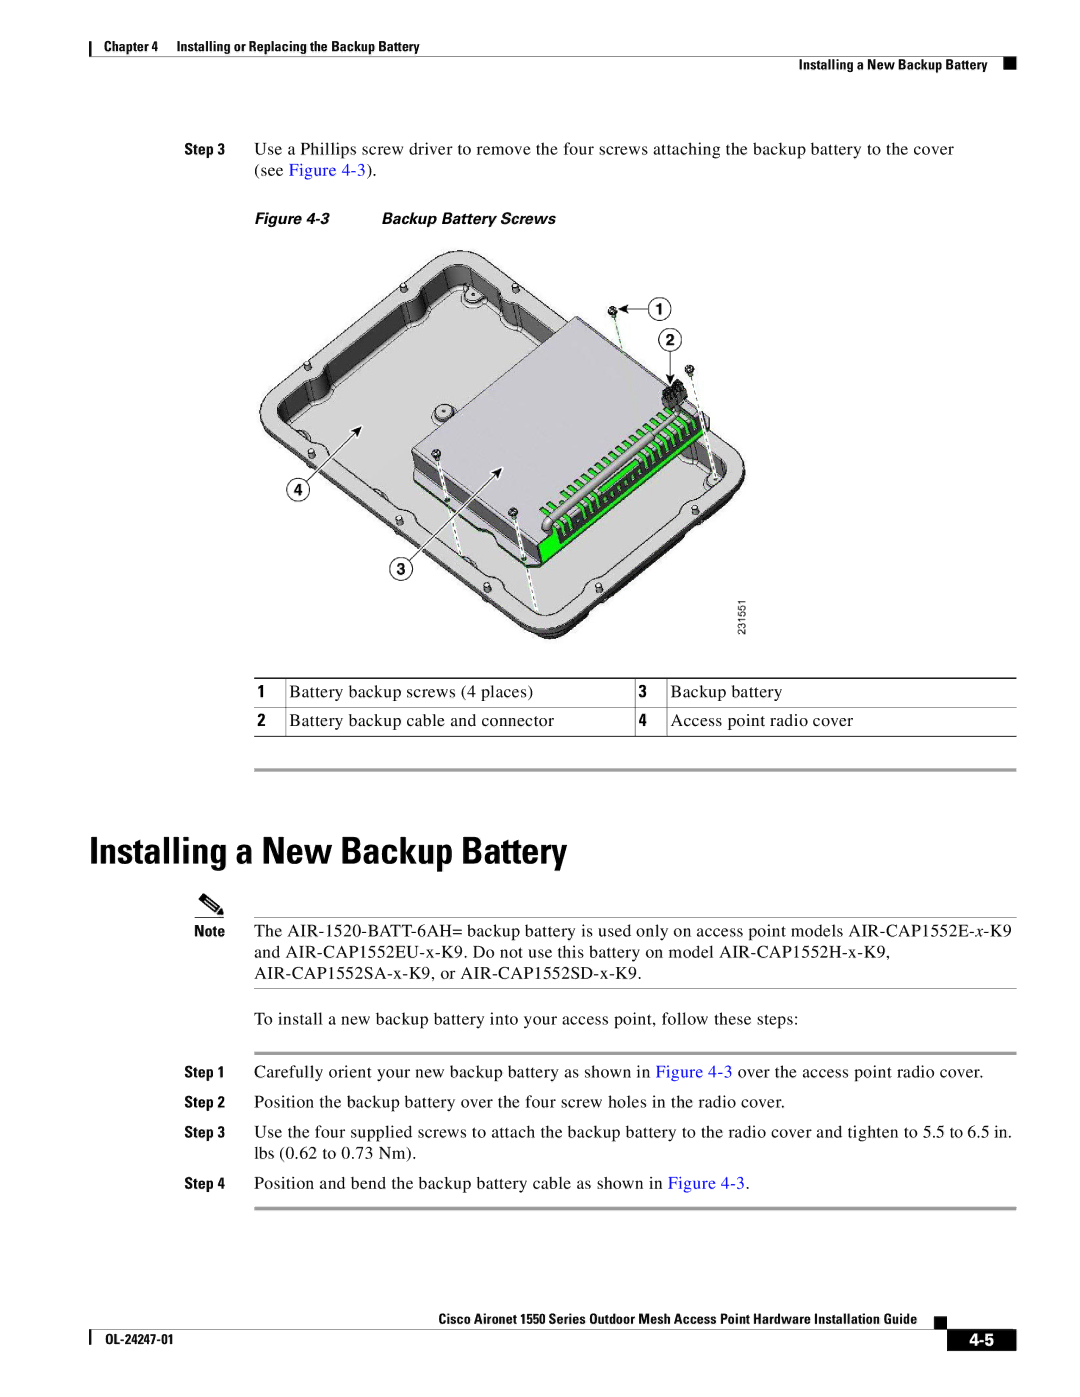
Step 3 Use a Phillips screw driver to remove the four screws attaching the backup battery to the cover (see Figure
Figure 4-3 Backup Battery Screws
1 | Battery backup screws (4 places) | 3 | Backup battery |
|
|
|
|
2 | Battery backup cable and connector | 4 | Access point radio cover |
|
|
|
|
|
|
|
|
Installing a New Backup Battery
Note The
To install a new backup battery into your access point, follow these steps:
Step 1 Carefully orient your new backup battery as shown in Figure
Step 3 Use the four supplied screws to attach the backup battery to the radio cover and tighten to 5.5 to 6.5 in. lbs (0.62 to 0.73 Nm).
Step 4 Position and bend the backup battery cable as shown in Figure
Cisco Aironet 1550 Series Outdoor Mesh Access Point Hardware Installation Guide
|
| ||
|
|
