Chapter 3 Installing the Cisco Wide Area Application Engine
Installing the Cisco Wide Area Application Engine
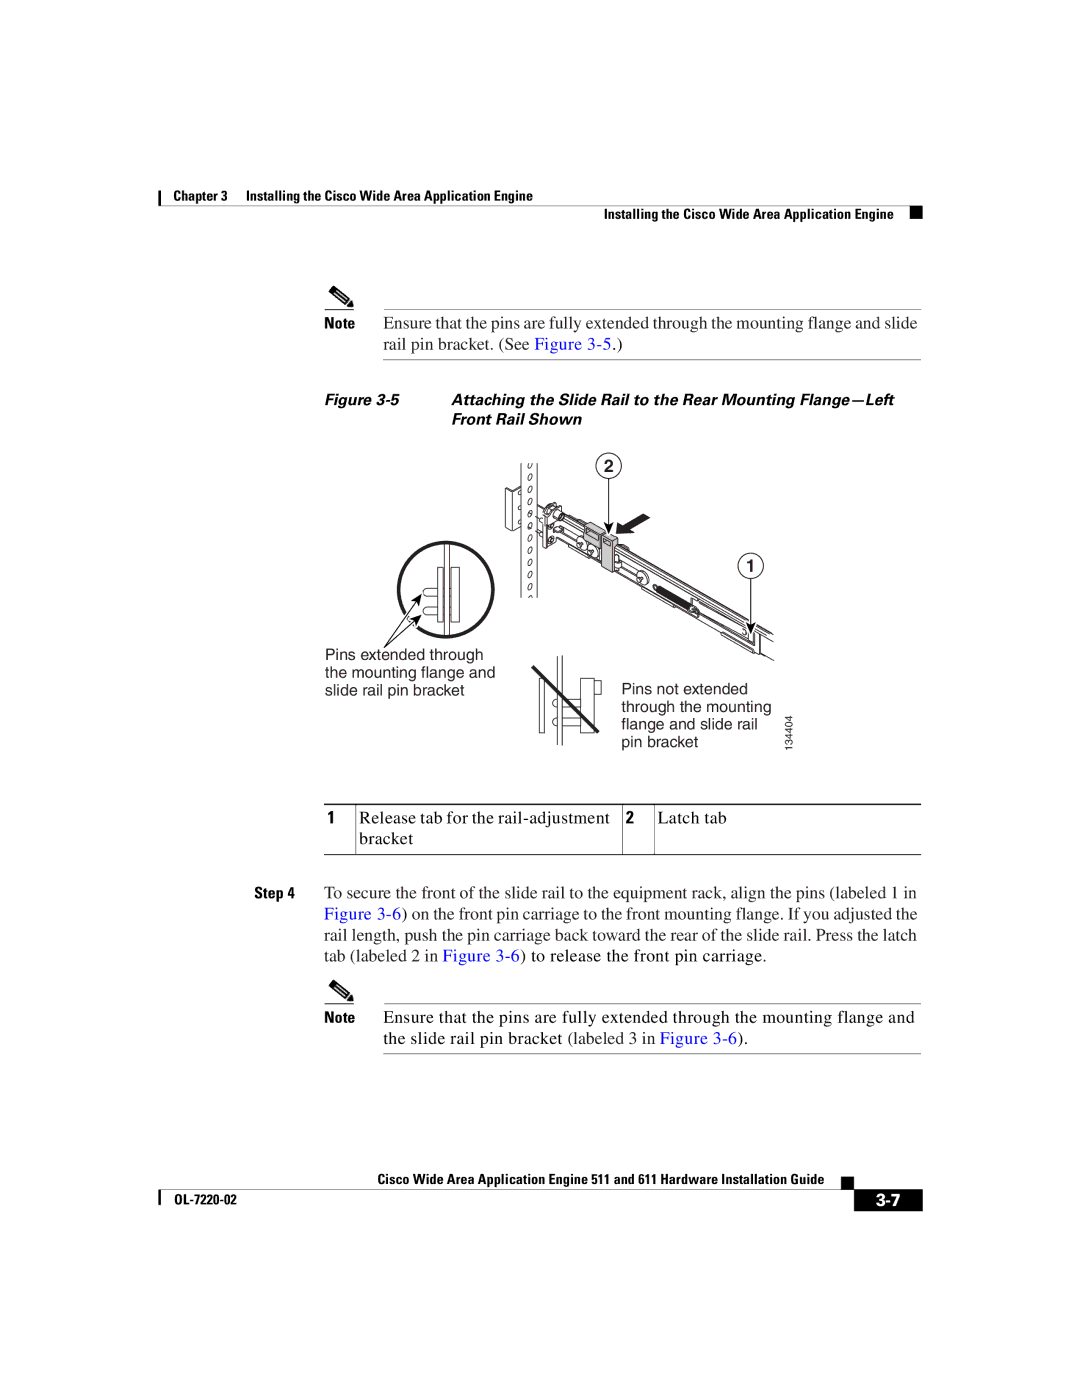
Note Ensure that the pins are fully extended through the mounting flange and slide rail pin bracket. (See Figure
Figure 3-5 Attaching the Slide Rail to the Rear Mounting Flange—Left Front Rail Shown
Pins extended through the mounting flange and slide rail pin bracket
2
1
Pins not extended |
|
through the mounting | 134404 |
pin bracket | |
flange and slide rail |
|
1
Release tab for the rail-adjustment bracket
2
Latch tab
Step 4 To secure the front of the slide rail to the equipment rack, align the pins (labeled 1 in Figure
Note Ensure that the pins are fully extended through the mounting flange and the slide rail pin bracket (labeled 3 in Figure
|
| Cisco Wide Area Application Engine 511 and 611 Hardware Installation Guide |
|
|
|
|
| ||
|
|
|
| |
|
|
|