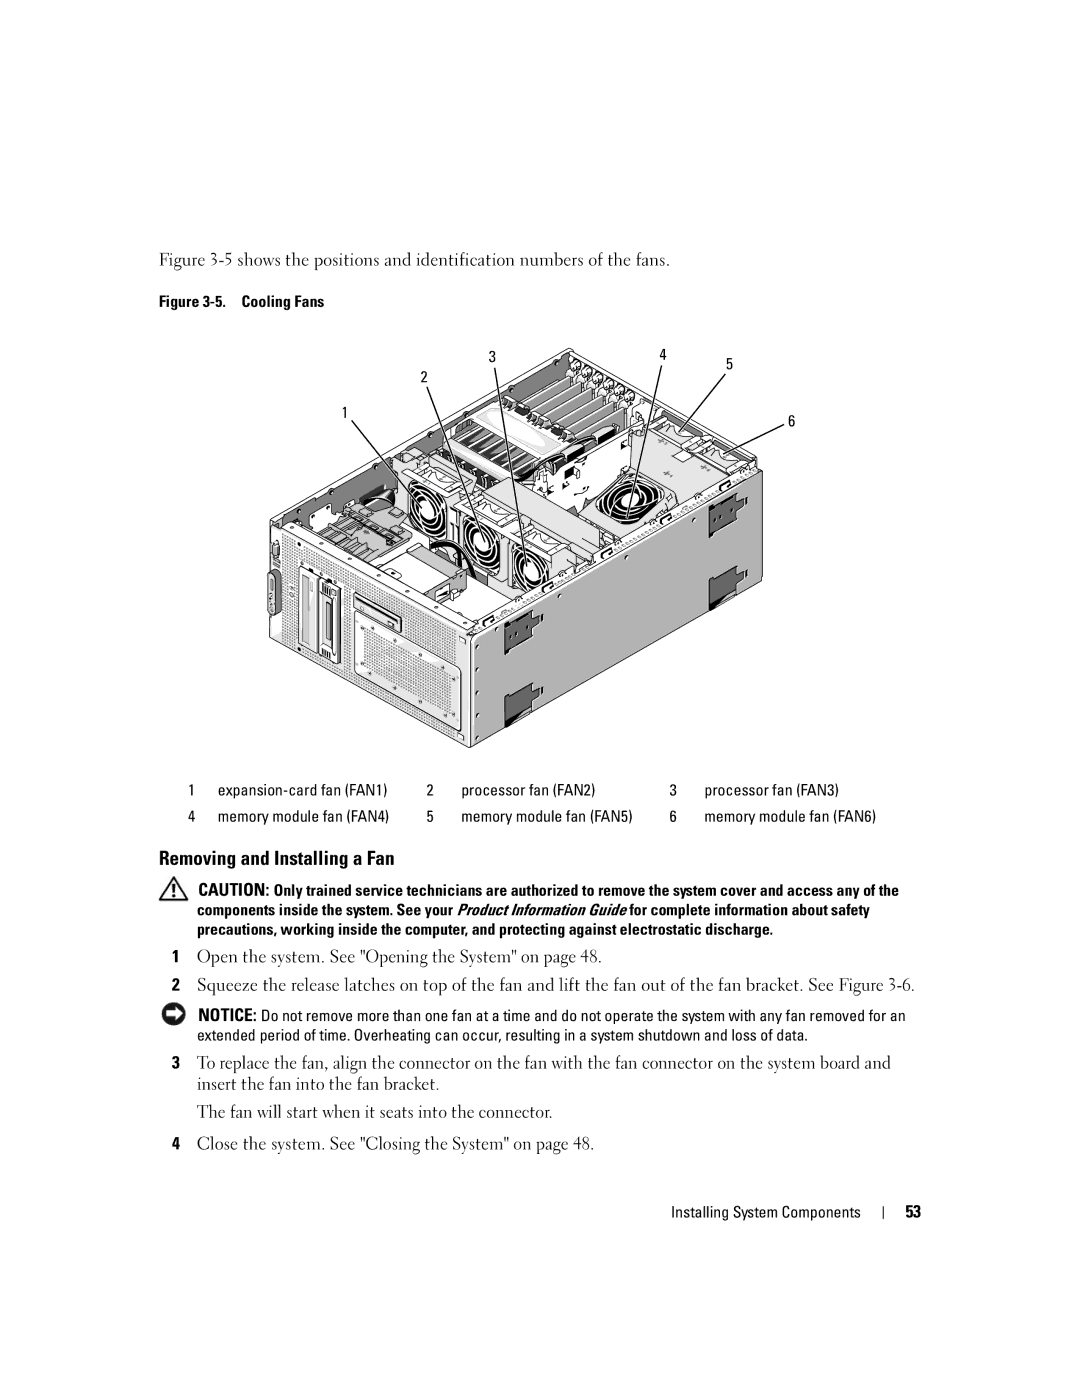
Figure 3-5 shows the positions and identification numbers of the fans.
Figure 3-5. Cooling Fans
3 | 4 | 5 |
2 |
| |
|
| |
1 |
| 6 |
|
|
1 | 2 | processor fan (FAN2) | 3 | processor fan (FAN3) | |
4 | memory module fan (FAN4) | 5 | memory module fan (FAN5) | 6 | memory module fan (FAN6) |
Removing and Installing a Fan
CAUTION: Only trained service technicians are authorized to remove the system cover and access any of the components inside the system. See your Product Information Guide for complete information about safety precautions, working inside the computer, and protecting against electrostatic discharge.
1Open the system. See "Opening the System" on page 48.
2Squeeze the release latches on top of the fan and lift the fan out of the fan bracket. See Figure
NOTICE: Do not remove more than one fan at a time and do not operate the system with any fan removed for an extended period of time. Overheating can occur, resulting in a system shutdown and loss of data.
3To replace the fan, align the connector on the fan with the fan connector on the system board and insert the fan into the fan bracket.
The fan will start when it seats into the connector.
4Close the system. See "Closing the System" on page 48.
Installing System Components
53
