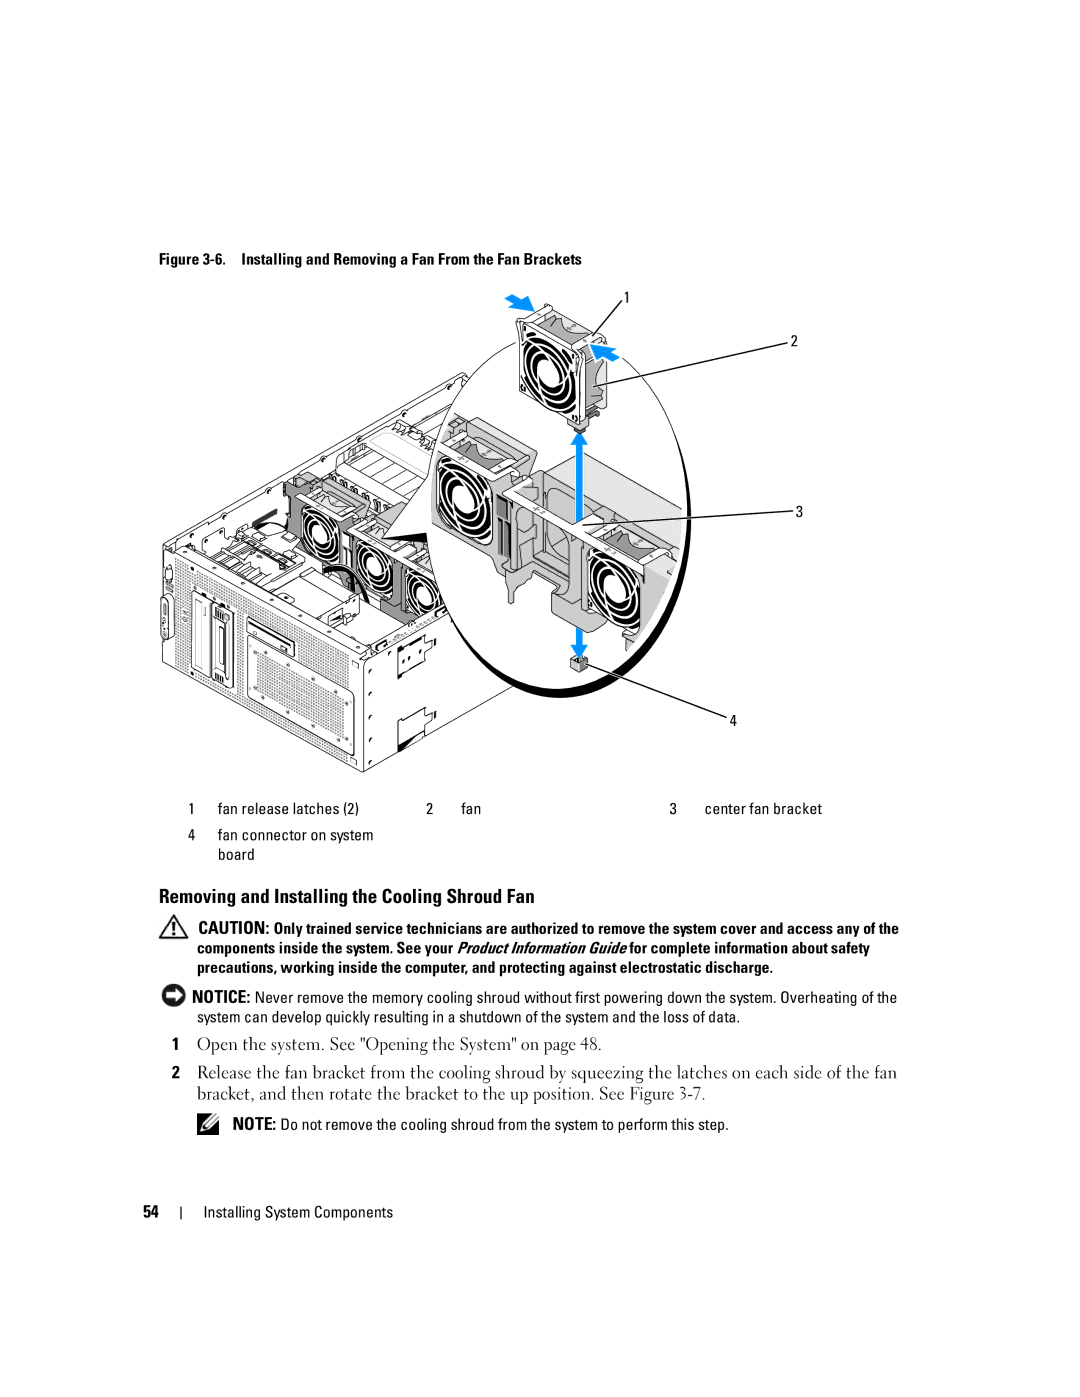
Figure 3-6. Installing and Removing a Fan From the Fan Brackets
1
2
3 |
4
1 | fan release latches (2) | 2 | fan | 3 | center fan bracket |
4fan connector on system board
Removing and Installing the Cooling Shroud Fan
CAUTION: Only trained service technicians are authorized to remove the system cover and access any of the components inside the system. See your Product Information Guide for complete information about safety precautions, working inside the computer, and protecting against electrostatic discharge.
![]() NOTICE: Never remove the memory cooling shroud without first powering down the system. Overheating of the system can develop quickly resulting in a shutdown of the system and the loss of data.
NOTICE: Never remove the memory cooling shroud without first powering down the system. Overheating of the system can develop quickly resulting in a shutdown of the system and the loss of data.
1Open the system. See "Opening the System" on page 48.
2Release the fan bracket from the cooling shroud by squeezing the latches on each side of the fan bracket, and then rotate the bracket to the up position. See Figure
NOTE: Do not remove the cooling shroud from the system to perform this step.
54