5.Highlight the channel that you want to lock. If necessary, press the UP or DOWN ARROW button to see the channel. You can also jump to a channel by typing the channel number using the NUMBER PAD buttons.
6.Press the SELECT button to lock or unlock the highlighted channel. If the checkbox next to the channel has a checkmark, then the channel is locked.
7.Select the Done option to save your changes.
8.If the receiver is not already locked, then you must lock it to put the locks you just created into effect.
Locking and Unlocking the Receiver Front Panel
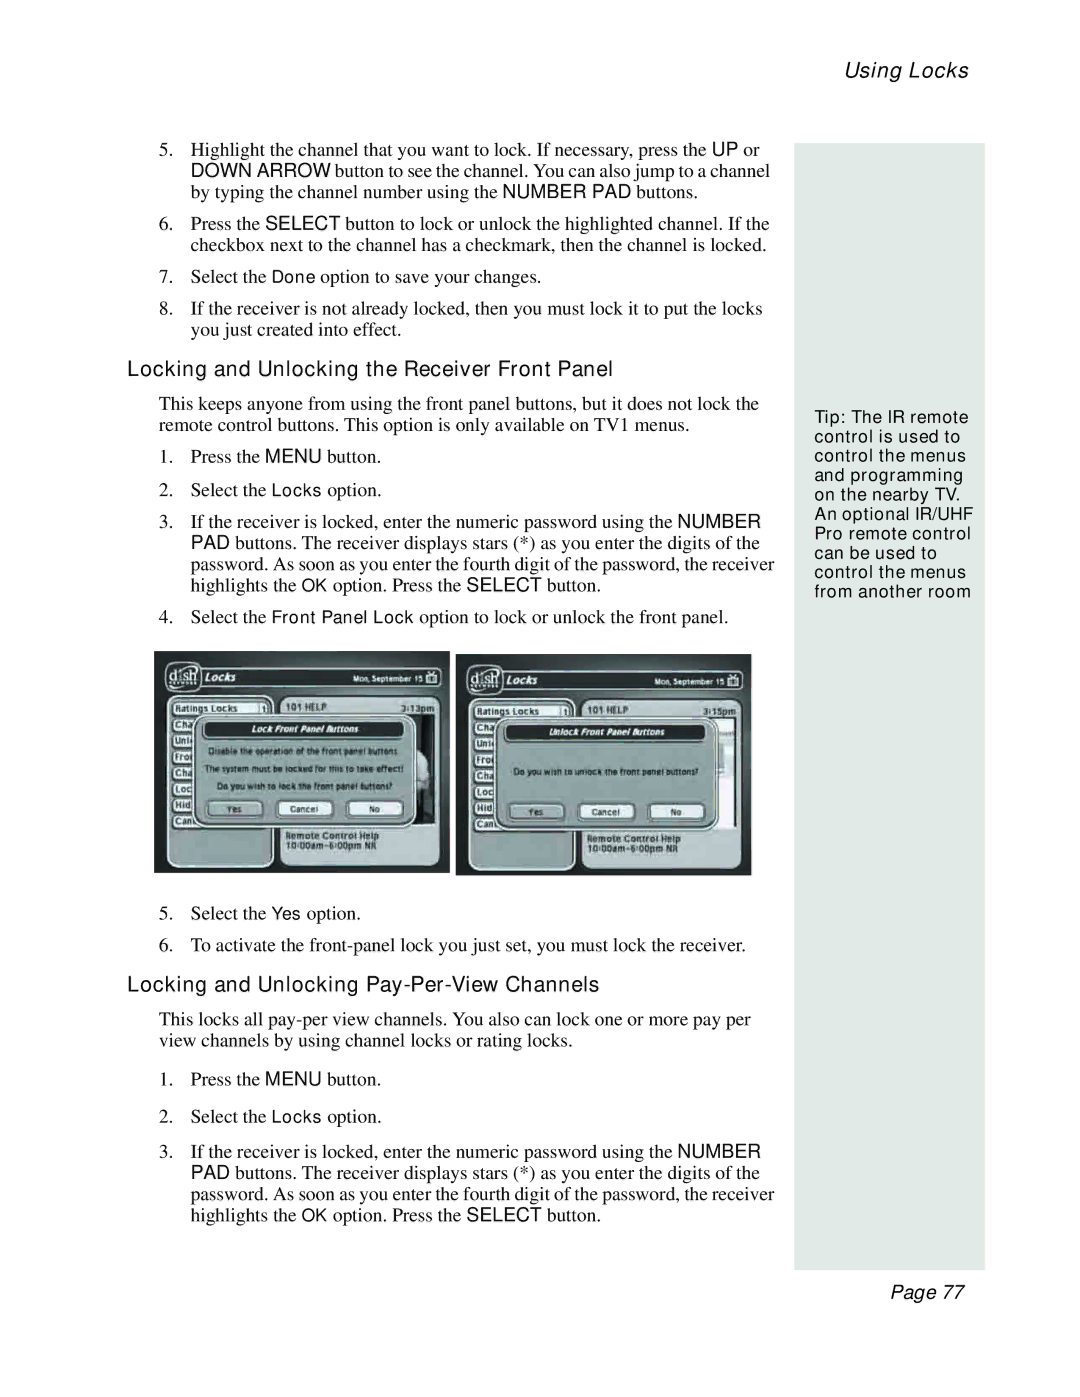
This keeps anyone from using the front panel buttons, but it does not lock the remote control buttons. This option is only available on TV1 menus.
1.Press the MENU button.
2.Select the Locks option.
3.If the receiver is locked, enter the numeric password using the NUMBER PAD buttons. The receiver displays stars (*) as you enter the digits of the password. As soon as you enter the fourth digit of the password, the receiver highlights the OK option. Press the SELECT button.
4.Select the Front Panel Lock option to lock or unlock the front panel.
5.Select the Yes option.
6.To activate the
Locking and Unlocking Pay-Per-View Channels
This locks all
1.Press the MENU button.
2.Select the Locks option.
3.If the receiver is locked, enter the numeric password using the NUMBER PAD buttons. The receiver displays stars (*) as you enter the digits of the password. As soon as you enter the fourth digit of the password, the receiver highlights the OK option. Press the SELECT button.
Using Locks
Tip: The IR remote control is used to control the menus and programming on the nearby TV.
An optional IR/UHF Pro remote control can be used to control the menus from another room
Page 77