Chapter 4
Dish Antenna Installation
These instructions guide you through the installation of a satellite system which includes your receiver (included with this manual), and a DISH Pro DISH 500 antenna system that can be identified by the DISH Pro logo shown below.
Installing a DISH 500 Antenna
The first step in installing your dish antenna is to assemble the satellite dish, mount it, and point it in the general direction of a satellite. To do this, follow these instructions:
Finding the Satellites
You need to find the satellites in the sky. To do this, you need to know the azimuth angle (the south, southeast, or southwest direction to the satellites) and the elevation angle (the angle up to the satellites) from your location, and the skew angle.
1.Make sure that the batteries are fresh in both remote controls, and are installed properly. If needed, make sure that the remote is in SAT mode to control the satellite receiver.
2.Make sure your satellite receiver is connected to your TV(s) and confirm that the remote controls are controlling the menus properly using the instructions in Chapter 2. Turn ON the television and receiver.
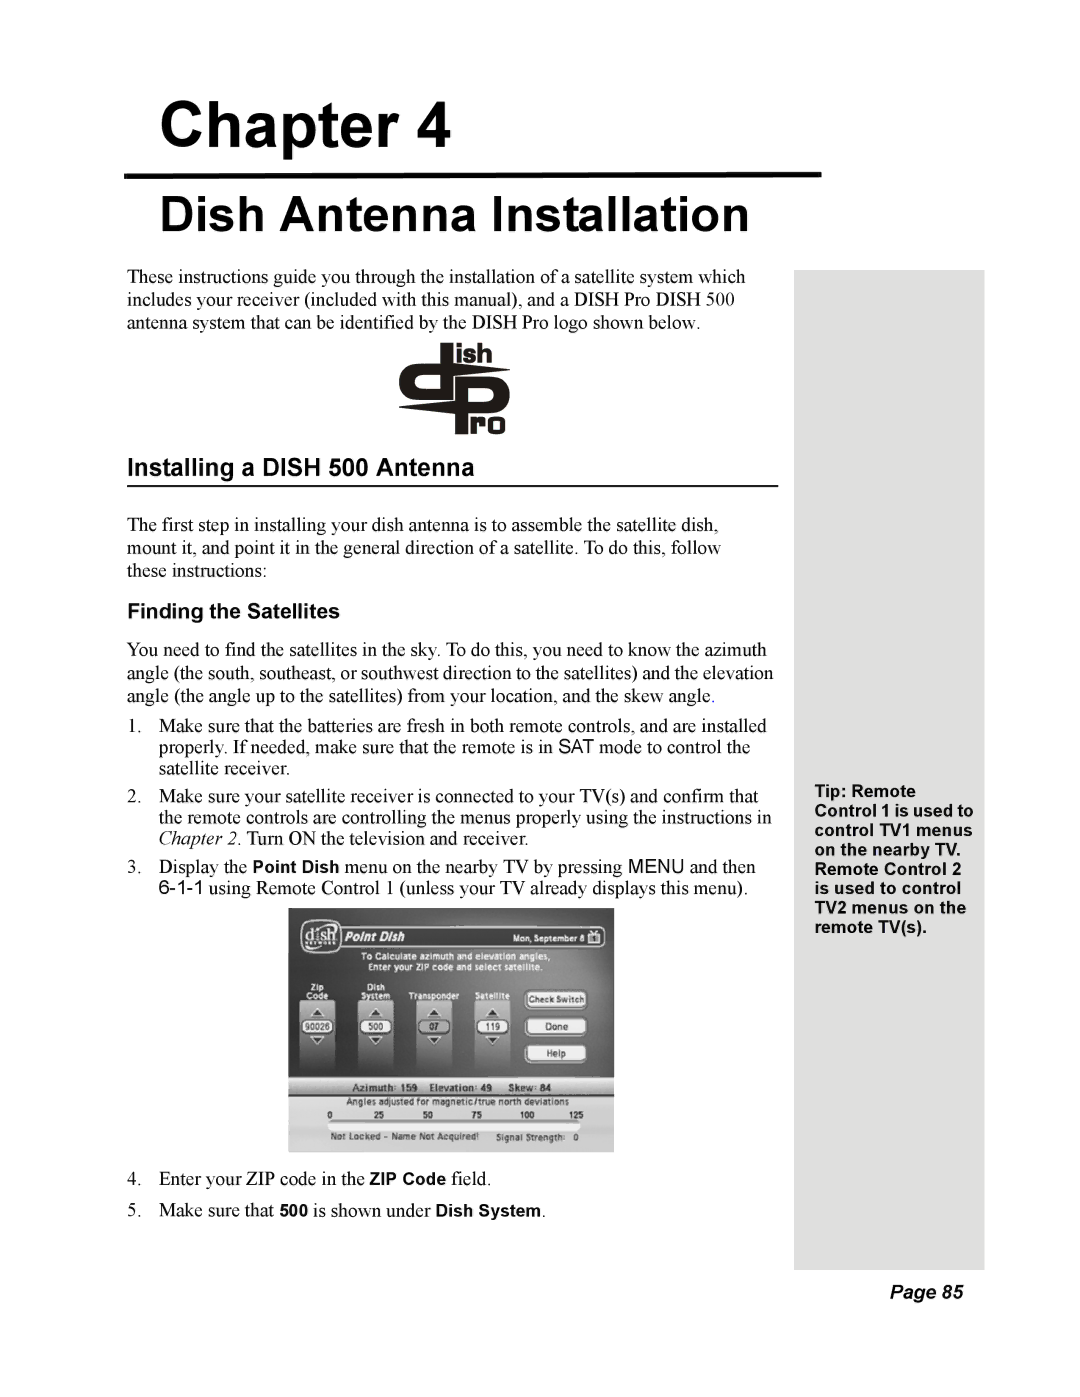
3.Display the Point Dish menu on the nearby TV by pressing MENU and then
4.Enter your ZIP code in the ZIP Code field.
5.Make sure that 500 is shown under Dish System.
Tip: Remote Control 1 is used to control TV1 menus on the nearby TV. Remote Control 2 is used to control TV2 menus on the remote TV(s).
Page 85