Dish Network Solo 351 manual Chapter

Models: Solo 351

1 137
Download 137 pages 44.73 Kb
Page 92
Image 92

Chapter 4

Dish Antenna Installation

Note: You can have as much as 200 feet of cable between the DISH Pro LNBF and the DISH Pro receiver. However, you must use only RG-6 coaxial cables rated for 950 to 2150 MHz. Some cables may say "Swept tested for 2150 MHz." If you have any doubt about this, ask your DISH Network retailer, examine the cable’s outer jacket, or look on the container the cable came in. Do not use cable company TV cables or cables from other satellite TV systems not rated for 950- 2150 MHz. These other cables may cause signal loss. Do not use existing cables such as RG-59. Also, be sure that any outdoor connections are made using waterproof F-connectors.

9.Attach the Y-bracket, using the Y-bracket screw.

10.Connect the RG-6 cables from the two SATELLITE IN connections on the back of the receiver directly to the two ports of the DISH Pro Twin LNBF, as shown below. Be sure there are no multi-dish switches between the LNBF and the receiver.

Tighten all of the coaxial cable connections only by hand. If you use a wrench, you may over-tighten the connections and damage your equipment. Such damage is not covered by the limited warranty.

11.Attach the LNBF to the Y-bracket using the two LNBF screws.

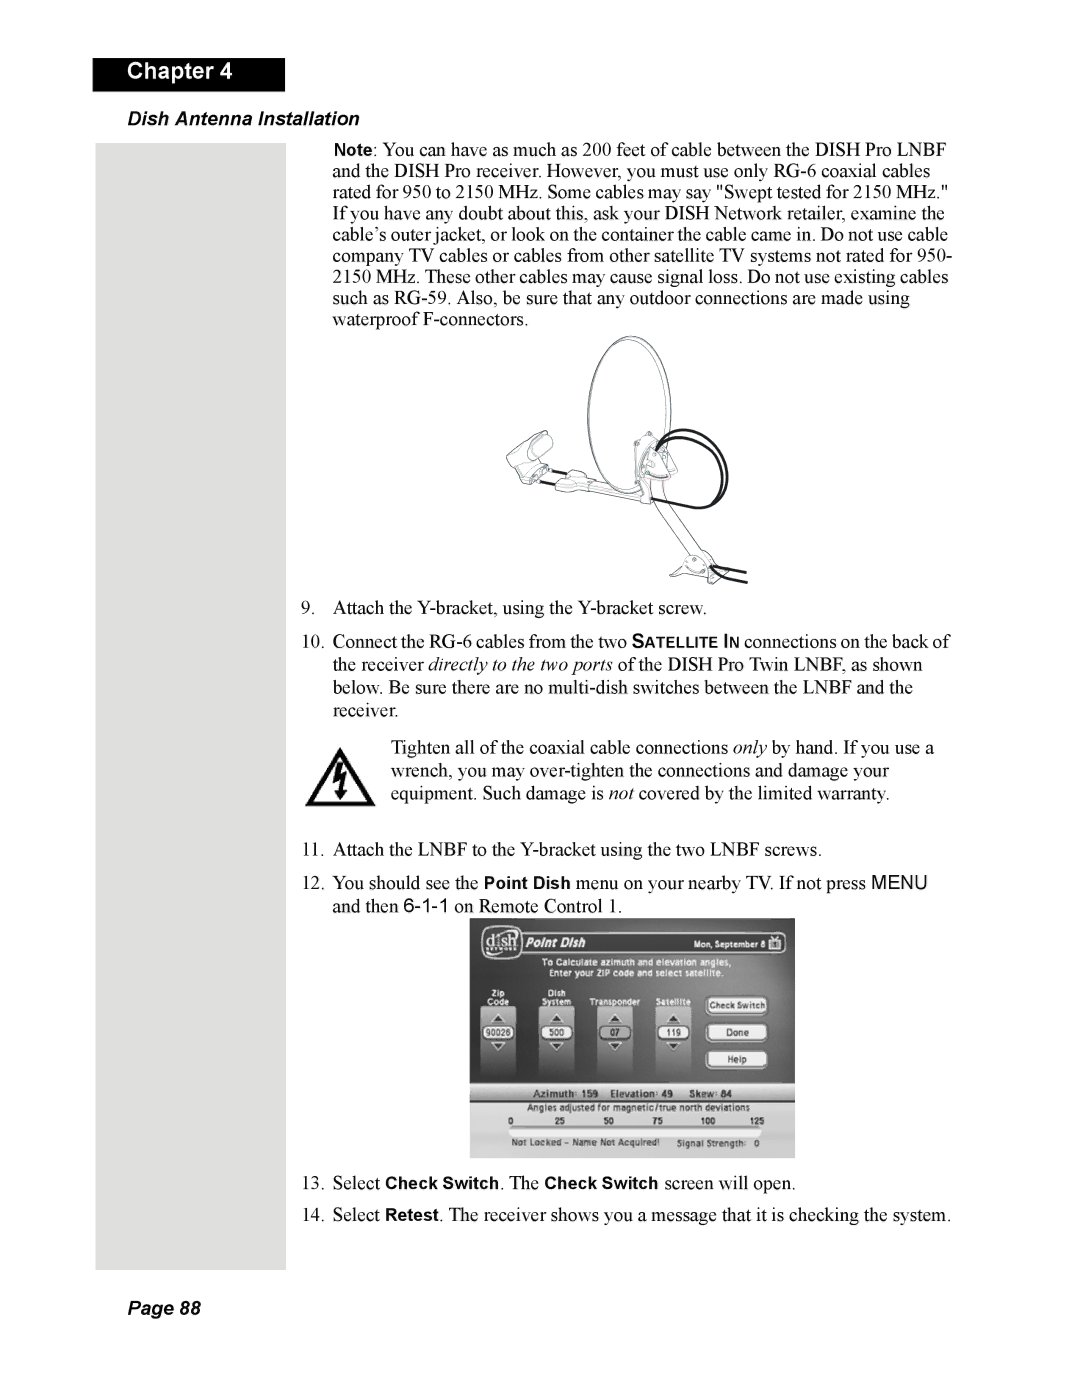
12.You should see the Point Dish menu on your nearby TV. If not press MENU and then 6-1-1on Remote Control 1.

13.Select Check Switch. The Check Switch screen will open.

14.Select Retest. The receiver shows you a message that it is checking the system.

Page 88

Page 92
Image 92
Dish Network Solo 351 manual Chapter