| Formatter PCA |
|
|
C a u t i o n | ESD SENSITIVE! |
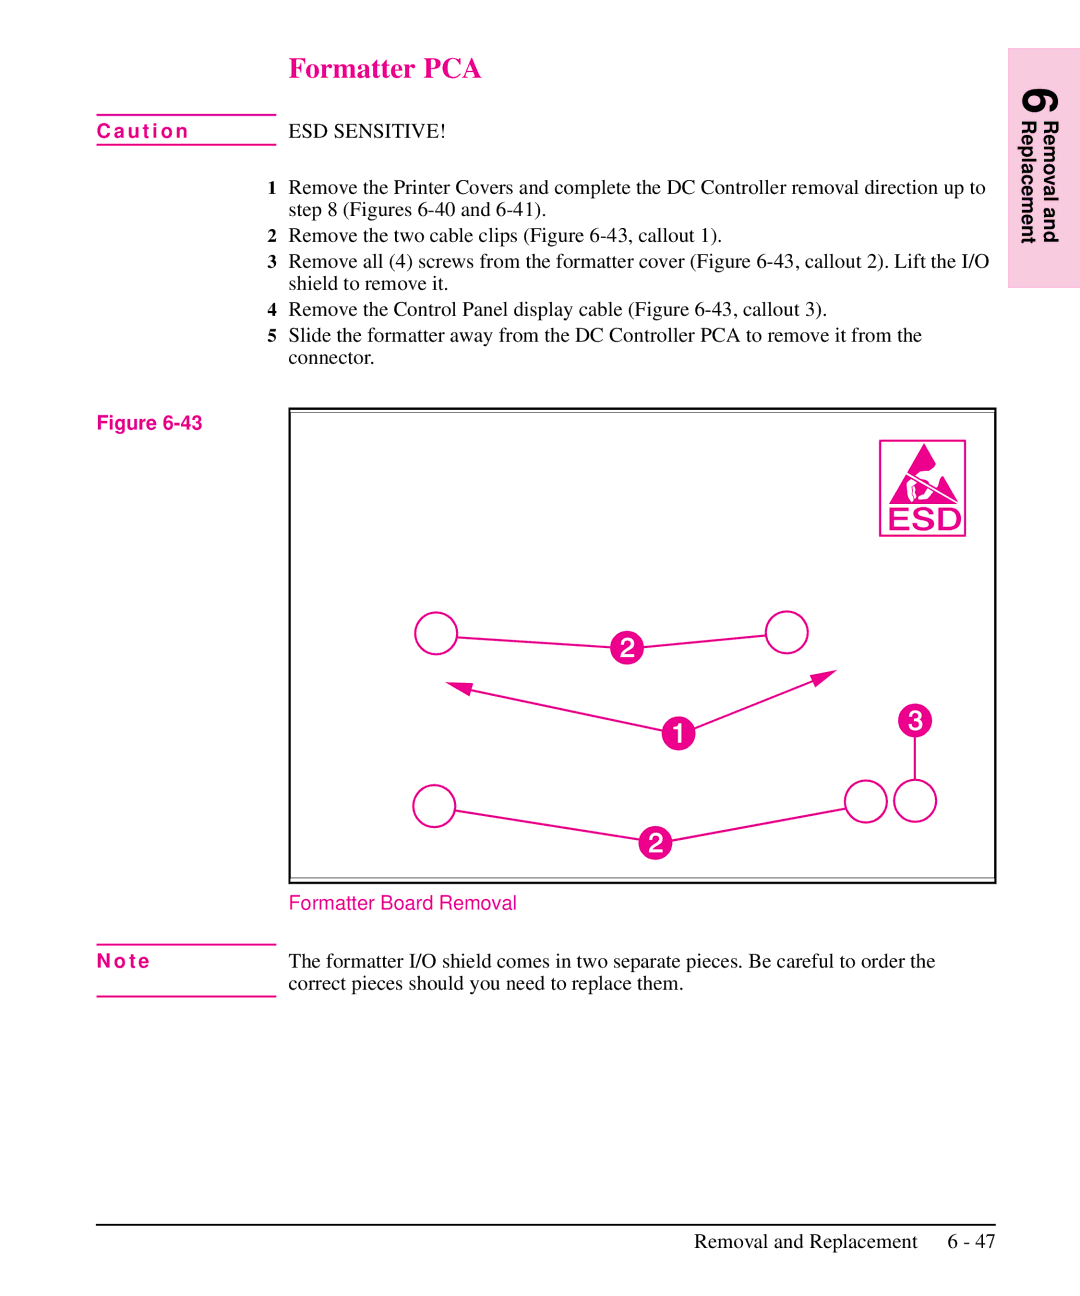
1Remove the Printer Covers and complete the DC Controller removal direction up to step 8 (Figures
2Remove the two cable clips (Figure
3Remove all (4) screws from the formatter cover (Figure
4Remove the Control Panel display cable (Figure
5Slide the formatter away from the DC Controller PCA to remove it from the connector.
Figure
| Formatter Board Removal |
|
|
N o t e | The formatter I/O shield comes in two separate pieces. Be careful to order the |
| correct pieces should you need to replace them. |
6 Removal and Replacement
Removal and Replacement 6 - 47