Image Defect Examples
This section illustrates some image defects and their possible causes. Since there are many variables in the printing process, you may encounter image defects that are not illustrated in the following examples. If you find a defect that is not illustrated, record the probable cause along with the printing environmental conditions and save a copy of the defect for future reference.
Each example lists, in order, the probable causes of the image defect.
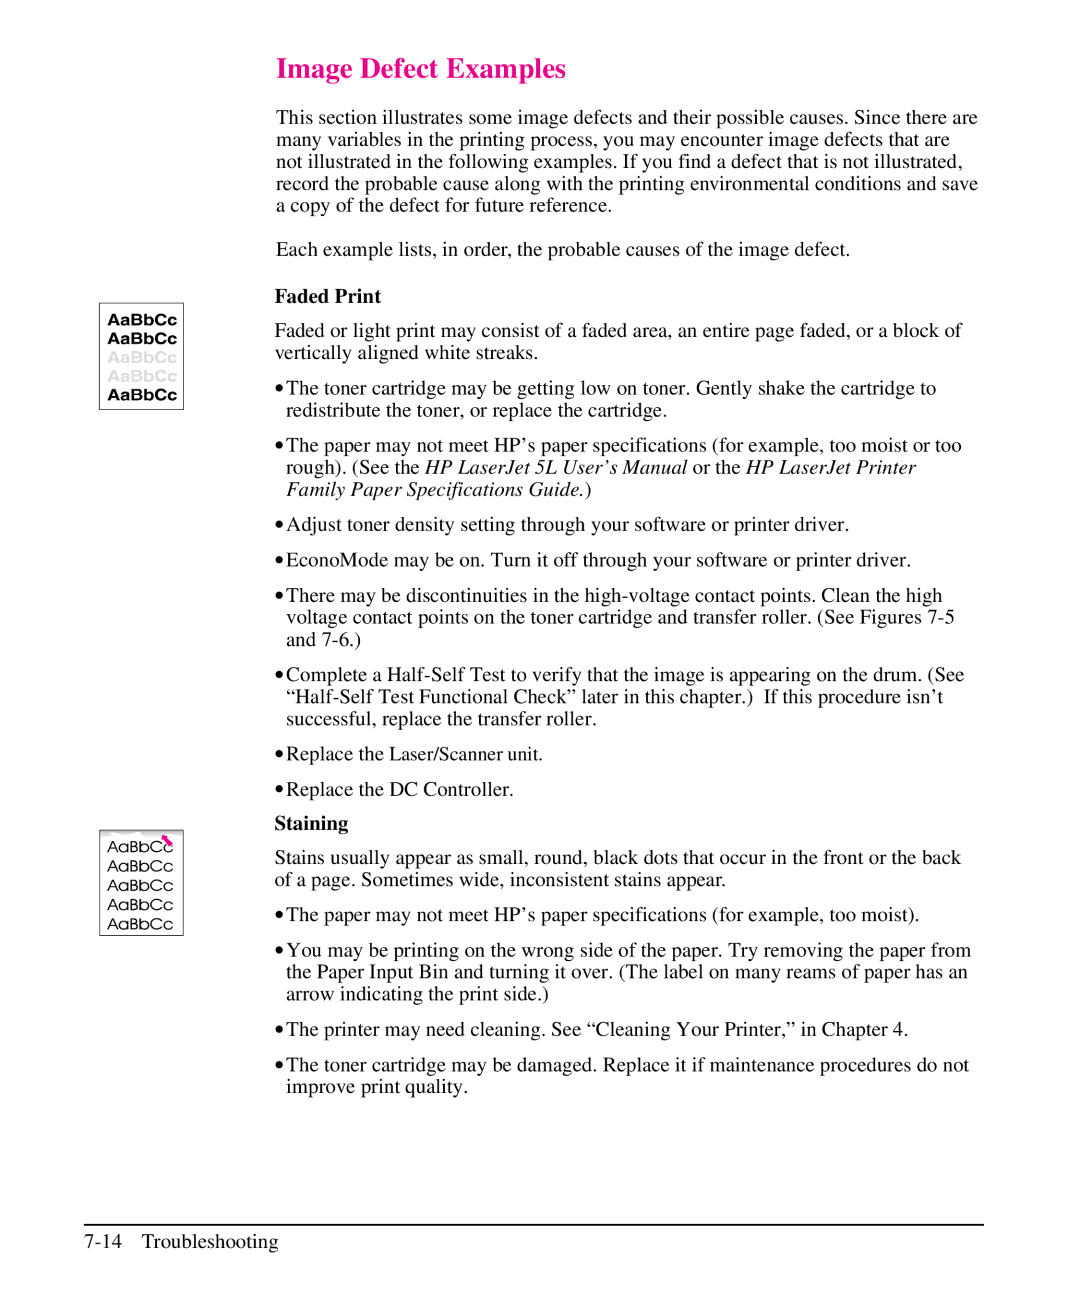
Faded Print
Faded or light print may consist of a faded area, an entire page faded, or a block of vertically aligned white streaks.
∙The toner cartridge may be getting low on toner. Gently shake the cartridge to redistribute the toner, or replace the cartridge.
∙The paper may not meet HP’s paper specifications (for example, too moist or too rough). (See the HP LaserJet 5L User’s Manual or the HP LaserJet Printer Family Paper Specifications Guide.)
∙Adjust toner density setting through your software or printer driver.
∙EconoMode may be on. Turn it off through your software or printer driver.
∙There may be discontinuities in the
∙Complete a
∙Replace the Laser/Scanner unit.
∙Replace the DC Controller.
Staining
Stains usually appear as small, round, black dots that occur in the front or the back of a page. Sometimes wide, inconsistent stains appear.
∙The paper may not meet HP’s paper specifications (for example, too moist).
∙You may be printing on the wrong side of the paper. Try removing the paper from the Paper Input Bin and turning it over. (The label on many reams of paper has an arrow indicating the print side.)
∙The printer may need cleaning. See “Cleaning Your Printer,” in Chapter 4.
∙The toner cartridge may be damaged. Replace it if maintenance procedures do not improve print quality.