To remove this type of paper jam the fuser area of the printer must be disassembled. The fuser and pressure roller should be checked for damage from the paper jam or the customer’s attempts to remove the paper jam. See chapter 6 in the service manual for disassembly instructions.

This JP protector and the output tray fin (from service note
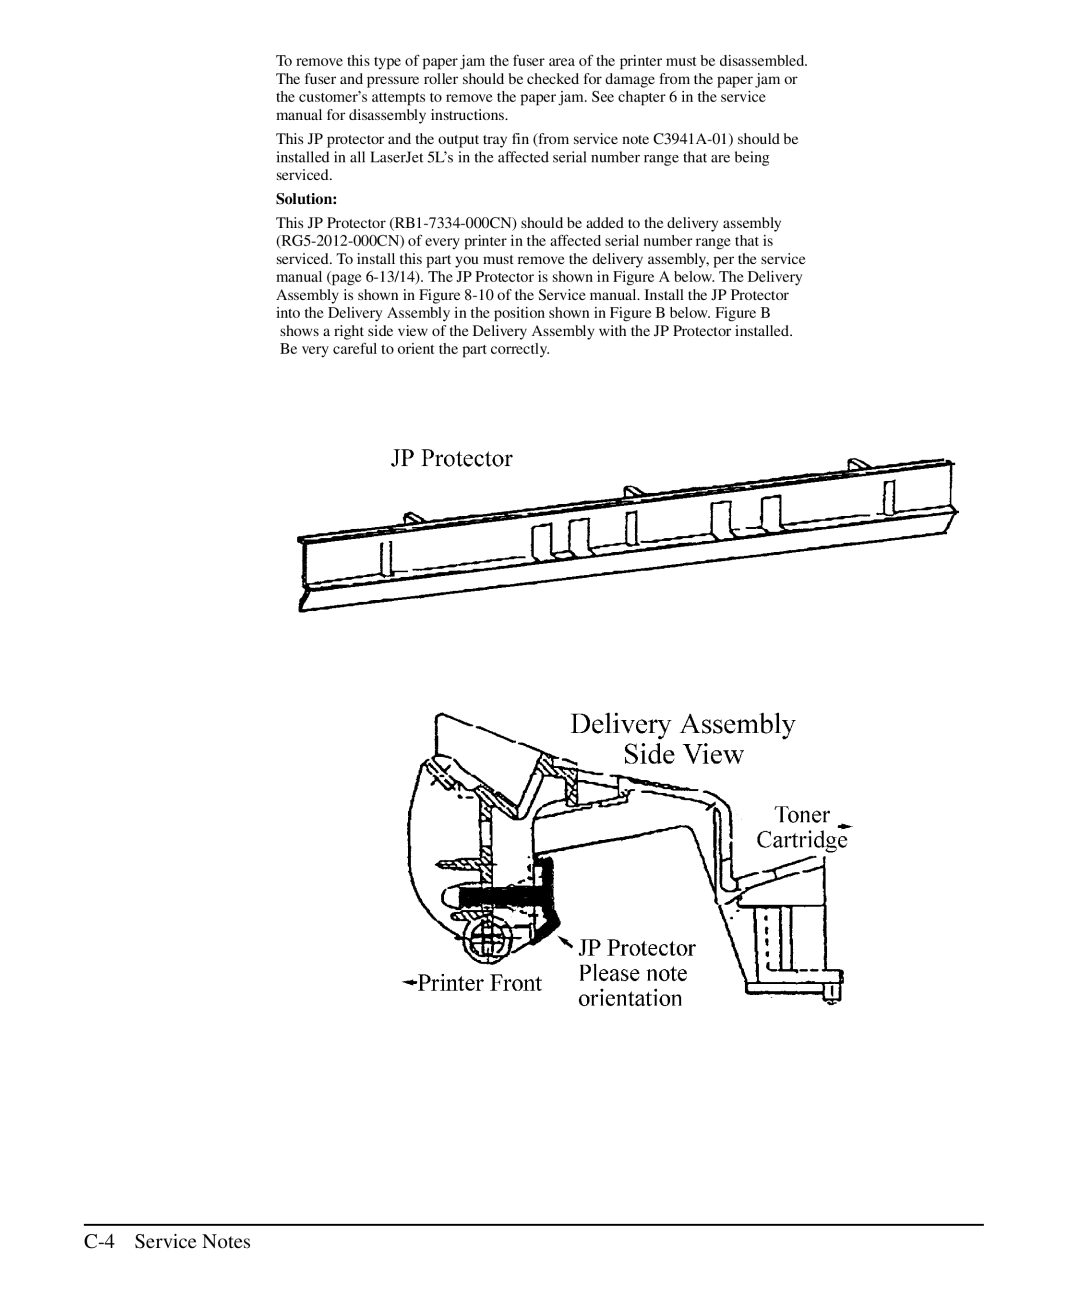
 C3941A-01) should be installed in all LaserJet 5L’s in the affected serial number range that are being serviced.

Solution:

This JP Protector (RB1-7334-000CN) should be added to the delivery assembly (RG5-2012-000CN) of every printer in the affected serial number range that is serviced. To install this part you must remove the delivery assembly, per the service manual (page 6-13/14). The JP Protector is shown in Figure A below. The Delivery Assembly is shown in Figure 8-10 of the Service manual. Install the JP Protector into the Delivery Assembly in the position shown in Figure B below. Figure B shows a right side view of the Delivery Assembly with the JP Protector installed. Be very careful to orient the part correctly.

C-4 Service Notes