Pressure Roller
1Remove Printer Covers, Delivery Assembly (Figures
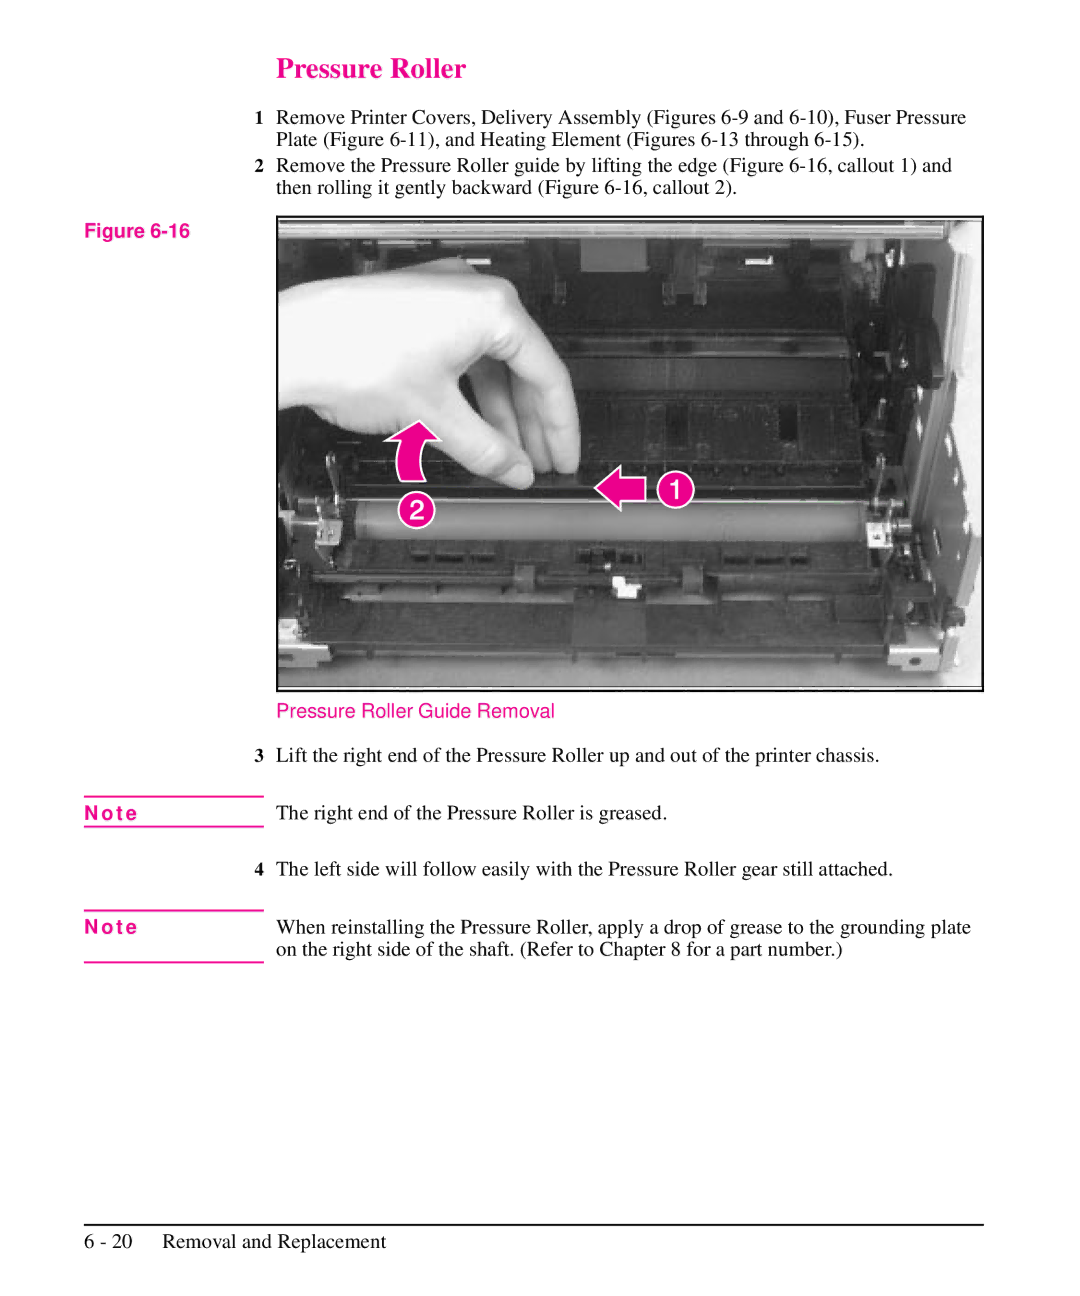
2Remove the Pressure Roller guide by lifting the edge (Figure
Figure
Pressure Roller Guide Removal
3Lift the right end of the Pressure Roller up and out of the printer chassis.
N o t e | The right end of the Pressure Roller is greased. |
4The left side will follow easily with the Pressure Roller gear still attached.
N o t e | When reinstalling the Pressure Roller, apply a drop of grease to the grounding plate |
| on the right side of the shaft. (Refer to Chapter 8 for a part number.) |