Paper Exit Sensor Flag
1Remove the Printer Covers, Delivery Assembly (Figures
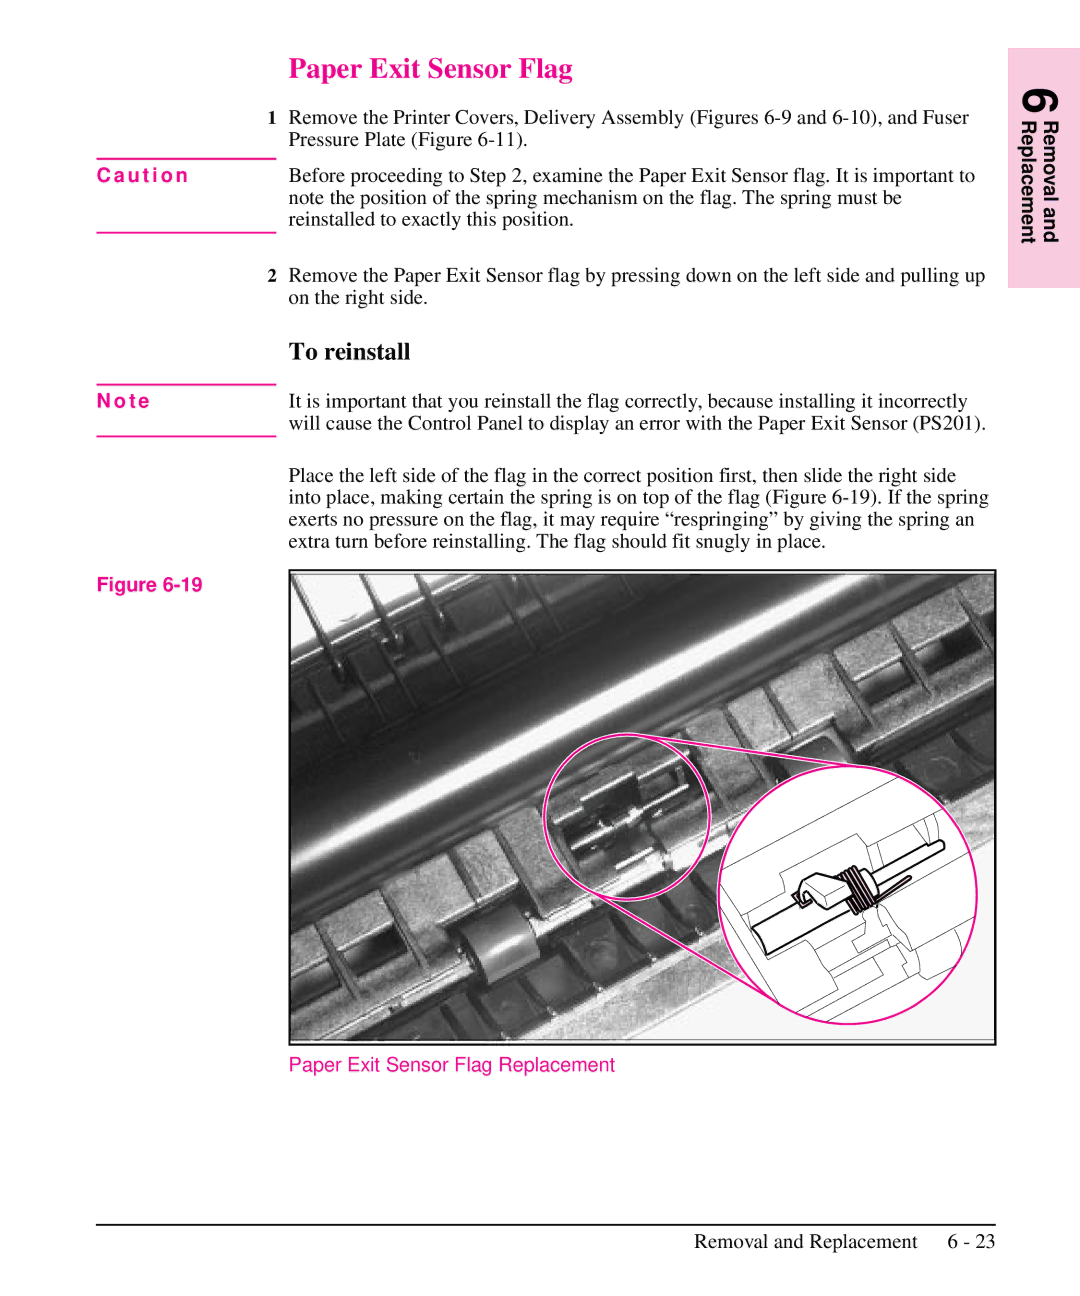
C a u t i o n | Before proceeding to Step 2, examine the Paper Exit Sensor flag. It is important to |
| note the position of the spring mechanism on the flag. The spring must be |
| reinstalled to exactly this position. |
2Remove the Paper Exit Sensor flag by pressing down on the left side and pulling up on the right side.
|
| To reinstall |
|
|
|
N o t e |
| It is important that you reinstall the flag correctly, because installing it incorrectly |
|
| will cause the Control Panel to display an error with the Paper Exit Sensor (PS201). |
|
| Place the left side of the flag in the correct position first, then slide the right side |
|
| into place, making certain the spring is on top of the flag (Figure |
|
| exerts no pressure on the flag, it may require “respringing” by giving the spring an |
|
| extra turn before reinstalling. The flag should fit snugly in place. |
Figure |
|
|
|
| |
|
|
|
|
|
|
Paper Exit Sensor Flag Replacement
6 Removal and Replacement
Removal and Replacement 6 - 23