Cleaning the printer
To maintain the print quality, thoroughly clean the printer:
lEvery time you change the toner cartridge.
lAfter printing approximately 2,500 pages.
lWhenever print quality problems occur.
Clean the outside of the printer with a lightly
WARNING! Before you begin these steps, unplug the printer to avoid shock hazard.
When cleaning around the front door area, avoid touching the heating element. It may be HOT. (For heating element location, see Figure
Cleaning printer components
CAUTION To avoid permanent damage to the toner cartridge, do not use
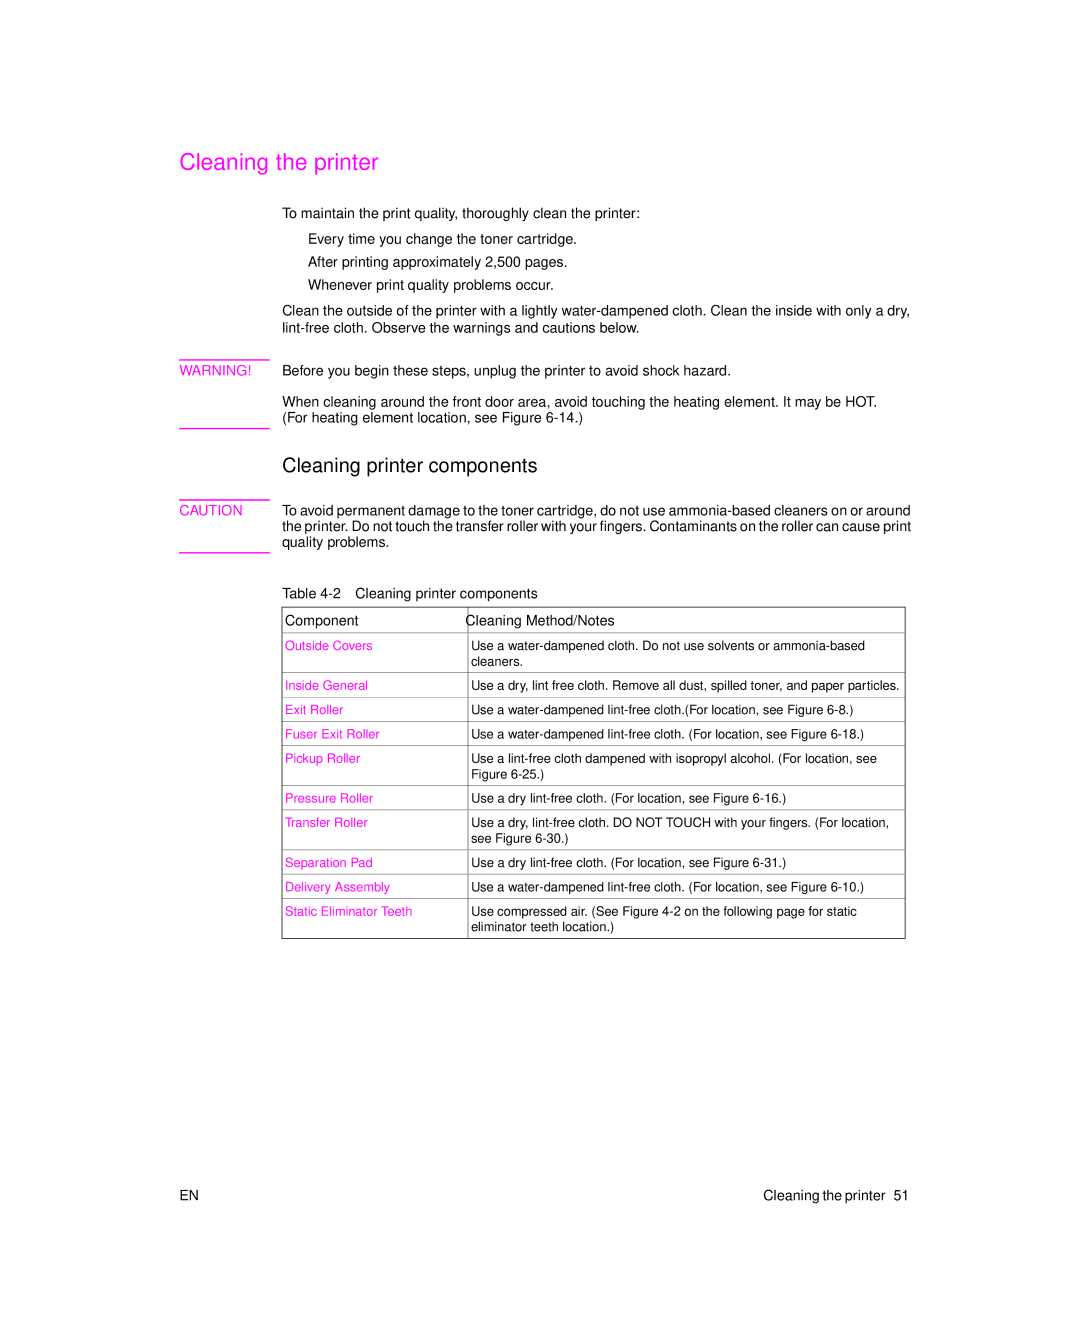
Table 4-2 Cleaning printer components
Component | Cleaning Method/Notes |
|
|
Outside Covers | Use a |
| cleaners. |
|
|
Inside General | Use a dry, lint free cloth. Remove all dust, spilled toner, and paper particles. |
|
|
Exit Roller | Use a |
|
|
Fuser Exit Roller | Use a |
|
|
Pickup Roller | Use a |
| Figure |
|
|
Pressure Roller | Use a dry |
|
|
Transfer Roller | Use a dry, |
| see Figure |
|
|
Separation Pad | Use a dry |
|
|
Delivery Assembly | Use a |
|
|
Static Eliminator Teeth | Use compressed air. (See Figure |
| eliminator teeth location.) |
|
|
EN | Cleaning the printer 51 |