Chapter 13: Replacing Hardware Components
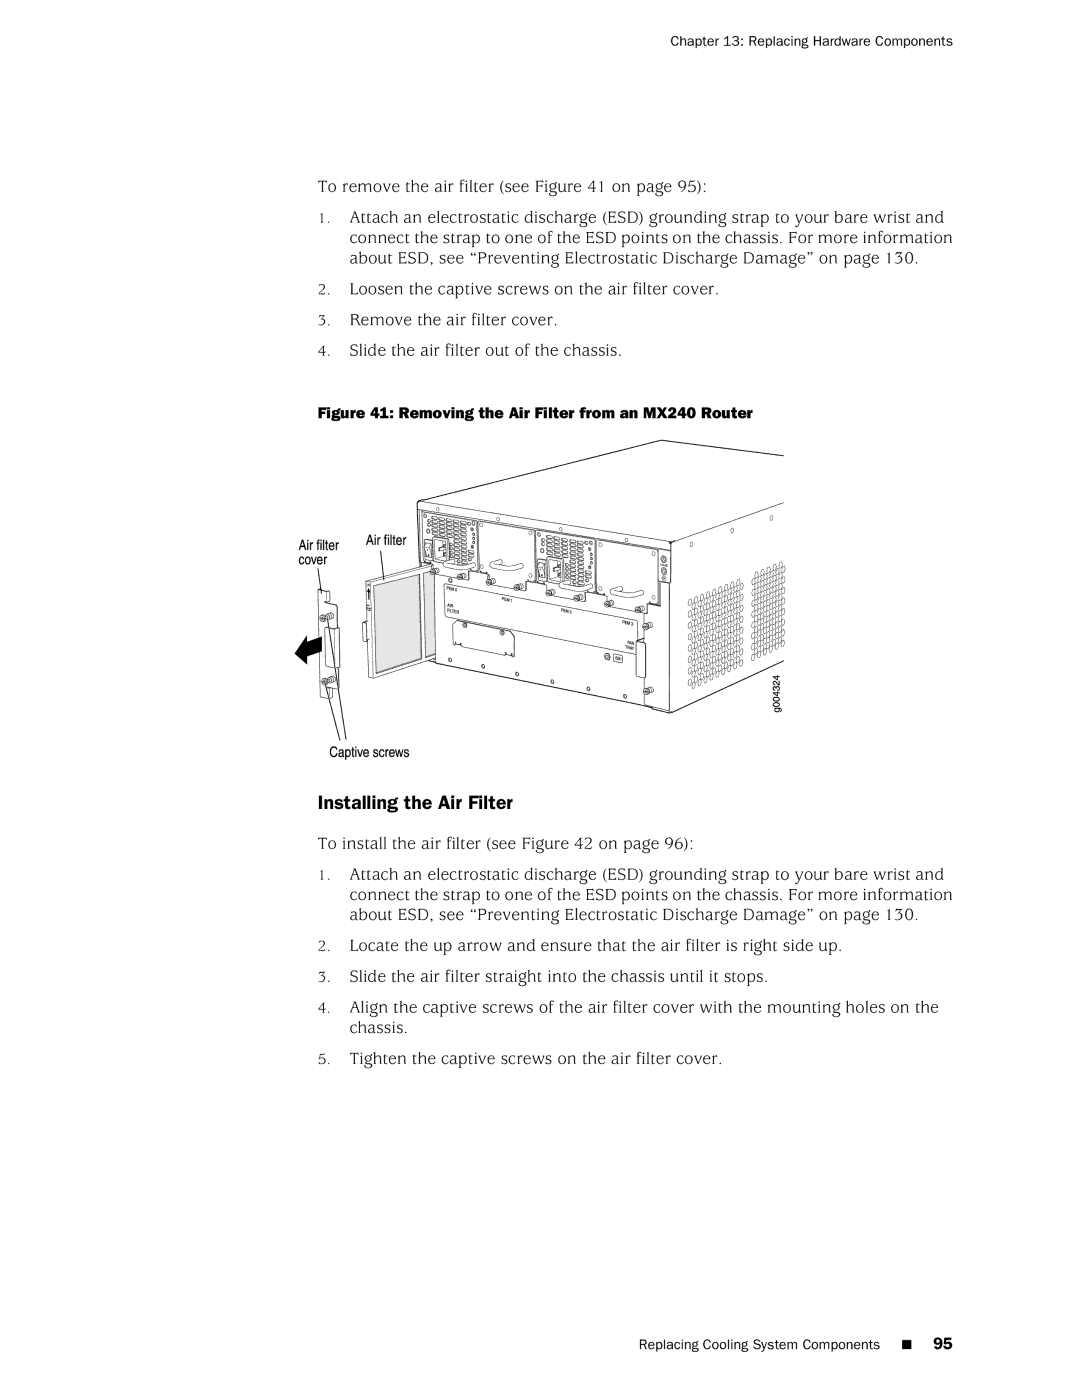
To remove the air filter (see Figure 41 on page 95):
1.Attach an electrostatic discharge (ESD) grounding strap to your bare wrist and connect the strap to one of the ESD points on the chassis. For more information about ESD, see “Preventing Electrostatic Discharge Damage” on page 130.
2.Loosen the captive screws on the air filter cover.
3.Remove the air filter cover.
4.Slide the air filter out of the chassis.
Figure 41: Removing the Air Filter from an MX240 Router
Installing the Air Filter
To install the air filter (see Figure 42 on page 96):
1.Attach an electrostatic discharge (ESD) grounding strap to your bare wrist and connect the strap to one of the ESD points on the chassis. For more information about ESD, see “Preventing Electrostatic Discharge Damage” on page 130.
2.Locate the up arrow and ensure that the air filter is right side up.
3.Slide the air filter straight into the chassis until it stops.
4.Align the captive screws of the air filter cover with the mounting holes on the chassis.
5.Tighten the captive screws on the air filter cover.
Replacing Cooling System Components ■ 95