Configuring Destination for the Network Scanner Features | 6 |
|
your administrator of the copier. The Manual Address screen appears.
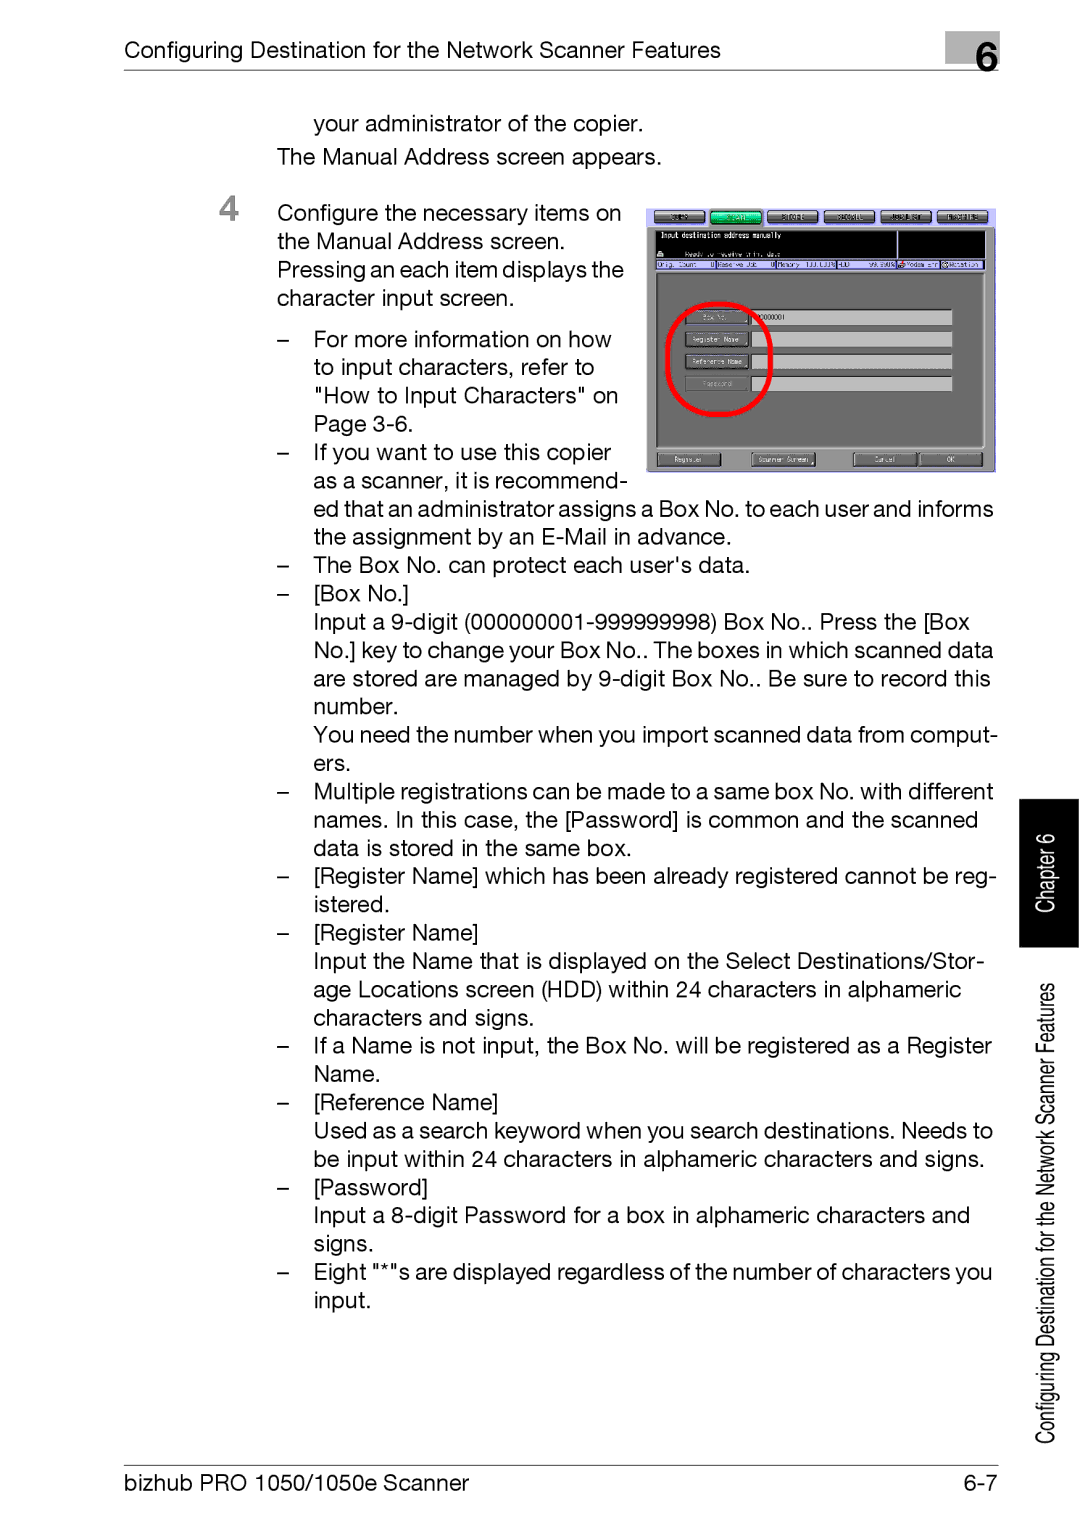
4 Configure the necessary items on
the Manual Address screen. Pressing an each item displays the character input screen.
–For more information on how to input characters, refer to "How to Input Characters" on Page
–If you want to use this copier as a scanner, it is recommend-
ed that an administrator assigns a Box No. to each user and informs the assignment by an
–The Box No. can protect each user's data.
–[Box No.]
Input a
You need the number when you import scanned data from comput- ers.
–Multiple registrations can be made to a same box No. with different names. In this case, the [Password] is common and the scanned data is stored in the same box.
–[Register Name] which has been already registered cannot be reg- istered.
–[Register Name]
Input the Name that is displayed on the Select Destinations/Stor- age Locations screen (HDD) within 24 characters in alphameric characters and signs.
–If a Name is not input, the Box No. will be registered as a Register Name.
–[Reference Name]
Used as a search keyword when you search destinations. Needs to be input within 24 characters in alphameric characters and signs.
–[Password]
Input a
–Eight "*"s are displayed regardless of the number of characters you input.
Chapter 6 |
Configuring Destination for the Network Scanner Features
bizhub PRO 1050/1050e Scanner |