Chapter 7 |
Using the Network Scanner Features
| 7 | Using the Network Scanner Features |
|
|
7.6Transmission to a Group
To send the scanned data to a registered Group, follow the steps below.
!
Detail
For more information on how to register a Group, refer to "Registering a Group" on Page
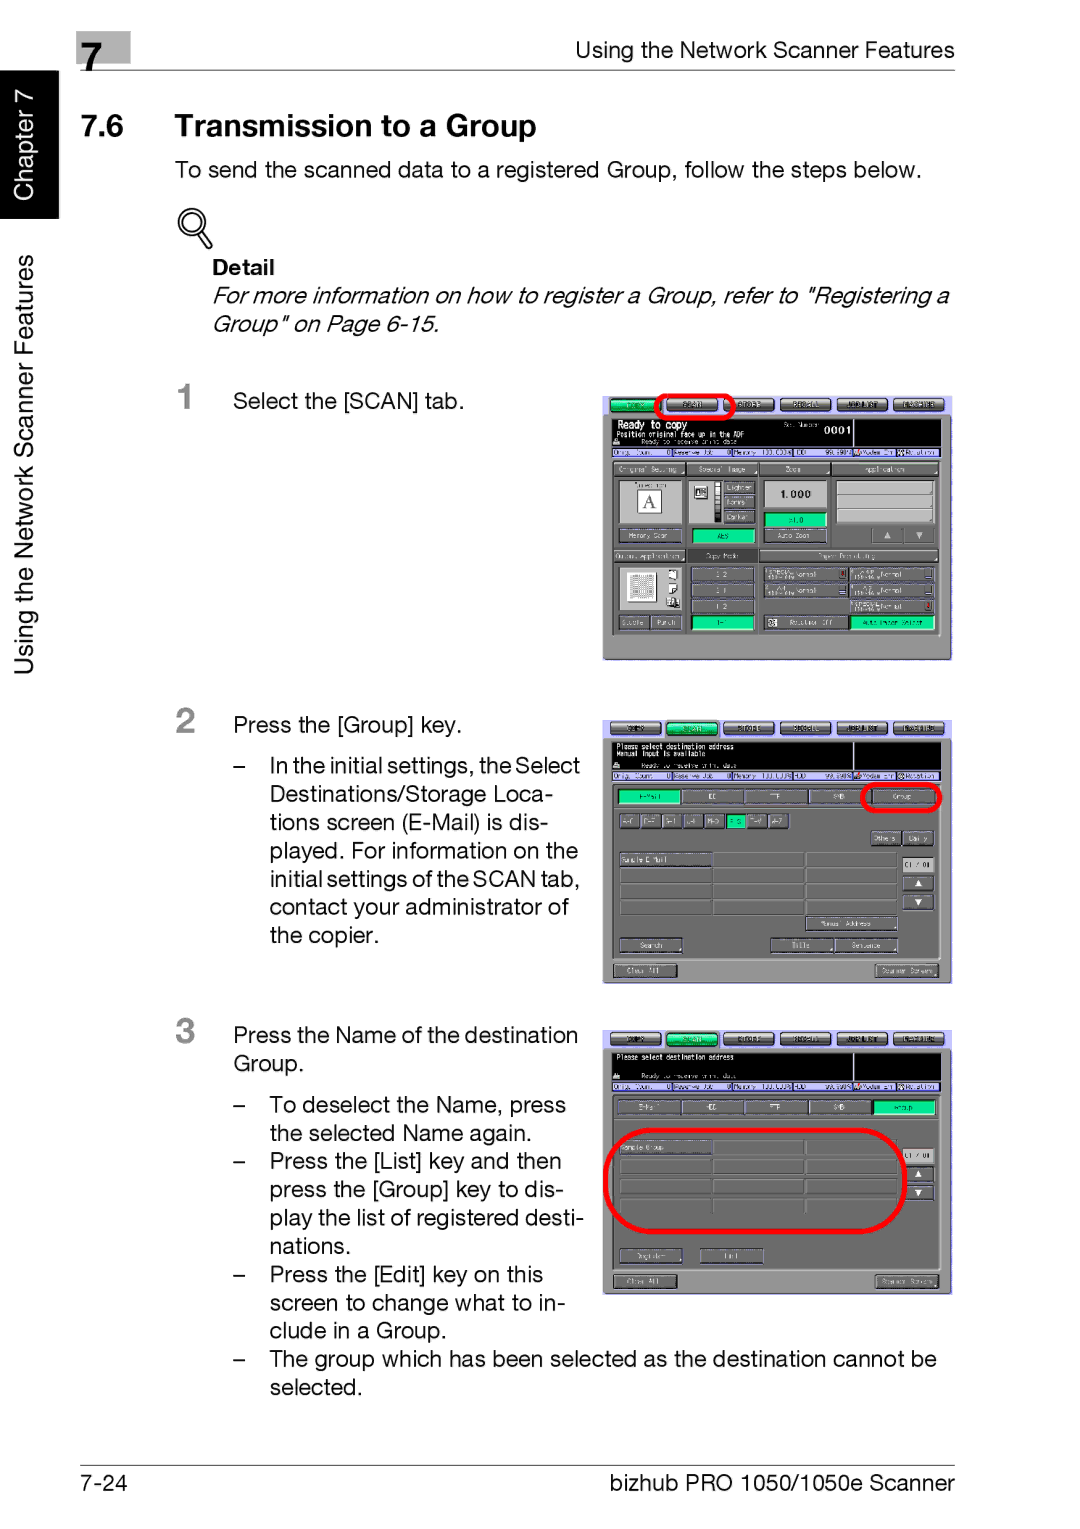
1 Select the [SCAN] tab.
2 Press the [Group] key.
–In the initial settings, the Select
Destinations/Storage Loca- tions screen
3 Press the Name of the destination Group.
–To deselect the Name, press
the selected Name again.
–Press the [List] key and then
press the [Group] key to dis- play the list of registered desti- nations.
–Press the [Edit] key on this screen to change what to in- clude in a Group.
–The group which has been selected as the destination cannot be selected.
bizhub PRO 1050/1050e Scanner |