3: Installing the Spider Device
4.The Pwr2 LED illuminates blue and the SysOK LED flashes green to indicate that the Spider device is booting. Bootup should complete within one minute. The SysOK LED stops flashing and remains illuminated. If you use the external power supply to boot, Pwr1 illuminates blue. lists the LED labels, colors, and actions.
|
| Table |
|
|
|
Label | Color | Action |
|
|
|
Pwr1 | Blue | Indicates adequate power from USB1 (external power supply first). |
|
|
|
Pwr2 | Blue | Indicates adequate power from USB2 or PS/2. |
|
|
|
SysOK | Green | Blinks upon bootup. Steady when up and healthy. |
|
|
|
Video | Green | Indicates that video (VSync) transmitting from server. |
|
|
|
Unit ID | Orange | Indicates, when lit, to assist in finding unit. |
|
|
|
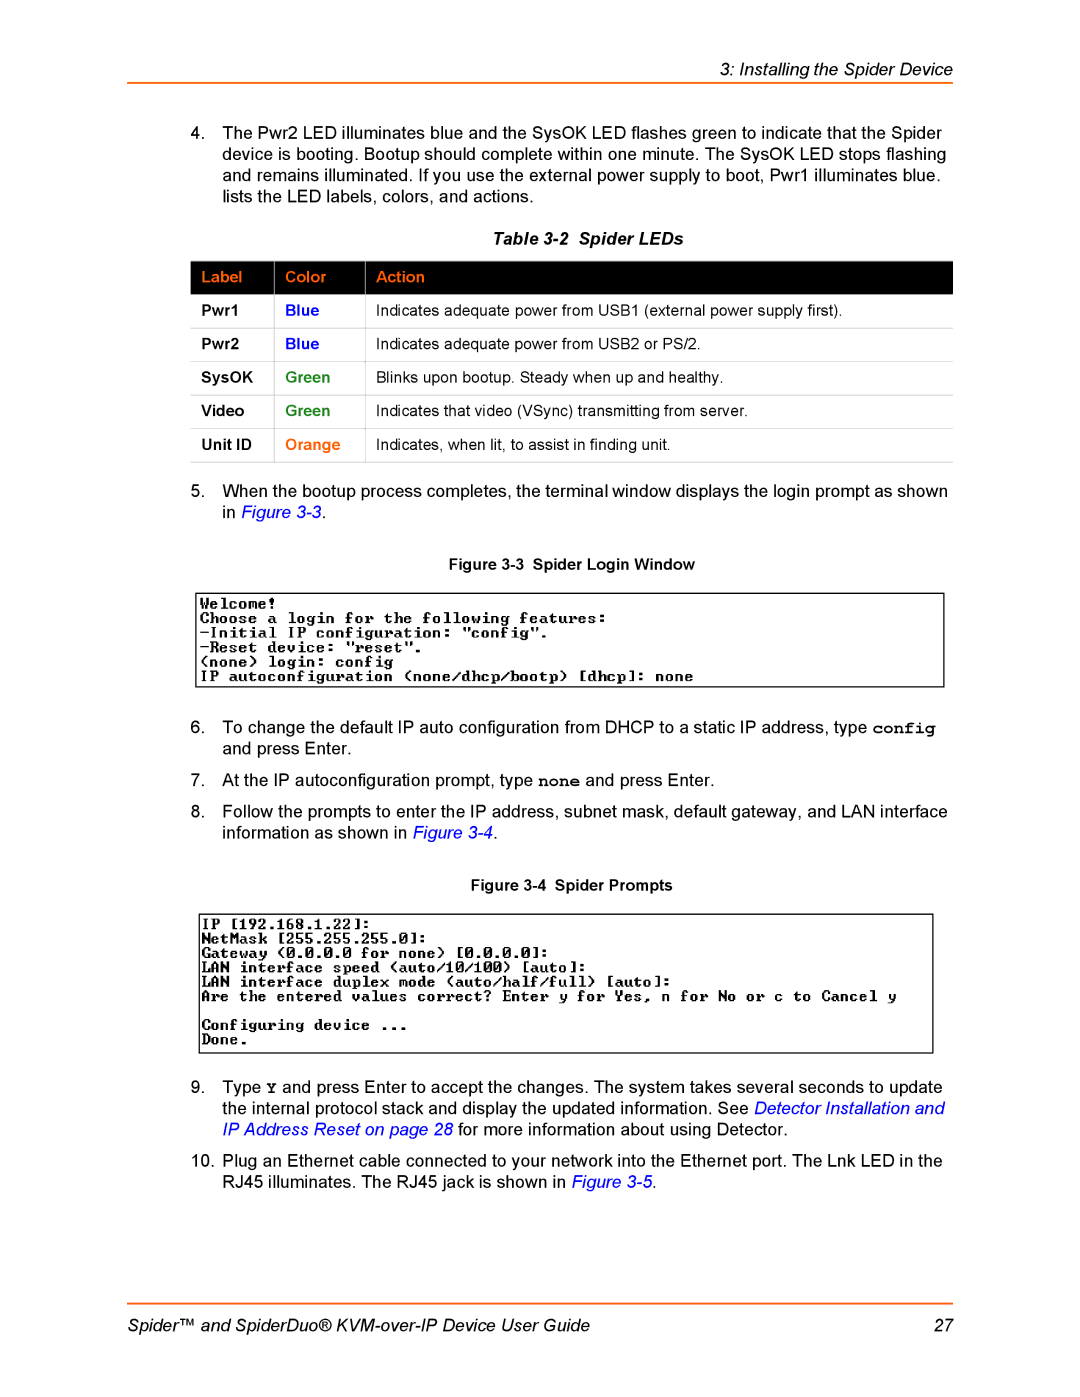
5.When the bootup process completes, the terminal window displays the login prompt as shown in Figure
Figure 3-3 Spider Login Window
6.To change the default IP auto configuration from DHCP to a static IP address, type config and press Enter.
7.At the IP autoconfiguration prompt, type none and press Enter.
8.Follow the prompts to enter the IP address, subnet mask, default gateway, and LAN interface information as shown in Figure
Figure 3-4 Spider Prompts
9.Type Y and press Enter to accept the changes. The system takes several seconds to update the internal protocol stack and display the updated information. See Detector Installation and IP Address Reset on page 28 for more information about using Detector.
10.Plug an Ethernet cable connected to your network into the Ethernet port. The Lnk LED in the RJ45 illuminates. The RJ45 jack is shown in Figure
Spider™ and SpiderDuo® | 27 |
