Left-side view
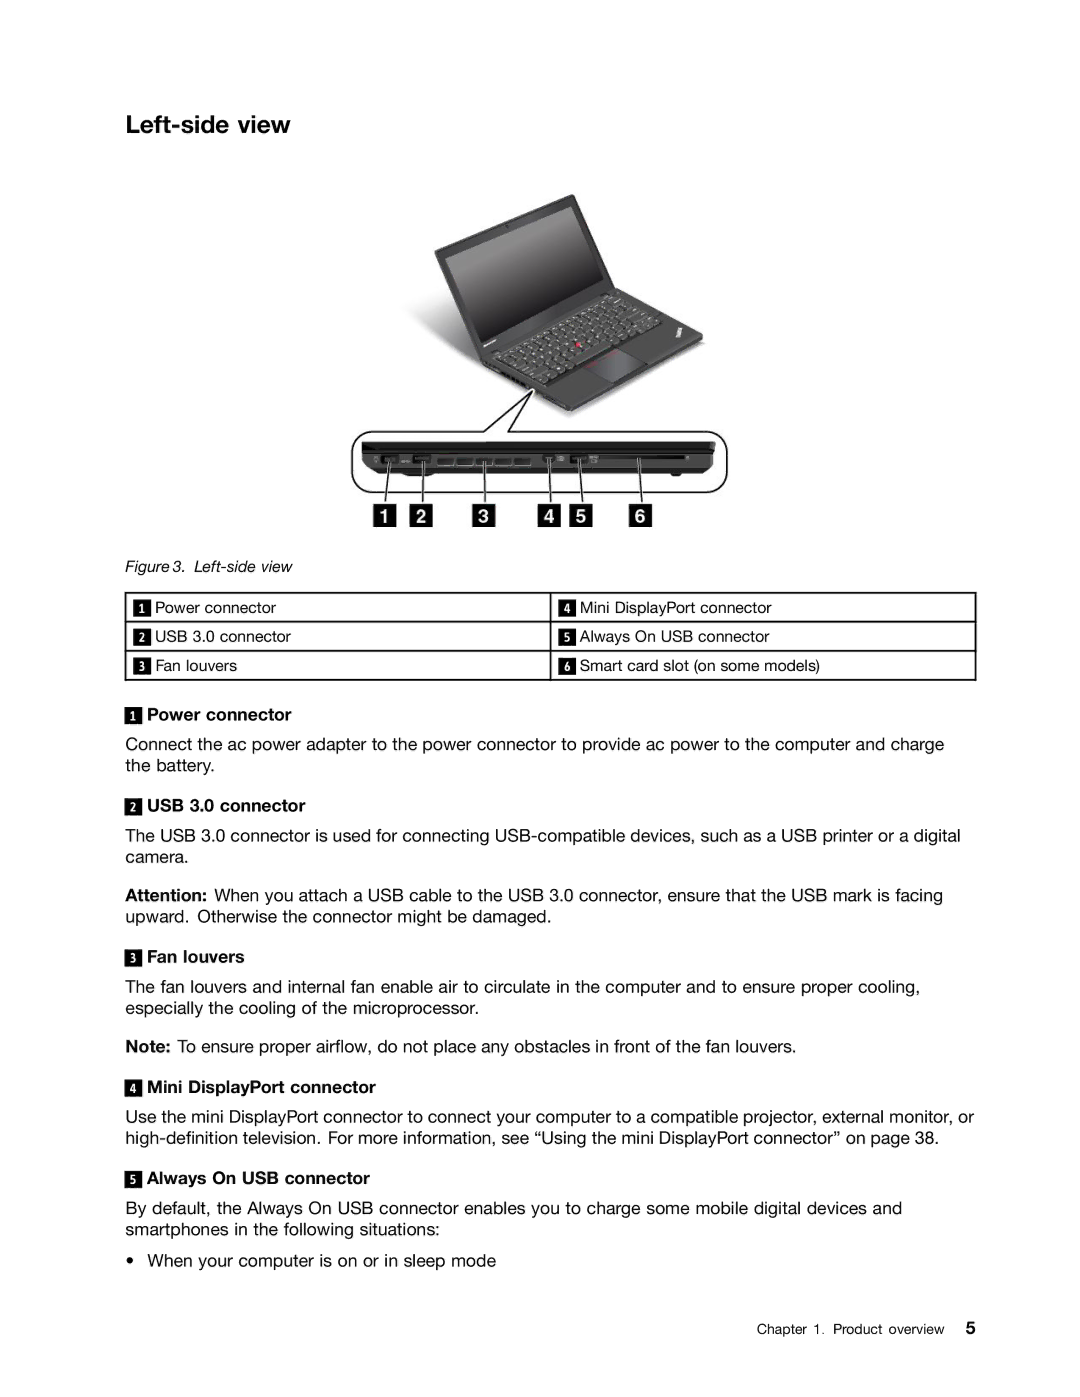
Figure 3. Left-side view
|
| Power connector |
|
| Mini DisplayPort connector |
| 1 |
| 4 | ||
|
|
|
|
|
|
|
| USB 3.0 connector |
|
| Always On USB connector |
| 2 | 5 | |||
|
|
|
|
|
|
|
| Fan louvers |
|
| Smart card slot (on some models) |
| 3 | 6 | |||
|
|
|
|
|
|
1
Power connector
Connect the ac power adapter to the power connector to provide ac power to the computer and charge the battery.
2
USB 3.0 connector
The USB 3.0 connector is used for connecting
Attention: When you attach a USB cable to the USB 3.0 connector, ensure that the USB mark is facing upward. Otherwise the connector might be damaged.
3
Fan louvers
The fan louvers and internal fan enable air to circulate in the computer and to ensure proper cooling, especially the cooling of the microprocessor.
Note: To ensure proper airflow, do not place any obstacles in front of the fan louvers.
4
Mini DisplayPort connector
Use the mini DisplayPort connector to connect your computer to a compatible projector, external monitor, or
5
Always On USB connector
By default, the Always On USB connector enables you to charge some mobile digital devices and smartphones in the following situations:
• When your computer is on or in sleep mode
Chapter 1. Product overview 5