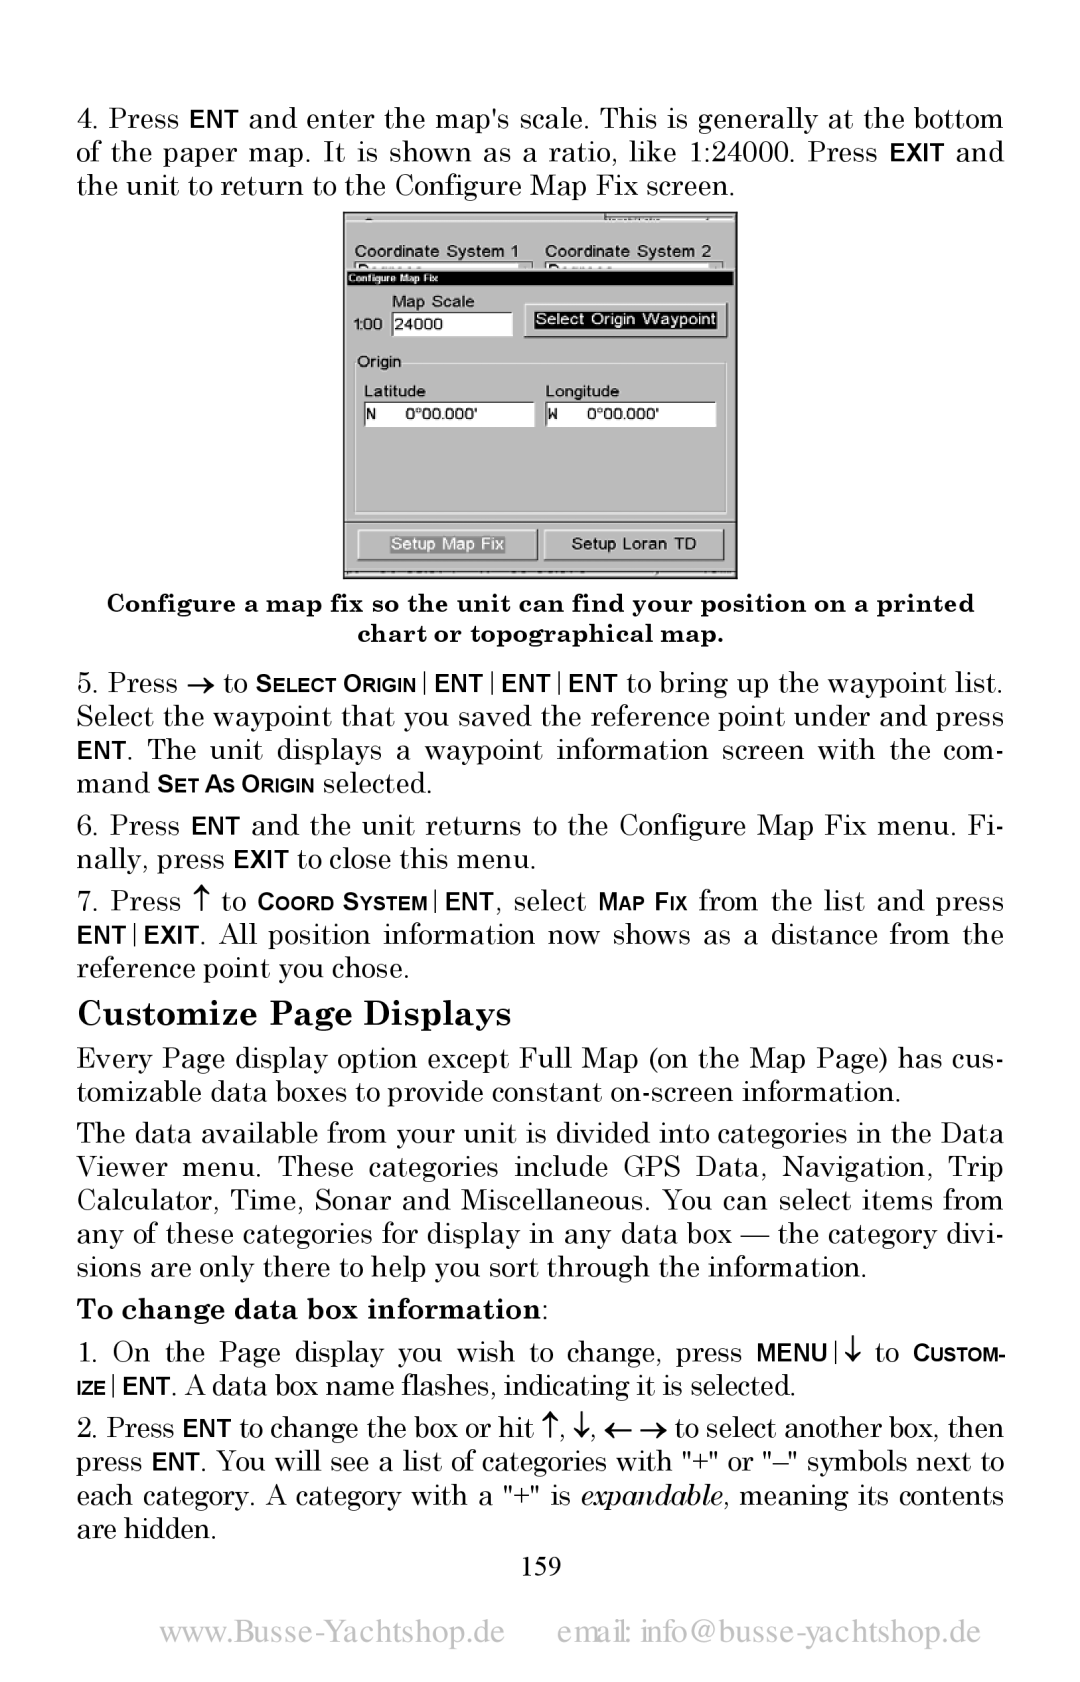
4.Press ENT and enter the map's scale. This is generally at the bottom of the paper map. It is shown as a ratio, like 1:24000. Press EXIT and the unit to return to the Configure Map Fix screen.
Configure a map fix so the unit can find your position on a printed
chart or topographical map.
5.Press → to SELECT ORIGINENTENTENT to bring up the waypoint list. Select the waypoint that you saved the reference point under and press ENT. The unit displays a waypoint information screen with the com- mand SET AS ORIGIN selected.
6.Press ENT and the unit returns to the Configure Map Fix menu. Fi- nally, press EXIT to close this menu.
7.Press ↑ to COORD SYSTEMENT, select MAP FIX from the list and press ENTEXIT. All position information now shows as a distance from the reference point you chose.
Customize Page Displays
Every Page display option except Full Map (on the Map Page) has cus- tomizable data boxes to provide constant
The data available from your unit is divided into categories in the Data Viewer menu. These categories include GPS Data, Navigation, Trip Calculator, Time, Sonar and Miscellaneous. You can select items from any of these categories for display in any data box — the category divi- sions are only there to help you sort through the information.
To change data box information:
1.On the Page display you wish to change, press MENU↓ to CUSTOM- IZEENT. A data box name flashes, indicating it is selected.
2.Press ENT to change the box or hit ↑, ↓, ← → to select another box, then press ENT. You will see a list of categories with "+" or