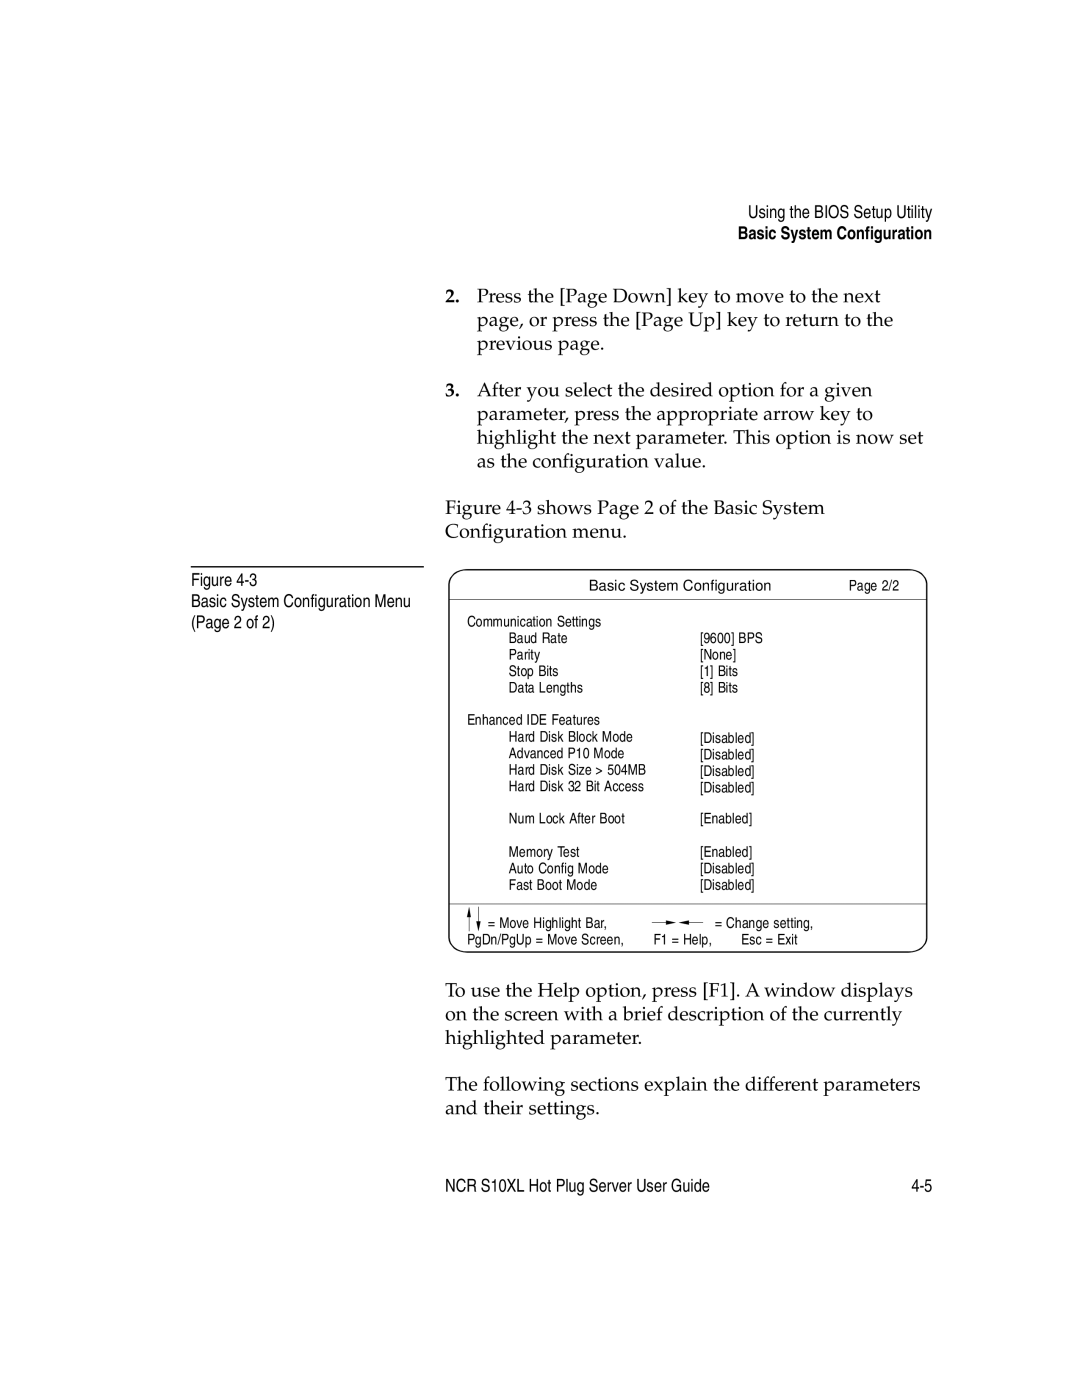
Figure
Basic System Configuration Menu (Page 2 of 2)
Using the BIOS Setup Utility
Basic System Configuration
2.Press the [Page Down] key to move to the next page, or press the [Page Up] key to return to the previous page.
3.After you select the desired option for a given parameter, press the appropriate arrow key to highlight the next parameter. This option is now set as the configuration value.
Figure 4-3 shows Page 2 of the Basic System Configuration menu.
|
|
| Basic System Configuration | Page 2/2 |
| |||||||
|
|
|
| |||||||||
|
|
|
|
|
|
|
|
|
|
|
|
|
| Communication Settings |
| [9600] BPS |
|
|
|
| |||||
|
|
| Baud Rate |
|
|
|
|
| ||||
|
|
| Parity |
| [None] |
|
|
|
| |||
|
|
| Stop Bits |
| [1] Bits |
|
|
|
| |||
|
|
| Data Lengths |
| [8] Bits |
|
|
|
| |||
| Enhanced IDE Features |
|
|
|
|
|
|
| ||||
|
|
| Hard Disk Block Mode |
| [Disabled] |
|
|
|
| |||
|
|
| Advanced P10 Mode |
| [Disabled] |
|
|
|
| |||
|
|
| Hard Disk Size > 504MB |
| [Disabled] |
|
|
|
| |||
|
|
| Hard Disk 32 Bit Access |
| [Disabled] |
|
|
|
| |||
|
|
| Num Lock After Boot |
| [Enabled] |
|
|
|
| |||
|
|
| Memory Test |
| [Enabled] |
|
|
|
| |||
|
|
| Auto Config Mode |
| [Disabled] |
|
|
|
| |||
|
|
| Fast Boot Mode |
| [Disabled] |
|
|
|
| |||
|
|
|
|
|
|
|
|
|
|
|
| |
|
|
| = Move Highlight Bar, |
|
|
|
| = Change setting, |
|
|
| |
|
|
|
|
|
|
|
| |||||
|
| PgDn/PgUp = Move Screen, | F1 = Help, | Esc = Exit |
| |||||||
|
|
| ||||||||||
|
|
|
|
|
|
|
|
|
|
|
|
|
To use the Help option, press [F1]. A window displays on the screen with a brief description of the currently highlighted parameter.
The following sections explain the different parameters and their settings.
NCR S10XL Hot Plug Server User Guide |
