The default waveform position has pixel 1 at the left of the display, and the last pixel on the right of the display. It is possible to scroll the view of the waveform around, which provides a useful means of examining blanking data. This can be done with the ‘H pos’ slider. The image can be magnified using the ‘H mag’ slider, or numeric data entry, or by clicking on the ‘x10’, ‘x5’ or ‘x2’ boxes.
You can select a single line or two line display with the ‘1L’ or ‘2L’ boxes. You may need to select the single line mode in conjunction with these controls, depending on exactly what you want to see displayed.
Similarly, it is possible to select only a given vertical portion of the video image to create waveforms, using the ‘Ypos’ and ‘Y range’ controls.
The AV and FV buttons switch the waveform display between being restricted to just the active portion (AV), or the full raster (FV). These two buttons will only be visible in certain display modes.
There is another way of selecting a specific portion of the image for waveform generation. By right click and dragging with the mouse over the
Having defined an area, you can move the area about over the video by clicking and dragging with the middle mouse button. Finally, double clicking over anywhere in the
The ‘Sync
It is possible to click and drag to create a custom Safe Title (see Cage Generator on page 46). By selecting ‘Sync cage
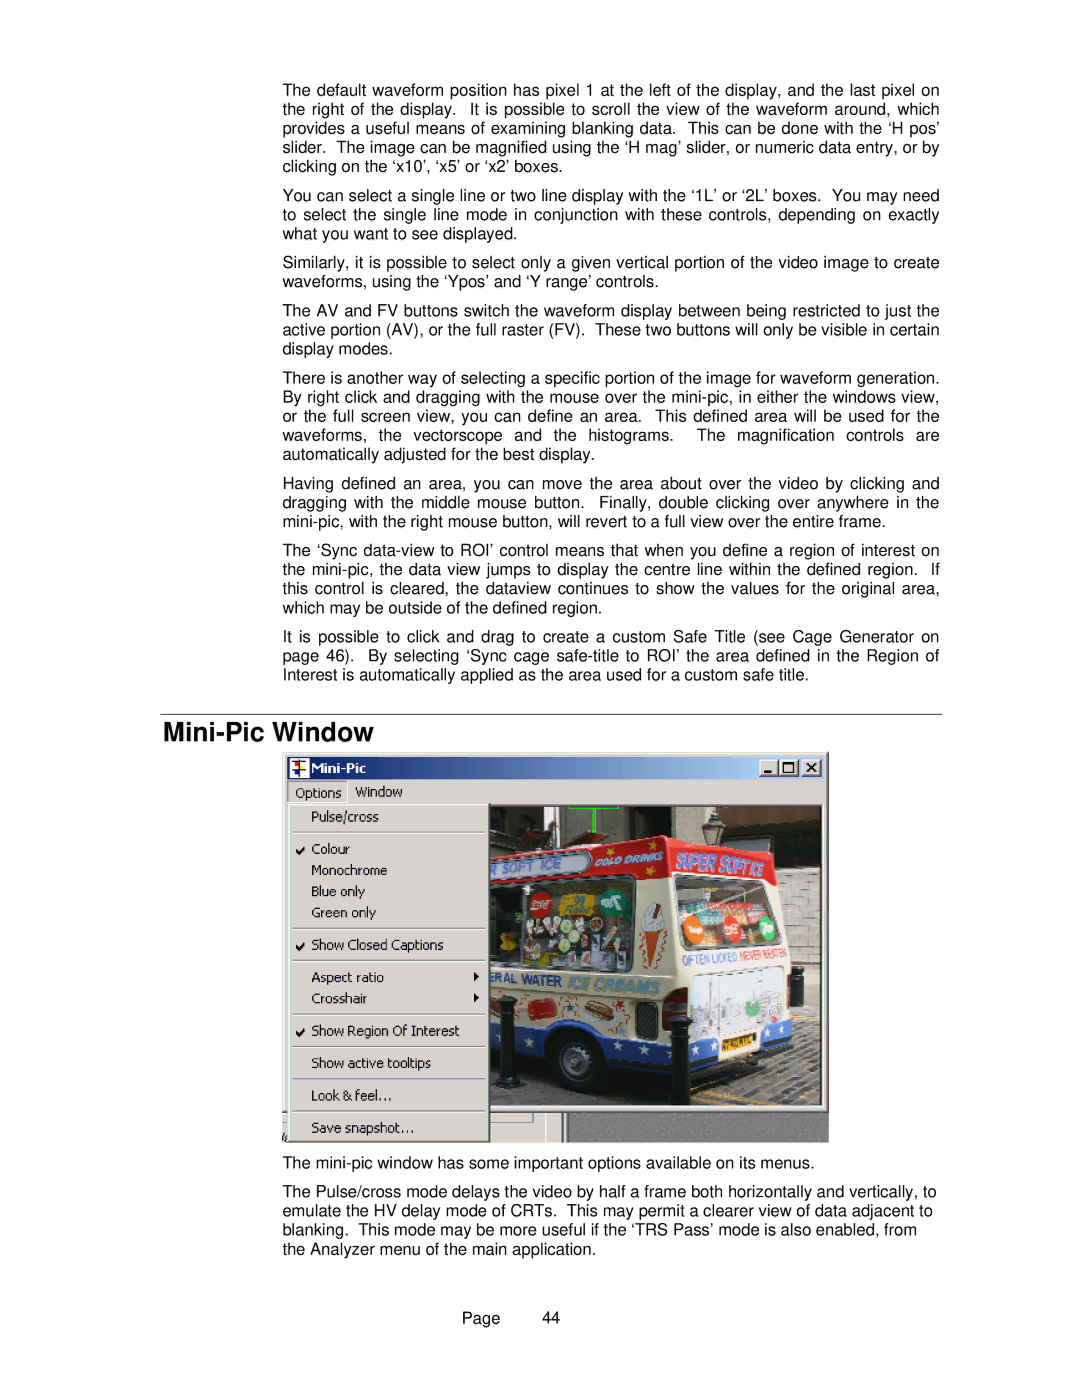
Mini-Pic Window
The
The Pulse/cross mode delays the video by half a frame both horizontally and vertically, to emulate the HV delay mode of CRTs. This may permit a clearer view of data adjacent to blanking. This mode may be more useful if the ‘TRS Pass’ mode is also enabled, from the Analyzer menu of the main application.
Page 44