3.3 Starting KX-TVM/NCV Maintenance Console
3.3Starting KX-TVM/NCV Maintenance Console
The instructions listed below explain how to start KX-TVM/NCV Maintenance Console. These instructions are for when connecting to the VPS via USB.
Note
•The screenshots shown here are for reference only, and may differ from the screens displayed on your PC.
•KX-TVM/NCV Maintenance Console uses English as the default language. See step 4 to change the language.
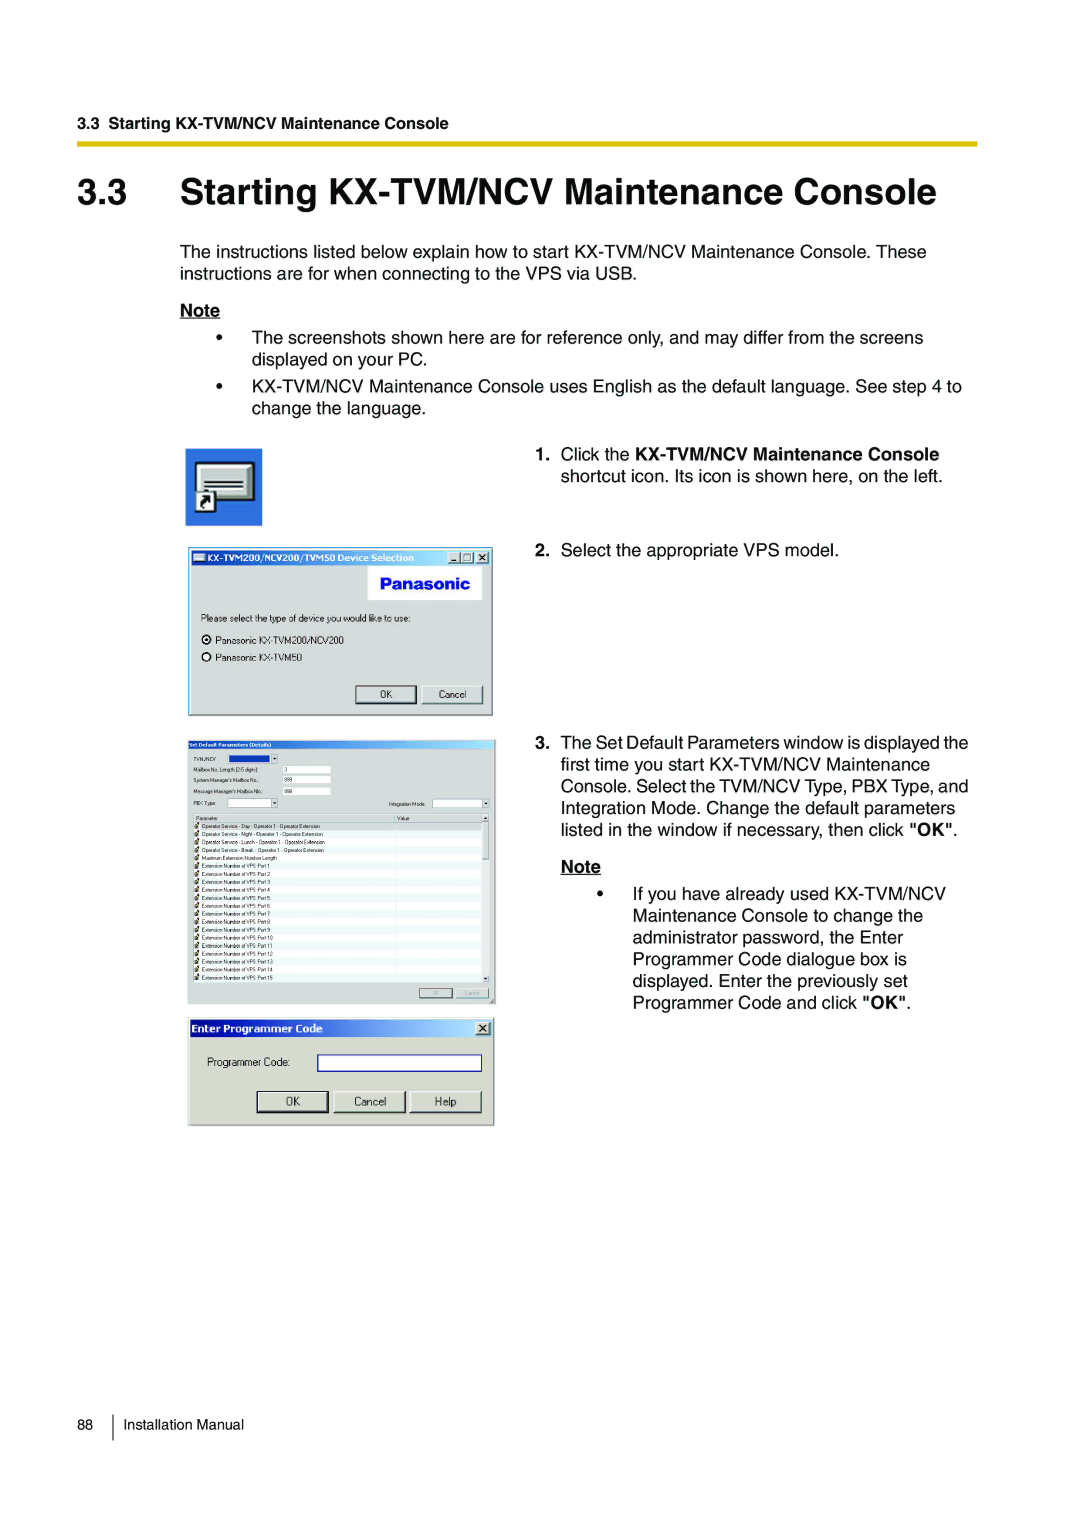
1.Click the KX-TVM/NCV Maintenance Console shortcut icon. Its icon is shown here, on the left.
2.Select the appropriate VPS model.
3. The Set Default Parameters window is displayed the first time you start KX-TVM/NCV Maintenance Console. Select the TVM/NCV Type, PBX Type, and Integration Mode. Change the default parameters listed in the window if necessary, then click "OK".
Note
• If you have already used KX-TVM/NCV Maintenance Console to change the administrator password, the Enter Programmer Code dialogue box is displayed. Enter the previously set Programmer Code and click "OK".

