ACCULINK 316x DSU/CSU
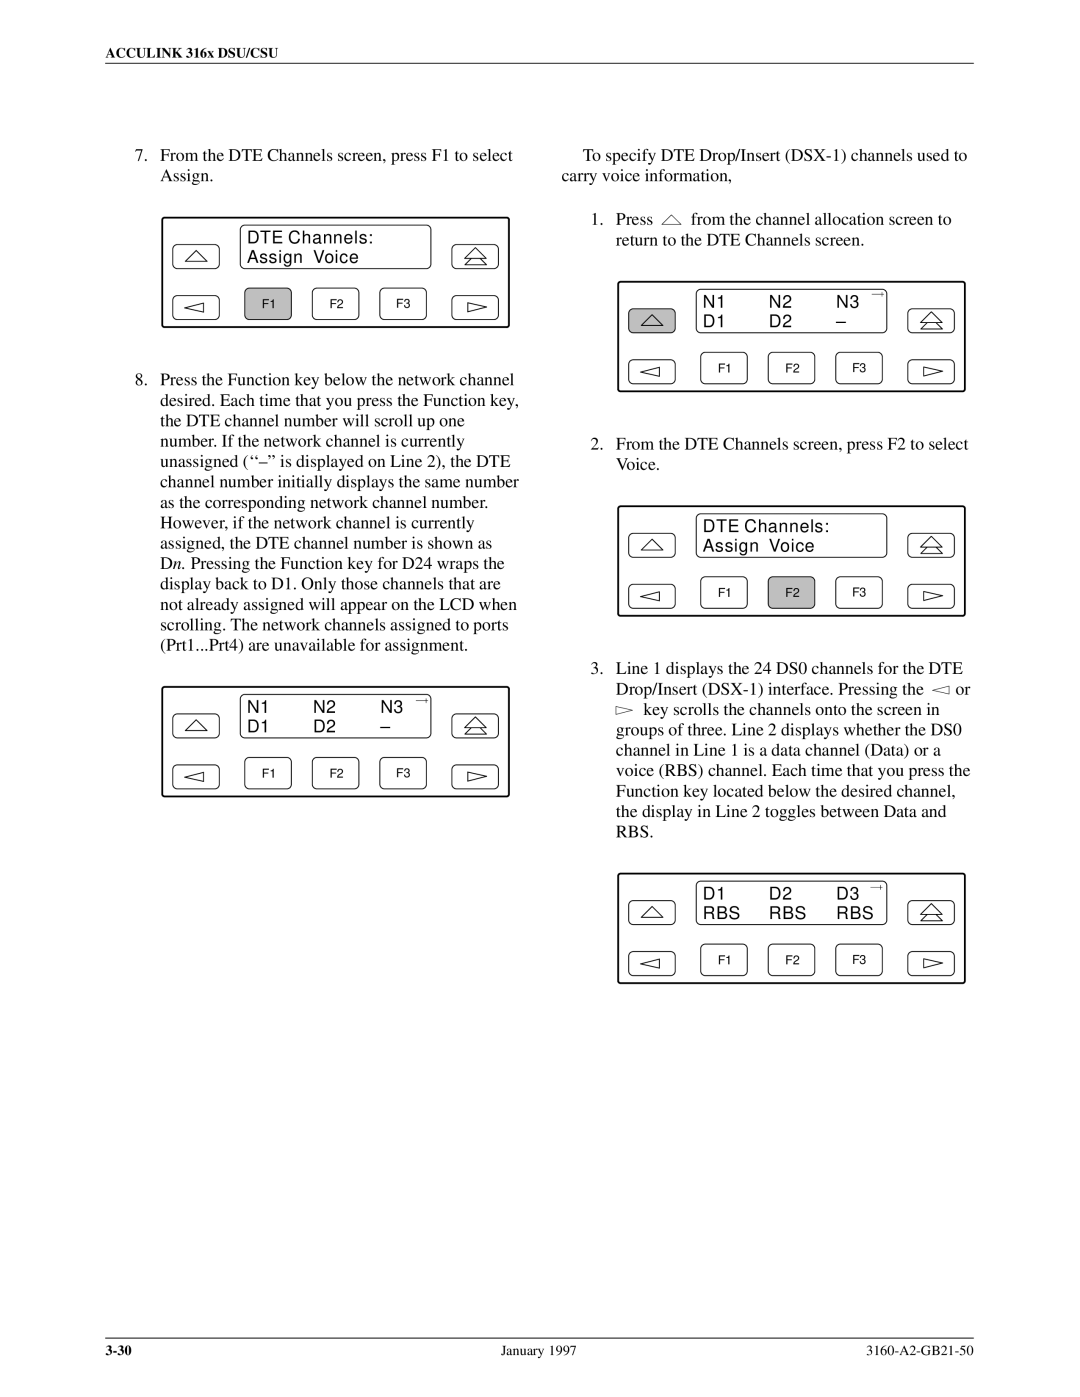
7.From the DTE Channels screen, press F1 to select Assign.
DTE Channels:
Assign Voice
F1 F2 F3
8.Press the Function key below the network channel desired. Each time that you press the Function key, the DTE channel number will scroll up one number. If the network channel is currently unassigned (``±º is displayed on Line 2), the DTE channel number initially displays the same number as the corresponding network channel number. However, if the network channel is currently assigned, the DTE channel number is shown as Dn. Pressing the Function key for D24 wraps the display back to D1. Only those channels that are not already assigned will appear on the LCD when scrolling. The network channels assigned to ports (Prt1...Prt4) are unavailable for assignment.
N1 | N2 | N3 |
D1 | D2 | ± |
F1 | F2 | F3 |
To specify DTE Drop/Insert
1.Press ![]() from the channel allocation screen to return to the DTE Channels screen.
from the channel allocation screen to return to the DTE Channels screen.
N1 | N2 | N3 |
D1 | D2 | ± |
F1 | F2 | F3 |
2.From the DTE Channels screen, press F2 to select Voice.
DTE Channels:
Assign Voice
F1 F2 F3
3. Line 1 displays the 24 DS0 channels for the DTE
Drop/Insert ![]() or
or ![]() key scrolls the channels onto the screen in groups of three. Line 2 displays whether the DS0
key scrolls the channels onto the screen in groups of three. Line 2 displays whether the DS0
channel in Line 1 is a data channel (Data) or a voice (RBS) channel. Each time that you press the Function key located below the desired channel, the display in Line 2 toggles between Data and RBS.
D1 | D2 | D3 |
RBS | RBS | RBS |
F1 | F2 | F3 |
January 1997 |