EXPORTING DATA RECORDED DURING DST
To export data recorded during DST:
1.In the Site Tree, click a site.
2.On the toolbar, click the Export icon ![]() .
.
3.To enter the export settings, in the Export Setting section:
a.In the Server box, verify that the correct site appears.
b.In the Channel section, select the export channels (1 to 4).
c.(Optional) To export audio data, in the Audio box, select On.
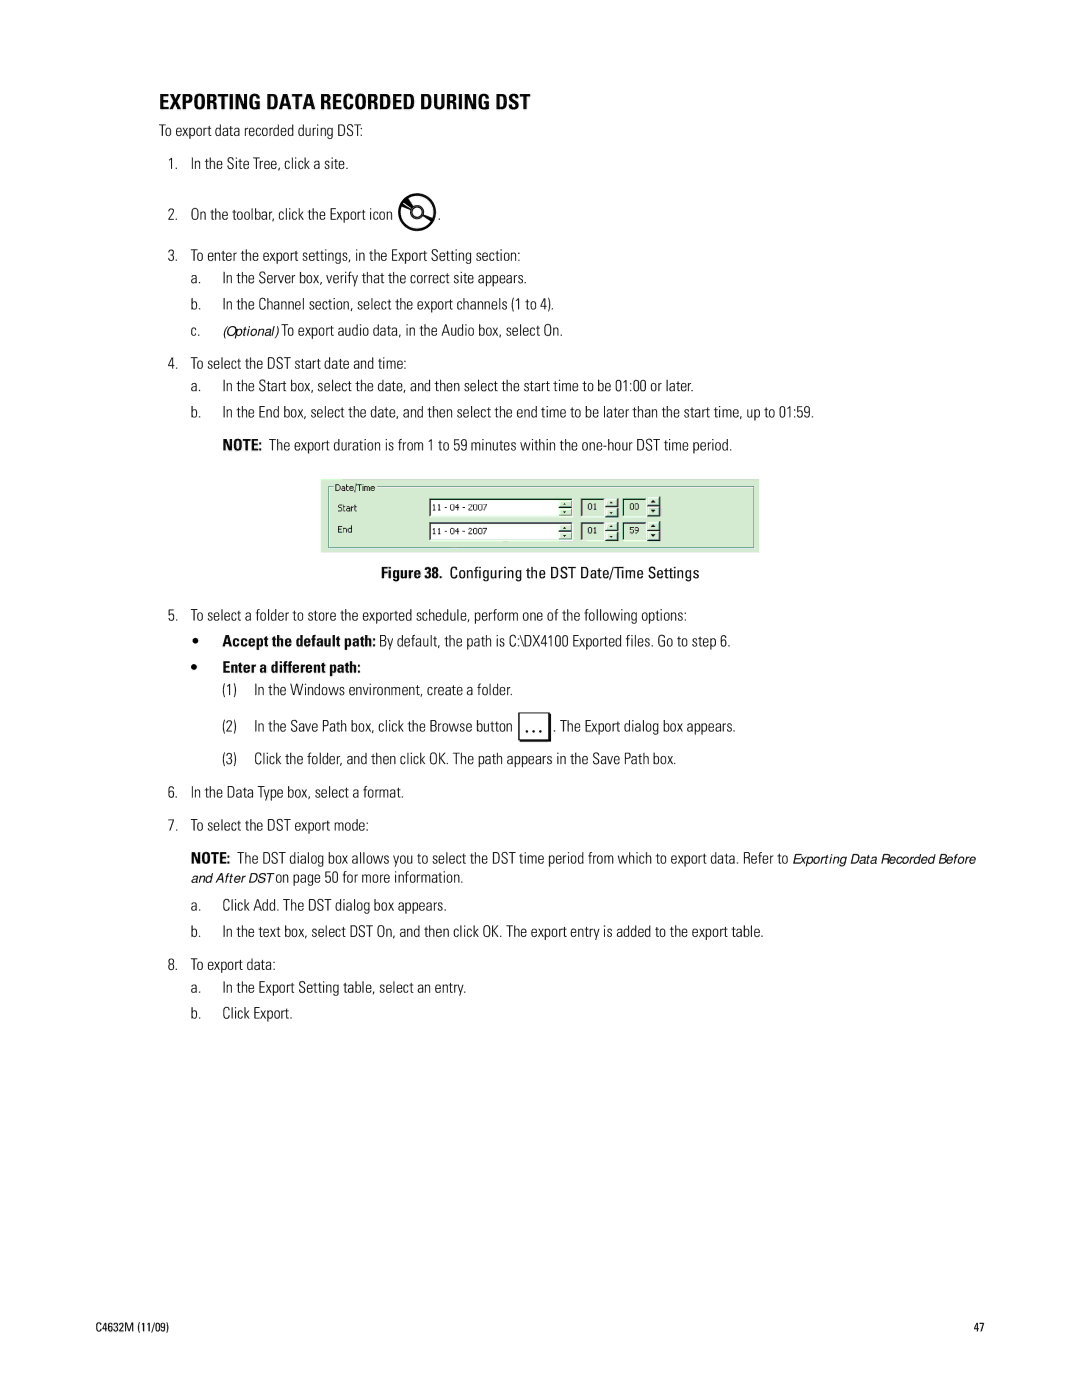
4.To select the DST start date and time:
a.In the Start box, select the date, and then select the start time to be 01:00 or later.
b.In the End box, select the date, and then select the end time to be later than the start time, up to 01:59. NOTE: The export duration is from 1 to 59 minutes within the
Figure 38. Configuring the DST Date/Time Settings
5.To select a folder to store the exported schedule, perform one of the following options:
•Accept the default path: By default, the path is C:\DX4100 Exported files. Go to step 6.
•Enter a different path:
(1)In the Windows environment, create a folder.
(2)In the Save Path box, click the Browse button ![]() . The Export dialog box appears.
. The Export dialog box appears.
(3)Click the folder, and then click OK. The path appears in the Save Path box.
6.In the Data Type box, select a format.
7.To select the DST export mode:
NOTE: The DST dialog box allows you to select the DST time period from which to export data. Refer to Exporting Data Recorded Before and After DST on page 50 for more information.
a.Click Add. The DST dialog box appears.
b.In the text box, select DST On, and then click OK. The export entry is added to the export table.
8.To export data:
a.In the Export Setting table, select an entry.
b.Click Export.
C4632M (11/09) | 47 |