Connecting a PC
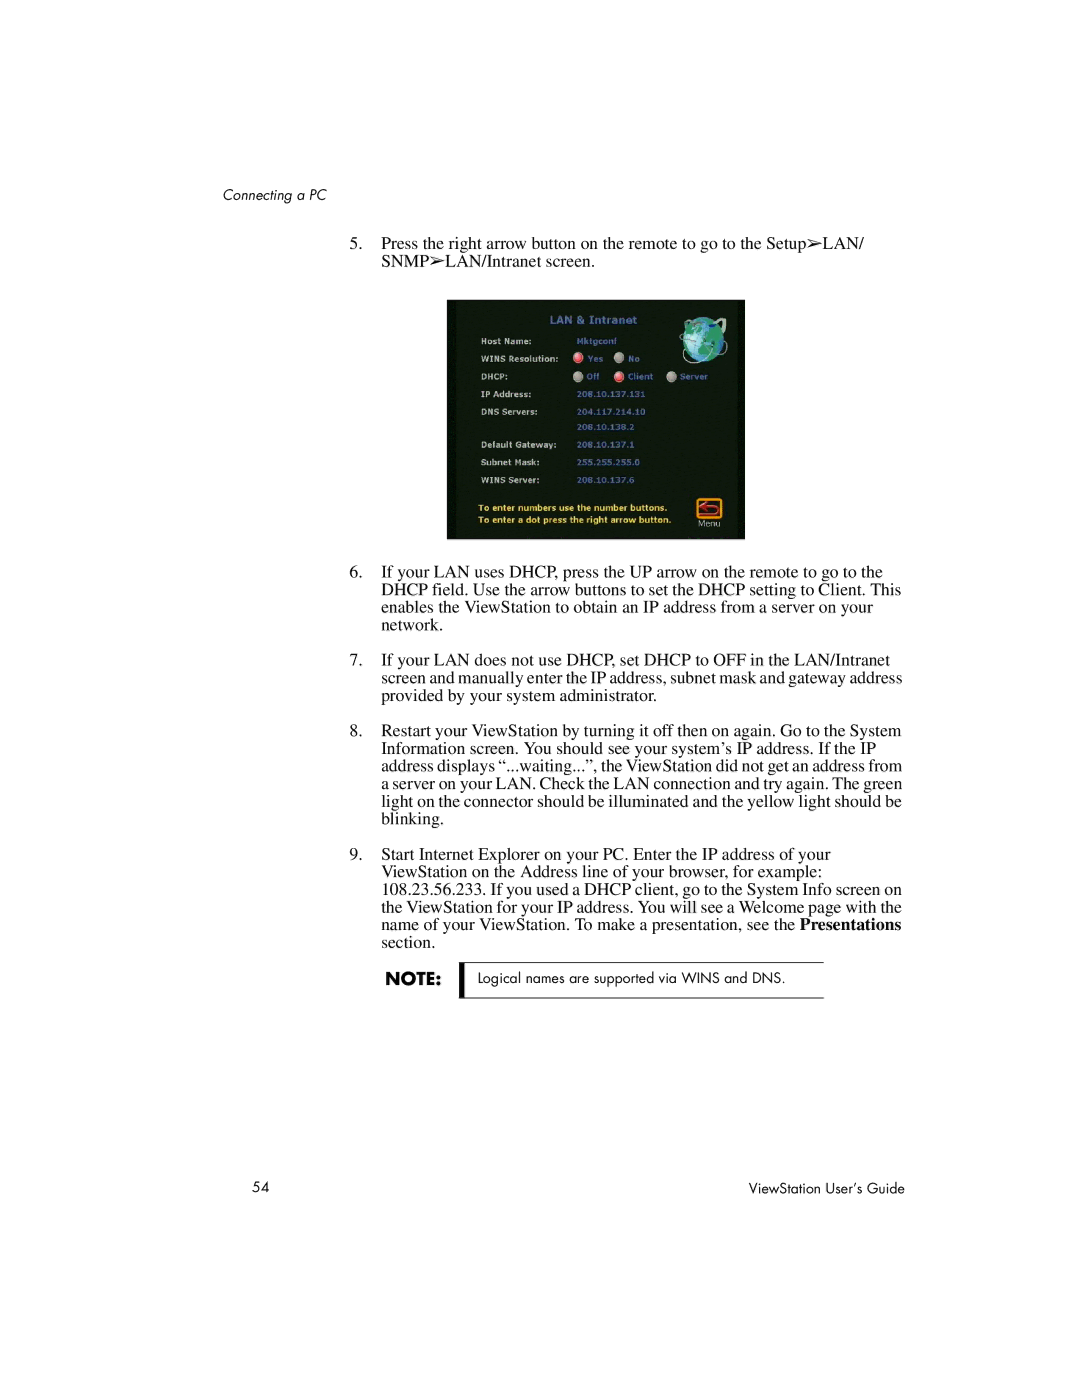
5.Press the right arrow button on the remote to go to the Setup➢LAN/ SNMP➢LAN/Intranet screen.
6.If your LAN uses DHCP, press the UP arrow on the remote to go to the DHCP field. Use the arrow buttons to set the DHCP setting to Client. This enables the ViewStation to obtain an IP address from a server on your network.
7.If your LAN does not use DHCP, set DHCP to OFF in the LAN/Intranet screen and manually enter the IP address, subnet mask and gateway address provided by your system administrator.
8.Restart your ViewStation by turning it off then on again. Go to the System Information screen. You should see your system’s IP address. If the IP address displays “...waiting...”, the ViewStation did not get an address from a server on your LAN. Check the LAN connection and try again. The green light on the connector should be illuminated and the yellow light should be blinking.
9.Start Internet Explorer on your PC. Enter the IP address of your ViewStation on the Address line of your browser, for example: 108.23.56.233. If you used a DHCP client, go to the System Info screen on the ViewStation for your IP address. You will see a Welcome page with the name of your ViewStation. To make a presentation, see the Presentations section.
NOTE:
Logical names are supported via WINS and DNS.
54 | ViewStation User’s Guide |