Installation and Initialization |
|
Hardware Installation |
|
|
|
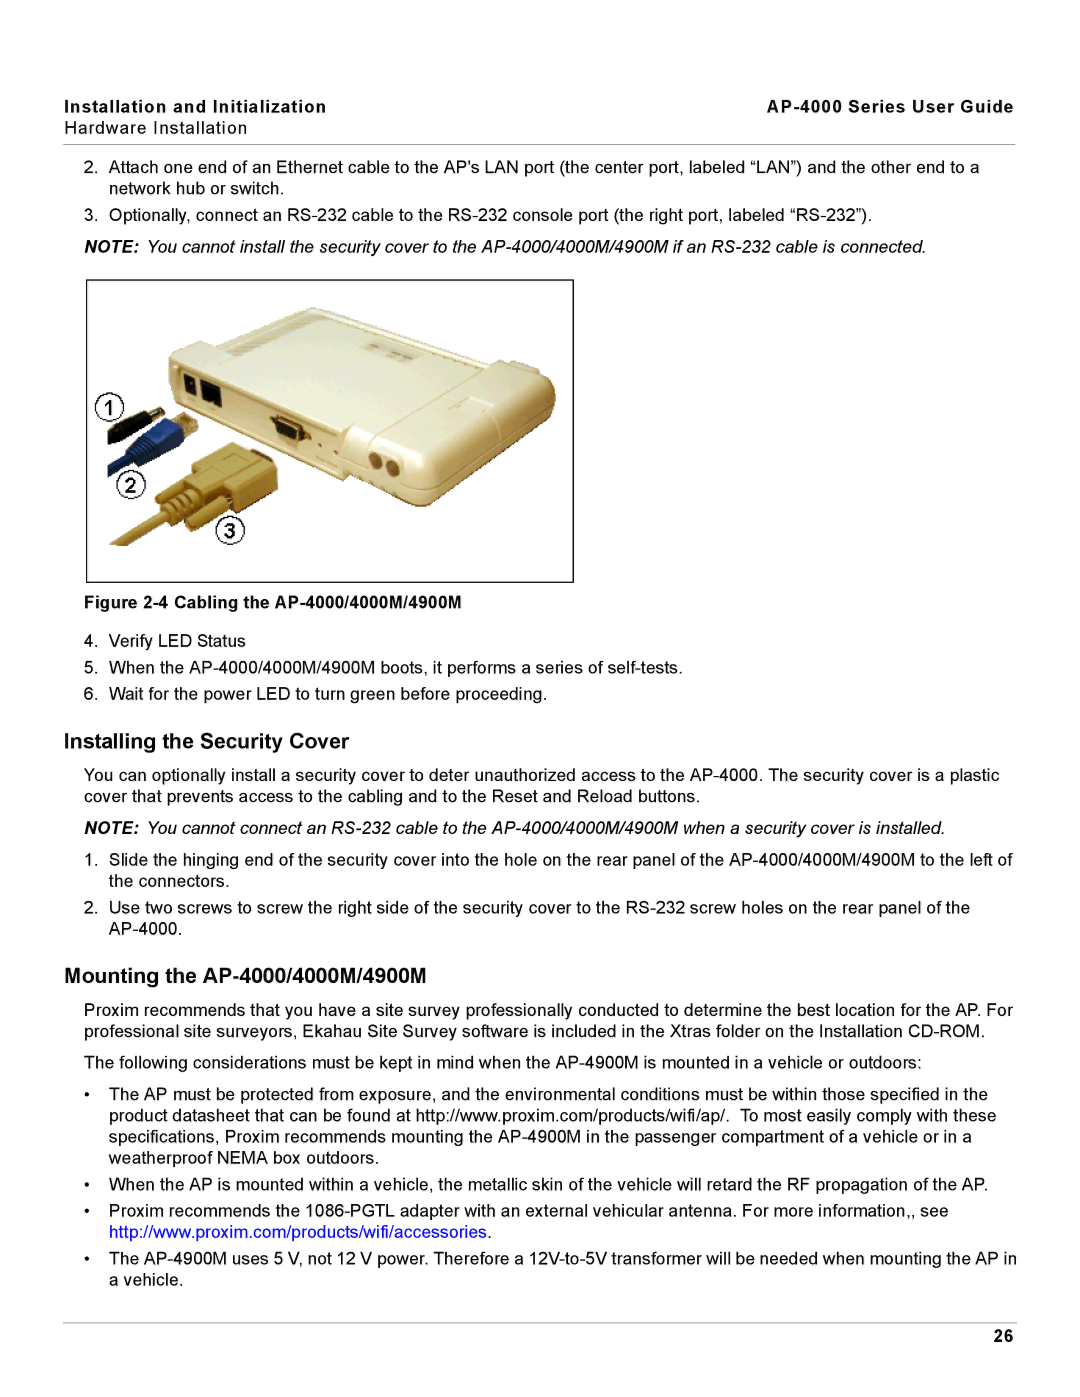
2.Attach one end of an Ethernet cable to the AP's LAN port (the center port, labeled “LAN”) and the other end to a network hub or switch.
3.Optionally, connect an
NOTE: You cannot install the security cover to the
Figure 2-4 Cabling the AP-4000/4000M/4900M
4.Verify LED Status
5.When the
6.Wait for the power LED to turn green before proceeding.
Installing the Security Cover
You can optionally install a security cover to deter unauthorized access to the
NOTE: You cannot connect an
1.Slide the hinging end of the security cover into the hole on the rear panel of the
2.Use two screws to screw the right side of the security cover to the
Mounting the AP-4000/4000M/4900M
Proxim recommends that you have a site survey professionally conducted to determine the best location for the AP. For professional site surveyors, Ekahau Site Survey software is included in the Xtras folder on the Installation
The following considerations must be kept in mind when the
•The AP must be protected from exposure, and the environmental conditions must be within those specified in the product datasheet that can be found at http://www.proxim.com/products/wifi/ap/. To most easily comply with these specifications, Proxim recommends mounting the
•When the AP is mounted within a vehicle, the metallic skin of the vehicle will retard the RF propagation of the AP.
•Proxim recommends the
•The
26
