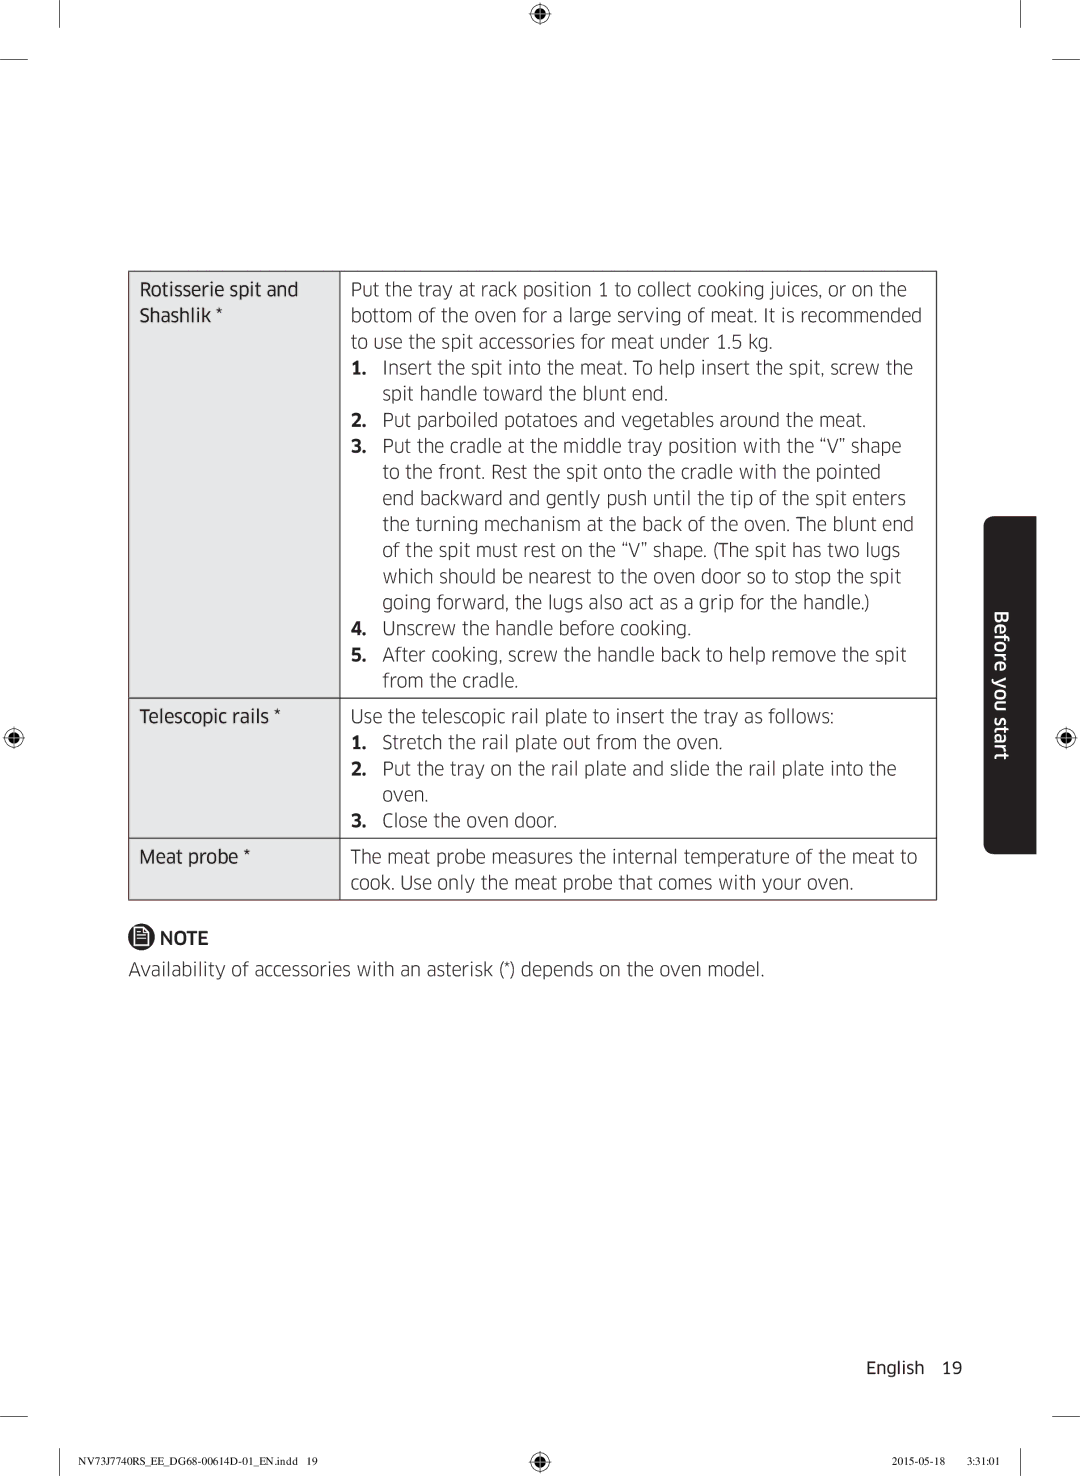
Rotisserie spit and | Put the tray at rack position 1 to collect cooking juices, or on the | |
Shashlik * | bottom of the oven for a large serving of meat. It is recommended | |
| to use the spit accessories for meat under 1.5 kg. | |
| 1. | Insert the spit into the meat. To help insert the spit, screw the |
|
| spit handle toward the blunt end. |
| 2. | Put parboiled potatoes and vegetables around the meat. |
| 3. | Put the cradle at the middle tray position with the “V” shape |
|
| to the front. Rest the spit onto the cradle with the pointed |
|
| end backward and gently push until the tip of the spit enters |
|
| the turning mechanism at the back of the oven. The blunt end |
|
| of the spit must rest on the “V” shape. (The spit has two lugs |
|
| which should be nearest to the oven door so to stop the spit |
|
| going forward, the lugs also act as a grip for the handle.) |
| 4. | Unscrew the handle before cooking. |
| 5. | After cooking, screw the handle back to help remove the spit |
|
| from the cradle. |
|
| |
Telescopic rails * | Use the telescopic rail plate to insert the tray as follows: | |
| 1. | Stretch the rail plate out from the oven. |
| 2. | Put the tray on the rail plate and slide the rail plate into the |
|
| oven. |
| 3. | Close the oven door. |
|
| |
Meat probe * | The meat probe measures the internal temperature of the meat to | |
| cook. Use only the meat probe that comes with your oven. | |
|
|
|
![]() NOTE
NOTE
Availability of accessories with an asterisk (*) depends on the oven model.
Before you start
English 19
