OPTION | OPTION | DESCRIPTION |
|
|
|
Authentication | Foreign Device | • Internal Credits: It is used |
Mode | Interface | when you cancel the job or |
(Continue) | (Continue) | when the job is cancelled by the |
|
| device due to insufficient credits |
|
| (coin) or is canceled by user’s |
|
| request. If you select Enable, |
|
| the machine deposits a credit |
|
| equal to the number of sheets |
|
| that did not print out correctly, |
|
| then it prints next job for free |
|
| (for the amount deposited). |
|
| With Disable, even if you |
|
| cancel the printing job, the |
|
| machine includes jammed |
|
| paper in the count and the cost |
|
| of printing. |
|
| • Image Counter: Depends on |
|
| whether the machine counts |
|
| blank white pages. |
|
|
|
Change Admin. Password | You can change the password for | |
|
| the Admin Setting authentication. |
|
|
|
OPTIONAL SERVICE
When you want to add the optional features for this machine, you have to install the optional kit and then set the machine to enable and activate those features. Follow the next steps to enable those features.
1.Press Machine Setup on the control panel.
2.Press Admin Setting. When the login message pops up, then enter password and press OK.
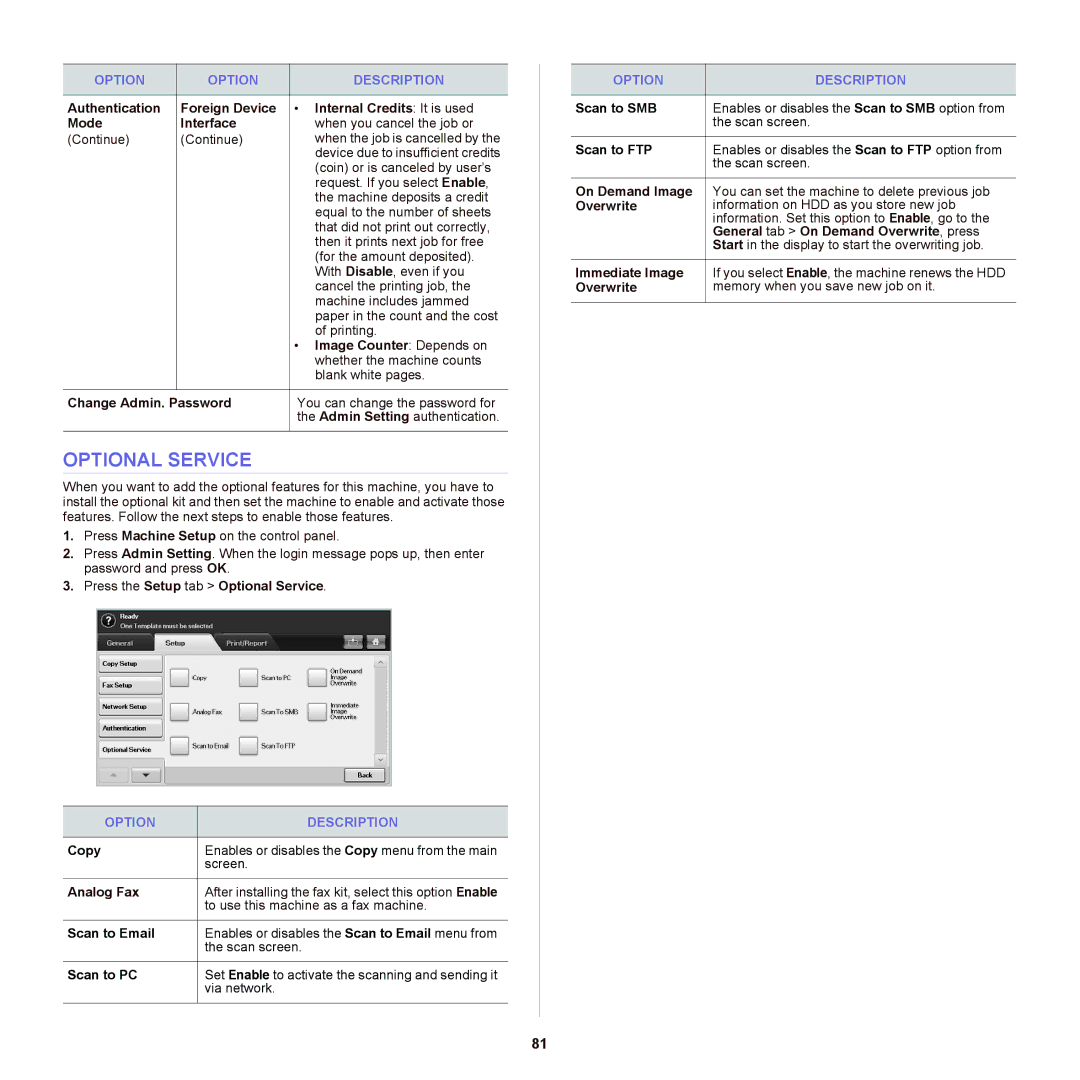
3.Press the Setup tab > Optional Service.
OPTION | DESCRIPTION |
|
|
Copy | Enables or disables the Copy menu from the main |
| screen. |
|
|
Analog Fax | After installing the fax kit, select this option Enable |
| to use this machine as a fax machine. |
|
|
Scan to Email | Enables or disables the Scan to Email menu from |
| the scan screen. |
|
|
Scan to PC | Set Enable to activate the scanning and sending it |
| via network. |
|
|
OPTION | DESCRIPTION |
|
|
Scan to SMB | Enables or disables the Scan to SMB option from |
| the scan screen. |
|
|
Scan to FTP | Enables or disables the Scan to FTP option from |
| the scan screen. |
|
|
On Demand Image | You can set the machine to delete previous job |
Overwrite | information on HDD as you store new job |
| information. Set this option to Enable, go to the |
| General tab > On Demand Overwrite, press |
| Start in the display to start the overwriting job. |
|
|
Immediate Image | If you select Enable, the machine renews the HDD |
Overwrite | memory when you save new job on it. |
|
|
81