BioOptix™ 10 |
| |
Section 2 | Installation |
|
|
|
|
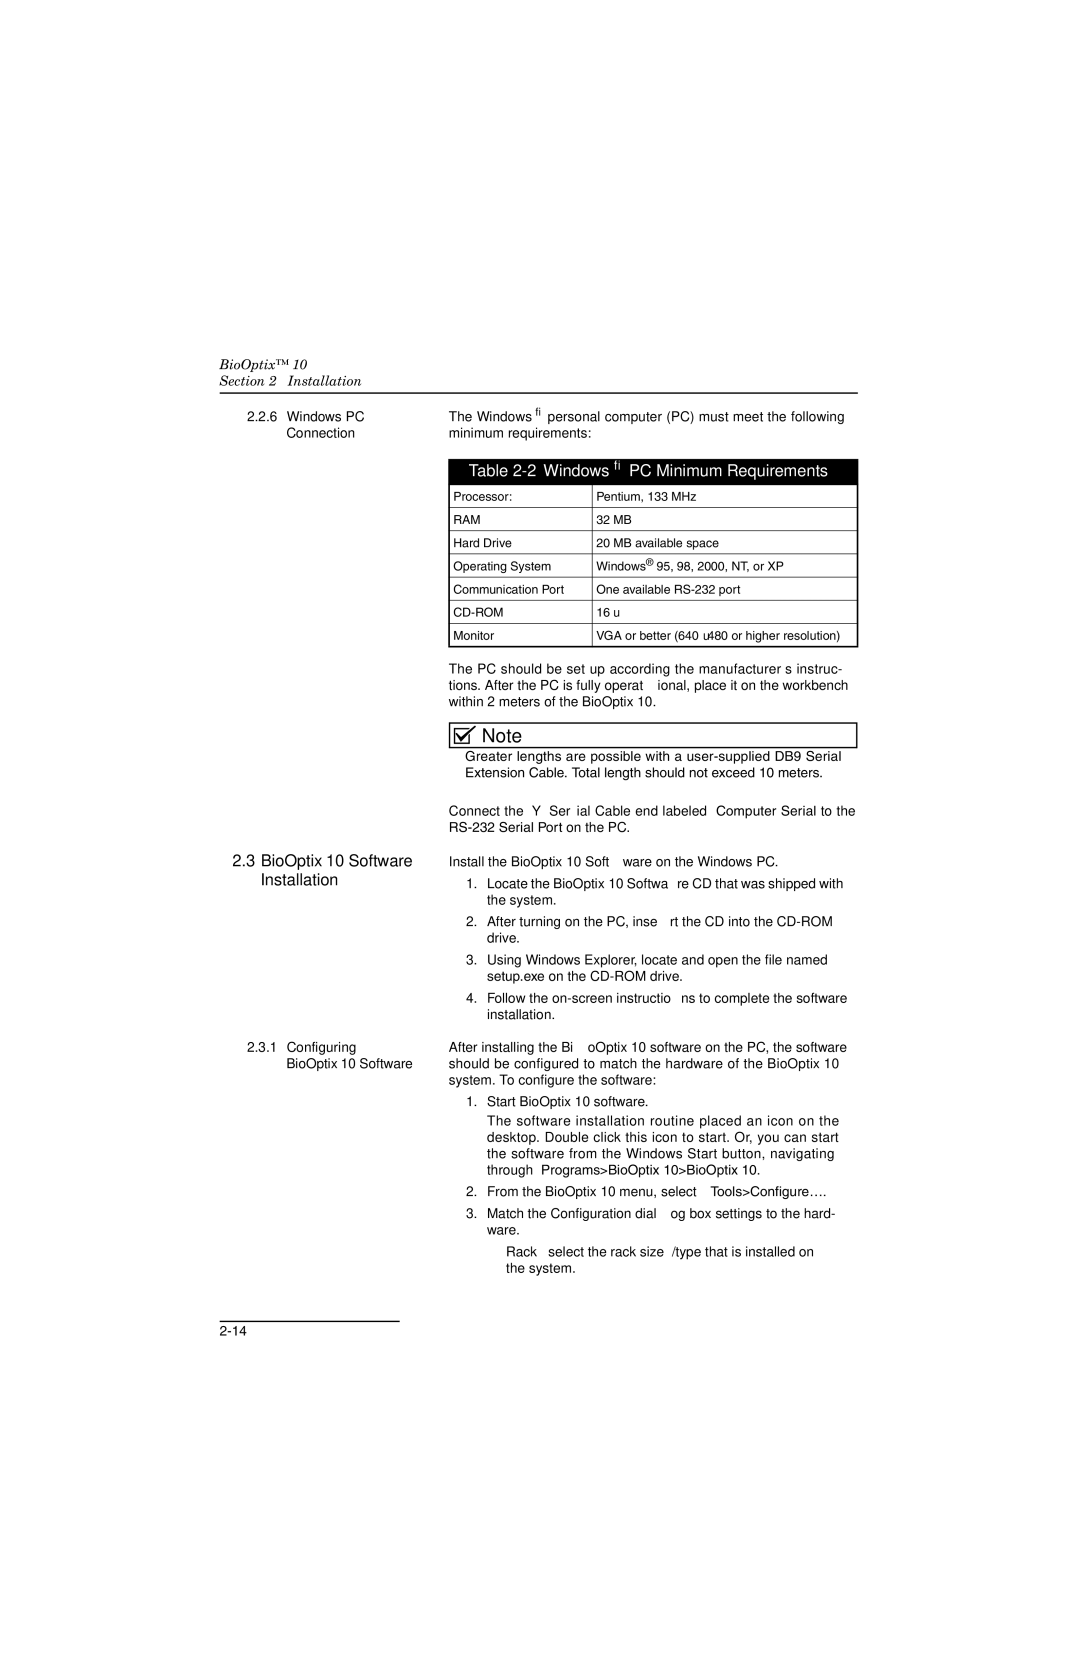
2.2.6 | Windows PC | The Windows® personal computer (PC) must meet the following |
| Connection | minimum requirements: |
Table 2-2 Windows® PC Minimum Requirements
Processor: | Pentium, 133 MHz |
|
|
RAM | 32 MB |
|
|
Hard Drive | 20 MB available space |
|
|
Operating System | Windows® 95, 98, 2000, NT, or XP |
Communication Port | One available |
|
|
16⋅ | |
|
|
Monitor | VGA or better (640⋅480 or higher resolution) |
|
|
The PC should be set up according the manufacturer’s instruc- tions. After the PC is fully operational, place it on the workbench within 2 meters of the BioOptix 10.
![]()
![]()
![]()
![]()
![]() Note
Note
Greater lengths are possible with a
Extension Cable. Total length should not exceed 10 meters.
Connect the “Y” Serial Cable end labeled Computer Serial to the
2.3BioOptix 10 Software Install the BioOptix 10 Software on the Windows PC.
Installation | 1. | Locate the BioOptix 10 Software CD that was shipped with |
|
| the system. |
| 2. | After turning on the PC, insert the CD into the |
|
| drive. |
| 3. | Using Windows Explorer, locate and open the file named |
|
| setup.exe on the |
| 4. | Follow the |
|
| installation. |
2.3.1 Configuring | After installing the BioOptix 10 software on the PC, the software | |
BioOptix 10 Software | should be configured to match the hardware of the BioOptix 10 | |
| system. To configure the software: | |
| 1. | Start BioOptix 10 software. |
|
| The software installation routine placed an icon on the |
|
| desktop. Double click this icon to start. Or, you can start |
|
| the software from the Windows Start button, navigating |
|
| through Programs>BioOptix 10>BioOptix 10. |
| 2. | From the BioOptix 10 menu, select Tools>Configure…. |
| 3. | Match the Configuration dialog box settings to the hard- |
|
| ware. |
❍ Rack – select the rack size/type that is installed on the system.