File Number
Toshiba Corporation
Copyright
Preface
Safety Precautions
Confidential
Acronyms
Conventions
Table of Contents
Only ONE Test
Chapter Tests and Diagnostics
Appendices
Chapter
Confidential
Confidential
Hardware Overview
Hardware Overview
Chapter Contents
Tables
Figures
Time required for charges of RTC battery
Hardware Overview
Features Hardware Overview
Features
‰ Vram
Hardware Overview Features
‰ LAN/MODEM
Shows the front of the computer
Shows the system units configuration
Hardware Overview System Block Diagram
System Block Diagram
‰ CPU
System Block Diagram Hardware Overview
Gpio
System Block Diagram Hardware Overview
Hardware Overview 3.5-inch USB Floppy Disk Drive
3.5-inch USB Floppy Disk Drive
2.5-inch Hard Disk Drive
2.5-inch HDD dimensions 2/2
2.5-inch Hard Disk Drive Hardware Overview
Standard
96.6 113.2
2.5-inch HDD specifications 2/2
CD-ROM Drive
CD-ROM Drive Hardware Overview
G8CC0002R220
Specifications Items
Hardware Overview CD-ROM Drive CD-ROM drive specifications
DVD-ROM Drive
DVD-ROM Drive Hardware Overview
G8CC0002W220 G8CC0002E220
G8CC0002W220
Specifications
DVD+R, DVD+RW, DVD-RAM 2.6GB/4.7GB
Hardware Overview DVD-ROM & CD-R/RW Drive
DVD-ROM & CD-R/RW Drive
Items Standard
Panasonic
Items Panasonic G8CC0002J220
CD-ROM, CD-R, CD-RW, CD-Audio Disc
DVD Super Multi drive Hardware Overview
DVD Super Multi drive
Items Standards
G8CC0002T220 G8CC0002S220
2MB CD-DA, CD-ROM, CD-ROM XA
Specifications Panasonic G8CC0002T220
CD-DA, CD-ROM, CD-ROM XA, CD-I, Video CD
Hardware Overview Keyboard
Keyboard
TFT Color Display
TFT Color Display Hardware Overview
LCD Module
12 LCD module specifications 15.0-inch SXGA+ TFT 2/2
FL Inverter Board
13 FL inverter board specifications
Hardware Overview Power Supply
Power Supply
Power Supply Hardware Overview Power supply output rating
1R8-B1V
1R5-E1V
Main Battery
Battery specifications
Batteries
Hardware Overview Batteries
16 Time required for charges of main battery
Battery Charging Control
17 Battery preservation time
Batteries Hardware Overview
RTC Battery
18 Time required for charges of RTC battery
Condition Time
19 AC adapter specifications 2/2
19 AC adapter specifications 1/2
AC Adapter
AC Adapter Hardware Overview
Hardware Overview AC Adapter
Chapter Troubleshooting Procedures
Troubleshooting Procedures
Power Status Check
Troubleshooting Procedures
Troubleshooting flowchart Set of tool for debug port test
Troubleshooting Procedures
Troubleshooting Troubleshooting Procedures
Troubleshooting
Troubleshooting Procedures Troubleshooting Flowchart
Troubleshooting Flowchart
Troubleshooting flowchart 1/2
Troubleshooting Flowchart Troubleshooting Procedures
Troubleshooting flowchart 2/2
Troubleshooting Flowchart Troubleshooting Procedures
Troubleshooting Procedures Power Supply Troubleshooting
Power Supply Troubleshooting
Procedure 1 Power Status Check
Battery icon
Power Supply Troubleshooting Troubleshooting Procedures
Error code Where Error occurs
Procedure 2 Error Code Check
Error code Meaning
‰ DC power supply AC adapter
‰ E5V output P61
‰ PPV output P65
‰ PTV output P75
Procedure 4 Charging Check
Procedure 3 Connection Check
Procedure 5 Replacement Check
System Board Troubleshooting Troubleshooting Procedures
System Board Troubleshooting
Procedure 1 Message Check
Troubleshooting Procedures System Board Troubleshooting
KBC Error HDC Error
A set of tool for debug port test
Procedure 2 Debug Port Check
Port Inspection items Details Status
Memori Clear
CHGFIRMA.EXE
Irtbiossignchk
Irtinismbaseend
Irtinipciend
Port Inspection items Details
Port status Inspection items Details
Ffffh
Procedure 4 Replacement Check
Procedure 3 Diagnostic Test Program Execution Check
3.5 FDD Troubleshooting
3.5 FDD Troubleshooting Troubleshooting Procedures
Procedure 1 FDD Head Cleaning Check
Procedure 2 Diagnostic Test Program Execution Check
Troubleshooting Procedures 3.5 FDD Troubleshooting
FDD error code and status
Code Status
Flkcs PCB
Procedure 3 Connector Check and Replacement Check
2.5 HDD Troubleshooting
Troubleshooting Procedures 2.5 HDD Troubleshooting
Procedure 1 Partition Check
Procedure 2 Message Check
2.5 HDD Troubleshooting Troubleshooting Procedures
Procedure 3 Format Check
2.5 Hard disk drive error code and status
Procedure 4 Diagnostic Test Program Execution Check
Procedure 5 Connector Check and Replacement Check
Keyboard Troubleshooting Troubleshooting Procedures
Keyboard Troubleshooting
Procedure 1 Diagnostic Test Program Execution Check
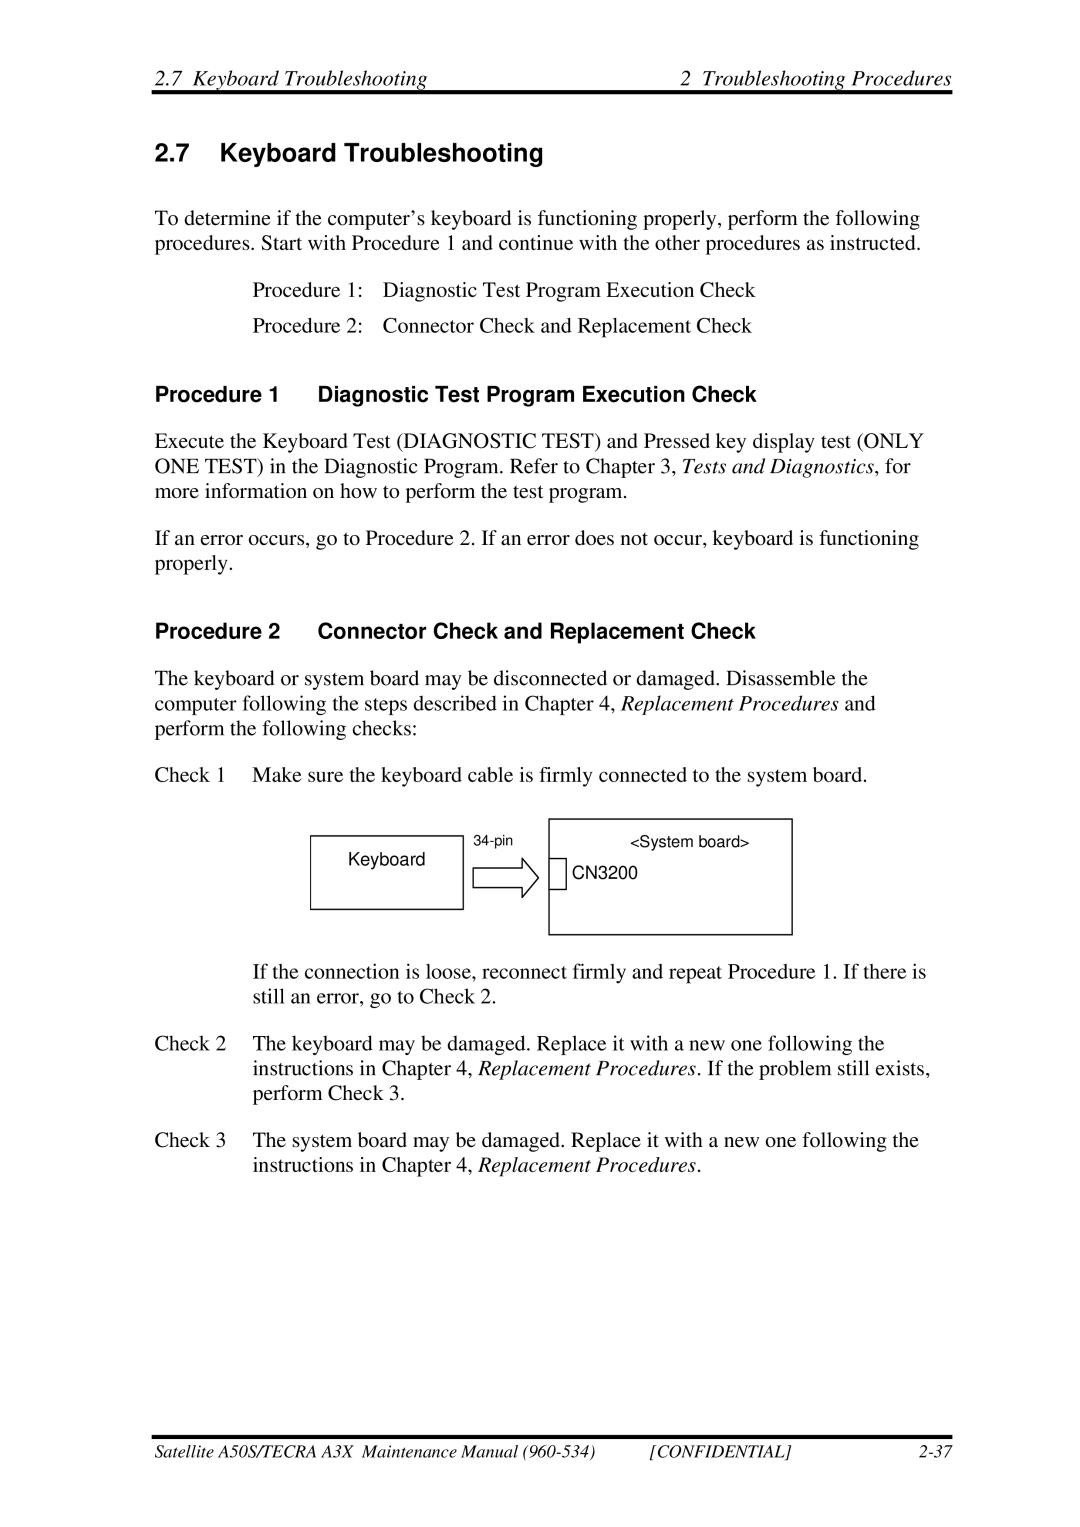
Procedure 2 Connector Check and Replacement Check
Display Troubleshooting
Troubleshooting Procedures Display Troubleshooting
Procedure 1 External Monitor Check
Procedure 3 Connector and Cable Check
Display Troubleshooting Troubleshooting Procedures
LCD module
FL inverter System board CN5000
Procedure 4 Replacement Check
Touch Pad Troubleshooting
Touch Pad Troubleshooting Troubleshooting Procedures
Procedure 2 Connector Check & Replacement Check
Troubleshooting Procedures Optical Drive Troubleshooting
Optical Drive Troubleshooting
Modem Troubleshooting Troubleshooting Procedures
Modem Troubleshooting
Troubleshooting Procedures LAN Troubleshooting
LAN Troubleshooting
Sound Troubleshooting
Sound Troubleshooting Troubleshooting Procedures
Procedure 2 Connector Check
Procedure 3 Replacement Check
Troubleshooting Procedures Sound Troubleshooting
Wireless LAN Troubleshooting Troubleshooting Procedures
Wireless LAN Troubleshooting
Procedure 1 Transmitting-Receiving Check
Procedure 2 Antennas Connection Check
Troubleshooting Procedures Wireless LAN Troubleshooting
Chapter Tests and Diagnostics
Tests and Diagnostics
20.1
Heatrun Test
20.2
21.1
31.1 Function Description Accessing the Setup Program
Tables
Tests and Diagnostics
Diagnostic Test
Tests and Diagnostics Diagnostic Test
Diagnostics menu
Diagnostic Test Tests and Diagnostics
Heatrun test program
2 H/W Hardware initial information setting tool
Executing the Diagnostic Test
Executing the Diagnostic Test Tests and Diagnostics
Diagnostics menu T&D
Tests and Diagnostics Executing the Diagnostic Test
System Test Name
2 H/W initial information setting tool
Setting of the hardware configuration Tests and Diagnostics
Setting of the hardware configuration
Tests and Diagnostics Setting of the hardware configuration
Setting of the hardware configuration Tests and Diagnostics
Heatrun Test
Tests and Diagnostics Heatrun Test
Subtest Names Tests and Diagnostics
Subtest Names
Test Name Subtest No Subtest Name
Async
Tests and Diagnostics Subtest Names Subtest names 2/2
System Test
System Test Tests and Diagnostics
Tests and Diagnostics System Test
Memory Test
Memory Test Tests and Diagnostics
Keyboard Test
Tests and Diagnostics Keyboard Test
Display Test
Display Test Tests and Diagnostics
Tests and Diagnostics Display Test
Display Test Tests and Diagnostics
Floppy Disk Test
Tests and Diagnostics Floppy Disk Test
Floppy Disk Test Tests and Diagnostics
Printer Test
Tests and Diagnostics Printer Test
Confidential
Async Test
Tests and Diagnostics Async Test
Hard Disk Test
Hard Disk Test Tests and Diagnostics
Tests and Diagnostics Hard Disk Test
HDD
Tests and Diagnostics Real Timer Test
Real Timer Test
Real Timer Test Tests and Diagnostics
NDP Test
Tests and Diagnostics NDP Test
Expansion Test Tests and Diagnostics
Sub# Address Good Bad Contents
Expansion Test
Tests and Diagnostics Expansion Test
CD-ROM/DVD-ROM Test
CD-ROM/DVD-ROM Test Tests and Diagnostics
Error Code and Error Status Names
Tests and Diagnostics Error Code and Error Status Names
Device name Error code Error status name
PRT Time OUT
No Pcmcia
Hard Disk Test Detail Status Tests and Diagnostics
Hard disk controller status register contents
Hard Disk Test Detail Status
BBK
Operations
Program Description
If Test OK, Press DellEnterkey
Only ONE Test
Button, return to the only ONE Test menu automatically
Subtest 05 USB
Press Enter and following message appears in the display
Head Cleaning Tests and Diagnostics
Head Cleaning
Function Description
Enter
Log Utilities
Tests and Diagnostics Log Utilities
00 00 0000 FDD-WRITE Protected
Log Utilities Tests and Diagnostics
Running Test
Tests and Diagnostics Running Test
Floppy Disk Drive Utilities
Floppy Disk Drive Utilities Tests and Diagnostics
Tests and Diagnostics Floppy Disk Drive Utilities
Floppy Disk Format & Copy
DIAGNOSTICS-HARD Disk & Floppy Disk Dump
Following message will appear. To finish the dump, select
Tests and Diagnostics System Configuration
System Configuration
System Configuration Display Ver X.XX Machine Name???
System Configuration Tests and Diagnostics
Wireless LAN Test Program Intel-made b/g
MAC =
Setting the responder machine
11g Communication Test NG
Wireless LAN Test Program Intel-made a/b/g
SKU NG
Aux Antenna Test NG
11a Communication Test NG
Confidential
Wireless LAN Test Program Askey-made
Wireless LAN Test Program Askey-made Tests and Diagnostics
Setting the tester DUT machine
Tests and Diagnostics Wireless LAN Test Program Askey-made
MAC Address Check OK
Tests and Diagnostics Wireless LAN Test Program Askey-made
LAN test
29 LAN/Modem/Bluetooth/IEEE1394 Test Program
LAN transmit & receive test Completed Repeat count 00000
Confidential
Modem loopback test
Modem test
Bluetooth test
Sssss
Message Contents
Error message
Error code for Bluetooth test Bdaddr 1/2
See the Specification of the Bluetooth System in detail
Eeeeeee
MM P M M M P
Error code for Bluetooth test Bdaddr of the DUT 1/2
Confidential
IEEE1394 test
Sound Test program Tests and Diagnostics
Sound Test program
Sound Standard test
Tests and Diagnostics Sound Test program
Sound Legacy test
Pass Count Write Data Read Data Address Xxxxxx Status XXX
CD Sound Standard test
Return to the CD Sound Standard menu after the test ends
CD Sound Legacy test
Setup Tests and Diagnostics
Setup
Tests and Diagnostics Setup
Accessing the Setup Program
Confidential
Accepting Changes and Exiting the Setup Window
Moving Within the Setup Menu and Changing Values
Factory Preset Configuration
HDD Mode Password Write Policy
System Date Sets date System Time Sets time
Setup Options
Low
Setup Tests and Diagnostics Using the AC adapter
Fn+F1
Setup Tests and Diagnostics
LCD Display Stretch
Ntsc US
Enable the Execute-Disable Bit function
Disable the Execute-Disable Bit function
Auto Power On
All Devices
LPT setting Interrupt level Address
LPT setting Interrupt level Address DMA channel
COM level
CD-ROM
ECP
Legacy Emulation
Chapter Replacement Procedures
Replacement Procedures
Parallel port board/Serial port board/S-Video board
Overview
105
Removing Battery Pack
53 to 4-100 Replacing Fluorescent Lamp
Overview
Overview Replacement Procedures
Safety Precautions
Replacement Procedures Overview
Before You Begin
Disassembly Procedures
Tools and Equipment
Assembly Procedure
Grip Color
Screw Tightening Torque
Screw Notation
Battery Pack/PC Card
Replacement Procedures Battery Pack/PC Card
Battery Pack Removing the battery pack
Installing the battery pack
Battery Pack/PC Card Replacement Procedures
PC Card Removing the PC card
Installing the PC card
Memory Module Replacement Procedures
Memory Module
Removing the memory module
Removing Memory Module
Replacement Procedures Memory Module
Installing the memory module
Replacement Procedures MDC
MDC
Removing the MDC
Installing the MDC
MDC Replacement Procedures
Replacement Procedures HDD
HDD
Removing the HDD
Removing HDD Assy
HDD Replacement Procedures
Installing the HDD
Wireless LAN card Replacement Procedures
Wireless LAN card
Never press hard or bend the wireless LAN card
Removing the Wireless LAN card
Installing the Wireless LAN card
Replacement Procedures Wireless LAN card
Cooling Fin/CPU Replacement Procedures
Cooling Fin/CPU
Removing the Cooling fin/CPU
12 Removing CPU Holder
13 Removing Cooling Fin
Installing the Cooling fin/CPU
Replacement Procedures Cooling Fin/CPU
16 Applying Silicon Grease
Removing the Keyboard
Replacement Procedures Keyboard
18 Removing Keyboard
Keyboard Replacement Procedures
19 Removing Keyboard support plate
Installing the Keyboard
Switch membrane board
Replacement Procedures Switch membrane board
Removing the Switch membrane board
Installing the Switch membrane board
Switch membrane board Replacement Procedures
Replacement Procedures Optical Drive
Optical Drive
Removing the Optical drive
22 Removing the bracket
Installing the Optical drive
Display Assembly
Replacement Procedures Display Assembly
Removing the Display assembly
24 Removing screws and cables under keyboard
Display Assembly Replacement Procedures
25 Removing Display Assembly
Installing the Display assembly
Installing the Sound Board
Replacement Procedures Sound Board
Sound Board
Removing the Sound Board
Parallel port board Removing the Parallel port board
Parallel port board / Serial port board / S-Video board
28 Removing parallel port board
Installing the Parallel port board
29 Removing serial port board
Serial port board Removing the serial port board
Installing the Serial port board
30 Removing S-Video board
Video board Removing the S-Video board
Installing the S-Video board
Installing the Fan
Replacement Procedures 14 Fan
14 Fan
Removing the Fan
System Board/DC-IN Jack/RTC Battery
System Board/DC-IN Jack/RTC Battery Replacement Procedures
Removing the system board/DC-IN jack/RTC battery
33 Removing System board
Replacement Procedures System Board/DC-IN Jack/RTC Battery
Installing the System board/DC-IN jack/RTC battery
Installing the PC card cover
Replacement Procedures PC card cover
PC card cover
Removing the PC card cover
Battery Latch
Battery Latch Replacement Procedures
Removing the Battery latch
Installing the Battery latch
Replacement Procedures Battery Latch
Battery Lock
Battery Lock Replacement Procedures
Removing the Battery lock
Installing the Battery lock
Replacement Procedures Battery Lock
Touch Pad Replacement Procedures
Touch Pad
Removing the Touch pad
Installing the Touch pad
Replacement Procedures Touch Pad
LCD Unit/FL Inverter Replacement Procedures
LCD Unit/FL Inverter
Removing the LCD unit/FL inverter
41 Removing FL Inverter and LCD Unit
Replacement Procedures LCD Unit/FL Inverter
42 Removing LCD Bracket
Installing the FL inverter/LCD unit
Latch Assembly Replacement Procedures
Latch Assembly
Removing the Latch assembly
Installing the Latch Assembly
Wireless LAN Antenna/Speaker/Hinge
Replacement Procedures Wireless LAN Antenna/Speaker/Hinge
Removing the Wireless LAN antenna/Speaker/Hinge
44 Removing wireless LAN antennas
Wireless LAN Antenna/Speaker/Hinge Replacement Procedures
45 Removing LCD harness Holder
Remove the wireless LAN antenna cables
48 Removing Optical drive cover
49 Removing speaker cables
50 Removing Speakers
52 Attaching sponges
Installing the Wireless LAN antenna/Speaker/Hinge
Replacement Procedures Wireless LAN Antenna/Speaker/Hinge
Fluorescent Lamp Replacement Procedures
Fluorescent Lamp
Type Supplier Section
53 Replacing 15.0 Inch Samsung fluorescent lamp XGA
Replacement Procedures Fluorescent Lamp
54 Replacing 15.0 Inch Samsung fluorescent lamp XGA
56 Replacing 15.0 Inch Samsung fluorescent lamp XGA
57 Replacing 15.0 Inch Samsung fluorescent lamp XGA
Fluorescent Lamp4 Replacement Procedures
58 Replacing 15.0 Inch Samsung fluorescent lamp XGA
59 Replacing 15.0 Inch Samsung fluorescent lamp XGA
60 Replacing 15.0 Inch Samsung fluorescent lamp XGA
61 Replacing 15.0 Inch Samsung fluorescent lamp XGA
Assembling the 15.0-inch XGA Samsumg Fluorescent Lamp
62 Replacing 15.0 Inch Sharp fluorescent lamp XGA
64 Replacing 15.0 Inch Sharp fluorescent lamp XGA
65 Replacing 15.0 Inch Sharp fluorescent lamp XGA
67 Replacing 15.0 Inch Sharp fluorescent lamp XGA
68 Replacing 15.0 Inch Sharp fluorescent lamp XGA
69 Replacing 15.0 Inch Sharp fluorescent lamp XGA
70 Replacing 15.0 Inch Sharp fluorescent lamp XGA
71 Replacing 15.0 Inch Sharp fluorescent lamp XGA
Replacement Procedures4.23 Fluorescent Lamp
72 Replacing 15.0 Inch Sharp fluorescent lamp XGA
Assembling the 15.0 Inch XGA Sharp Fluorescent Lamp
73 Replacing 15.0 Inch Sharp fluorescent lamp XGA
76 Replacing 15.0 Inch Sharp fluorescent lamp XGA
Upper diffusion sheet Lens sheet Light guide
78 Replacing 15.0 Inch Sharp fluorescent lamp XGA
79 Replacing 15.0 Inch Sharp fluorescent lamp XGA
81 Replacing 15.0 Inch Sharp fluorescent lamp XGA
83 Replacing 15.0 Inch Sharp fluorescent lamp XGA
84 Replacing 15.0 Inch Sharp fluorescent lamp XGA
85 Replacing 15.0 Inch LG.Philips fluorescent lamp XGA
86 Replacing 15.0 Inch LG.Philips fluorescent lamp XGA
87 Replacing 15.0 Inch LG.Philips fluorescent lamp XGA
88 Replacing 15.0 Inch LG.Philips fluorescent lamp XGA
89 Replacing 15.0 Inch LG.Philips fluorescent lamp XGA
Assembling the 15.0-inch XGA LG.Philips Fluorescent lamp
91 Replacing 15.0 Inch LG.Philips fluorescent lamp XGA
92 Replacing 15.0 Inch LG.Philips fluorescent lamp XGA
93 Replacing 15.0 Inch LG.Philips fluorescent lamp SXGA+
94 Replacing 15.0 Inch LG.Philips fluorescent lamp SXGA+
95 Replacing 15.0 Inch LG.Philips fluorescent lamp SXGA+
96 Replacing 15.0 Inch LG.Philips fluorescent lamp SXGA+
Assembling the 15.0 Inch SXGA+ LG.Philips Fluorescent lamp
97 Replacing 15.0 Inch LG.Philips fluorescent lamp SXGA+
98 Replacing 15.0 Inch LG.Philips fluorescent lamp SXGA+
99 Replacing 15.0 Inch LG.Philips fluorescent lamp SXGA+
100 Replacing 15.0 Inch LG.Philips fluorescent lamp SXGA+
114
Appendices
Appendices
Appendix Contents
App-iv
Appendices
Figure B-1 System board layout front
Table C-10
Table C-9
Table C-11
Table C-12
Table D-7
Appendix. a Handling the LCD Module Appendices
Precautions for handling the LCD module
Appendices Appendix. a Handling the LCD Module
Satellite A50S/TECRA A3X Maintenance Manual
Appendices Appendix. a Handling the LCD Module
Appendix. a Handling the LCD Module Appendices
Appendices Appendix. a Handling the LCD Module
Appendix. B Board Layout Appendices
System Board Front View
Mark Number Name
Figure B-2 System board layout back
System Board Back View
CPU
Front Back
Sound Board Flgsn
Appendices Appendix. B Board Layout
Parallel port Board Flgcp
Serial port Board Flgsr
Video Board Flkcs
Table C-1 Memory 0 connector pin assignment 200-pin 1/4
System Board Flksy CN1400 Memory 0 Connector 200-pin
Pin No Signal name Signal Name
Appendix. C Pin Assignment Appendices
GND ADM3-B1P ADQS3-B1N ADQS3-B1P
ADQS4-B1N
ADQS7-B1P
CN1410 Memory 1 Connector 200-pin
Table C-2 Memory 1 connector pin assignment 200-pin 1/4
Pin No Signal name
GND BDM3-B1P BDQS3-B1N BDQS3-B1P
BDQS4-B1N
Table C-3 HDD I/F connector pin assignment 44-pin
CN1800 HDD I/F Connector 44-pin
Table C-4 Optical drive I/F connector pin assignment 50-pin
CN1810 Optical Drive I/F Connector 50-pin
IS2110 PC Card I/F Connector 70-pin
Table C-5 PC card I/F connector pin assignment 70-pin 1/2
Appendices Appendix. C Pin Assignment
ACSTSC-PYP ACAD30-PYP ACCD2-P3N GND
Table C-6 Docking I/F connector 240-pin1/4
CN2300 Docking I/F connector 240-pin
DVIPD0-P3N DCADIO-S3P GND PME-S3P
DSSCL-S5P
DSSDA-S5P
Table C-7 Mini PCI I/F connector pin assignment 124-pin 1/2
CN2200 Mini PCI I/F Connector 124-pin
P3V CLKRUN-P3N SERR-P3N GND PERR-P3N CBE1-P3N
CN3490 Debug Port Connector 12-pin
CN3010 MDC I/F Connector 12-pin
Table C-8 MDC I/F connector pin assignment 12-pin
Table C-9 Debug port connector pin assignment 12-pin
11 CN3240 Touch Pad I/F Connector 4-pin
10 CN3200 Keyboard I/F Connector 34-pin
Table C-10 Keyboard I/F connector pin assignment 34-pin
Table C-11 Touch pad I/F connector pin assignment 4-pin
12 CN3280 Switch Board I/F Connector 10-pin
13 CN3502 FLGCP/FLGSR Board I/F Connector 30-pin
Table C-12 Switch board I/F connector pin assignment 10-pin
14 CN4100 Network I/F Connector 14-pin
15 CN4611 USB harness I/F Connector 8-pin
16 CN4610 USB I/F Connector 0 4-pin
Table C-17 LCD I/F connector pin assignment 41-pin
17 CN5000 LCD I/F Connector 41-pin
18 CN5620 RGB I/F Connector 15-pin
19 CN5340 S-Video I/F Connector 5-pin
20 CN6001 Speaker Connector Left 3-pin
21 CN6002 Speaker Connector Right 2-pin
22 CN9500 Sound Board I/F Connector 18-pin
23 CN8800 DC-IN Connector 4-pin
24 CN8020 1st Battery Connector 10-pin
25 CN9990 RTC Battery Connector 3-pin
26 CN8770 FAN I/F Connector 4-pin
29 CN9510 System Board I/F Connector 18-pin
28 J6310 Headphone Connector 6-pin
Table C-28 Headphone Connector pin assignment 6-pin
Table C-29 System board I/F Connector pin assignment 18-pin
Table C-30 System board I/F Connector pin assignment 10-pin
Table C-31 System board I/F Connector pin assignment 30-pin
32 CN4613 Parallel I/F Connector 25-pin
33 CN4620 USB harness I/F Connector 8-pin
34 CN4622 USB I/F Connector 1 4-pin
36 PJ4612 USB I/F Connector 1 4-pin
Video Board Flgcs 35 PJ4610 USB harness I/F Connector 8-pin
37 PJ4611 USB I/F Connector 2 4-pin
38 PJ5640 System Board I/F Connector 5-pin
Table C-39 S-Video Connector pin assignment 4-pin
39 PJ5641 S-Video Connector 4-pin
Table C-40 System board I/F Connector pin assignment 30-pin
41 CN3440 Serial I/F Connector 9-pin
42 CN4630 USB harness I/F Connector 8-pin
43 CN4632 USB I/F Connector 1 4-pin
Appendices Appendix. C Pin Assignment
Appendix. D Keyboard Scan/Character Codes Appendices
Table D-1 Scan codes set 1 and set 2 1/4
Cap Keytop Code set Make Break
Caps Lock Enter Shift L No.102
ALT R
122 F11 123 F12 124 PrintSc 126 Pause 202 203 Win 204 App
With left Shift With right Shift Set AA E0 2A E0 F0 12 E0
Cap Code set Keytop Make Break
Table D-4 Scan codes with Fn key
Table D-6 No.124 key scan code
Key Shift Code set Top Make
Appendix. E Key LayoutAppendices
Keyboard Layout
Appendices Appendix. E Key Layout
RGB Monitor ID Wraparound Connector 15-pin to 15-pin
Parallel Port Wraparound Connector
Appendix. F Wiring Diagrams Appendices
Appendices Appendix. F Wiring Diagrams
Appendix. G BIOS/KBC/EC Update Appendices
Appendix G BIOS/KBC/EC Update
Appendices Appendix. G BIOS/KBC/EC Update
Appendix. H Reliability Appendices
Table H-1 Mtbf
Component Time hours
Appendices Appendix. H Reliability