2. Enter License Key
The first time you launch ETV Backup, you will be prompted for a license key. This key is attached to the "Software Activation Keys" card shipped with the EtherneTV server. The application will launch as soon as you enter the license key.
3. Set Profile IP Addresses
ETV Backup is shipped with a preconfigured profile "group" called MCS Warm Backup Group. This group has individual profiles corresponding to all of the key Portal Server directories that need to be backed up. All ETV Backup functions use this preconfigured group. Before you can run ETV Backup you need to set the IP addresses for each of the individual profiles in MCS Warm Backup Group. These addresses must correspond to the actual IP address of your live Portal Server.
TTo set the profile IP addresses:
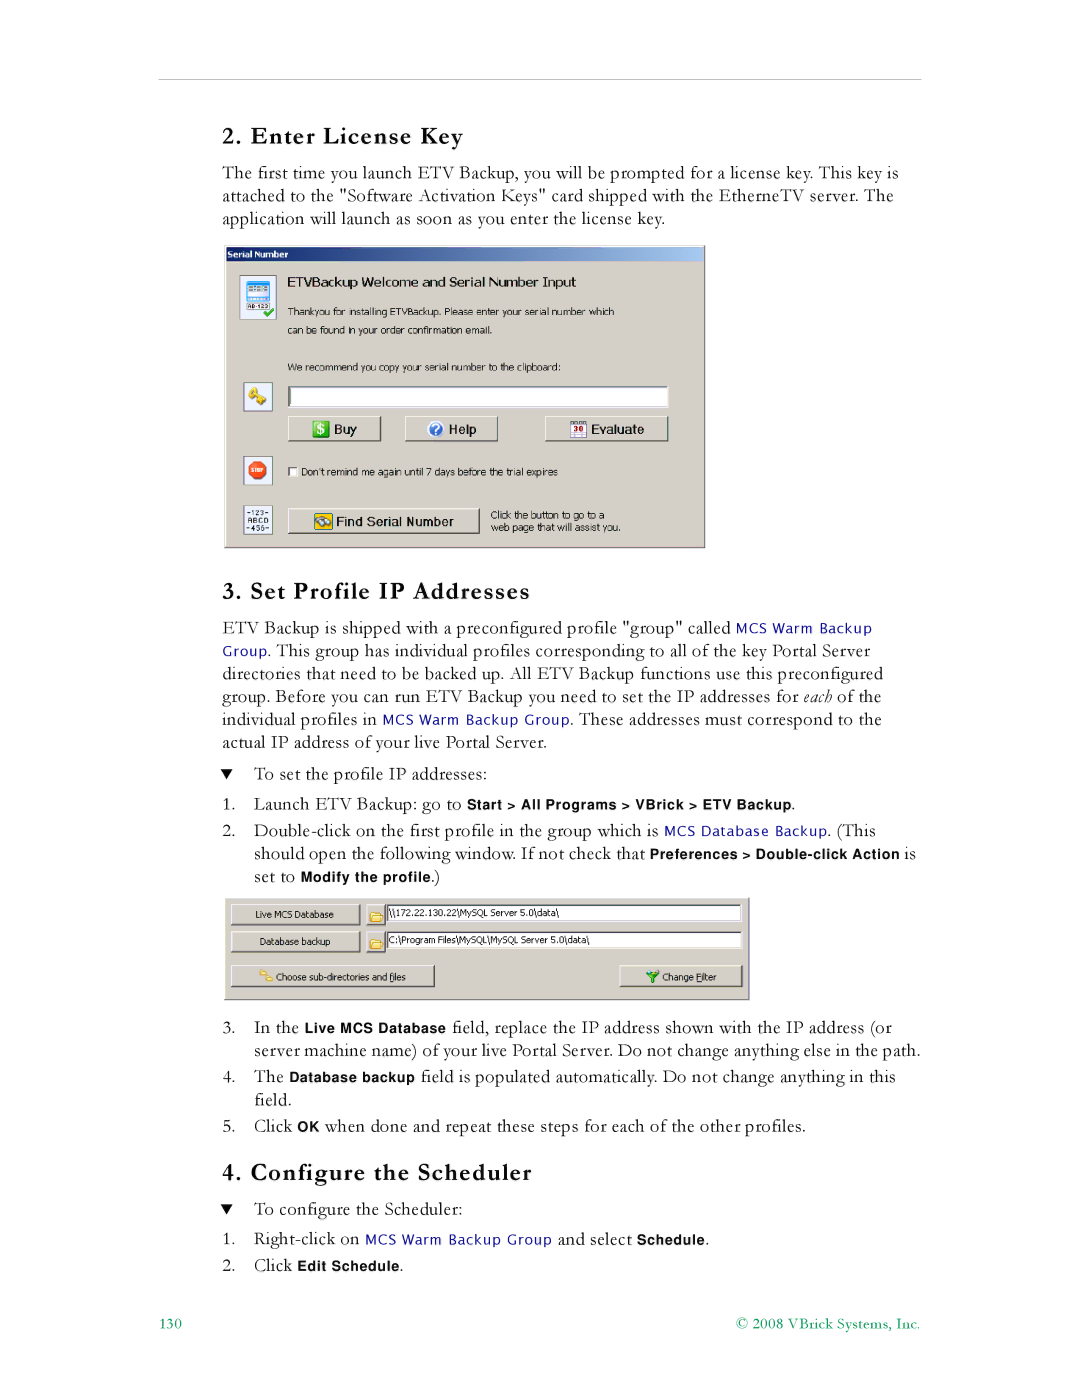
1.Launch ETV Backup: go to Start > All Programs > VBrick > ETV Backup.
2.
should open the following window. If not check that Preferences > |
set to Modify the profile.) |
3.In the Live MCS Database field, replace the IP address shown with the IP address (or server machine name) of your live Portal Server. Do not change anything else in the path.
4.The Database backup field is populated automatically. Do not change anything in this field.
5.Click OK when done and repeat these steps for each of the other profiles.
4. Configure the Scheduler
TTo configure the Scheduler:
1.
2.Click Edit Schedule.
130 | © 2008 VBrick Systems, Inc. |