Using the Scheduler
Record
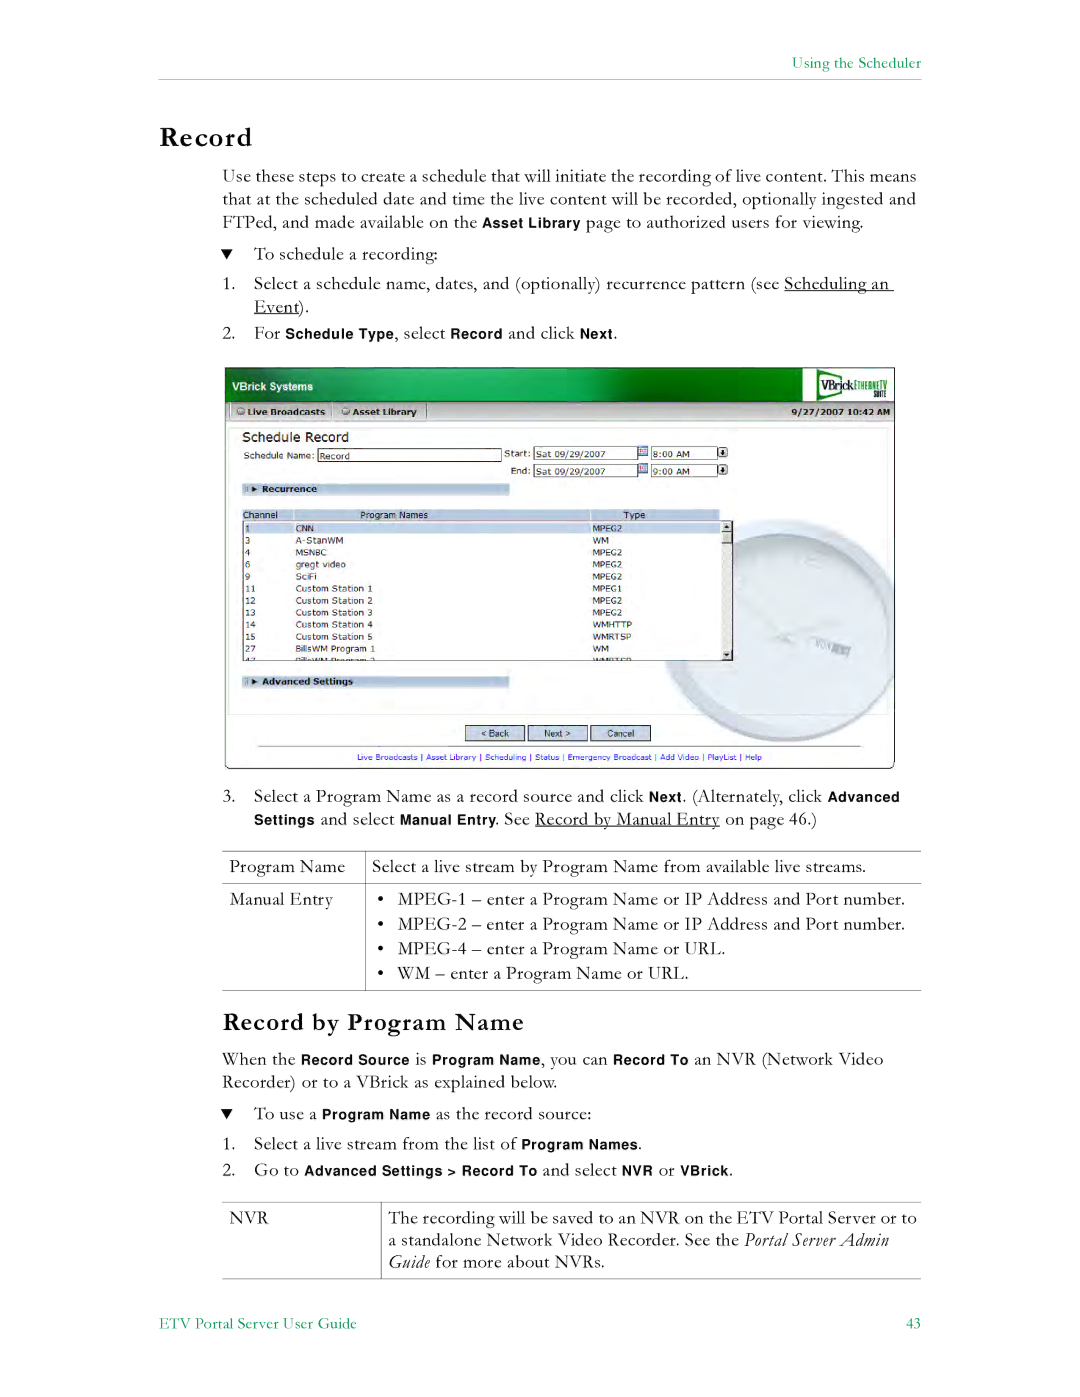
Use these steps to create a schedule that will initiate the recording of live content. This means that at the scheduled date and time the live content will be recorded, optionally ingested and FTPed, and made available on the Asset Library page to authorized users for viewing.
TTo schedule a recording:
1.Select a schedule name, dates, and (optionally) recurrence pattern (see Scheduling an Event).
2.For Schedule Type, select Record and click Next.
3.Select a Program Name as a record source and click Next. (Alternately, click Advanced Settings and select Manual Entry. See Record by Manual Entry on page 46.)
Program Name | Select a live stream by Program Name from available live streams. | ||
|
|
|
|
Manual Entry | • | – enter a Program Name or IP Address and Port number. | |
| • | – enter a Program Name or IP Address and Port number. | |
| • |
| – enter a Program Name or URL. |
| • WM – enter a Program Name or URL. | ||
|
|
|
|
Record by Program Name
When the Record Source is Program Name, you can Record To an NVR (Network Video Recorder) or to a VBrick as explained below.
TTo use a Program Name as the record source:
1.Select a live stream from the list of Program Names.
2.Go to Advanced Settings > Record To and select NVR or VBrick.
NVR
The recording will be saved to an NVR on the ETV Portal Server or to a standalone Network Video Recorder. See the Portal Server Admin Guide for more about NVRs.
ETV Portal Server User Guide | 43 |
