Redaction Settings Tab

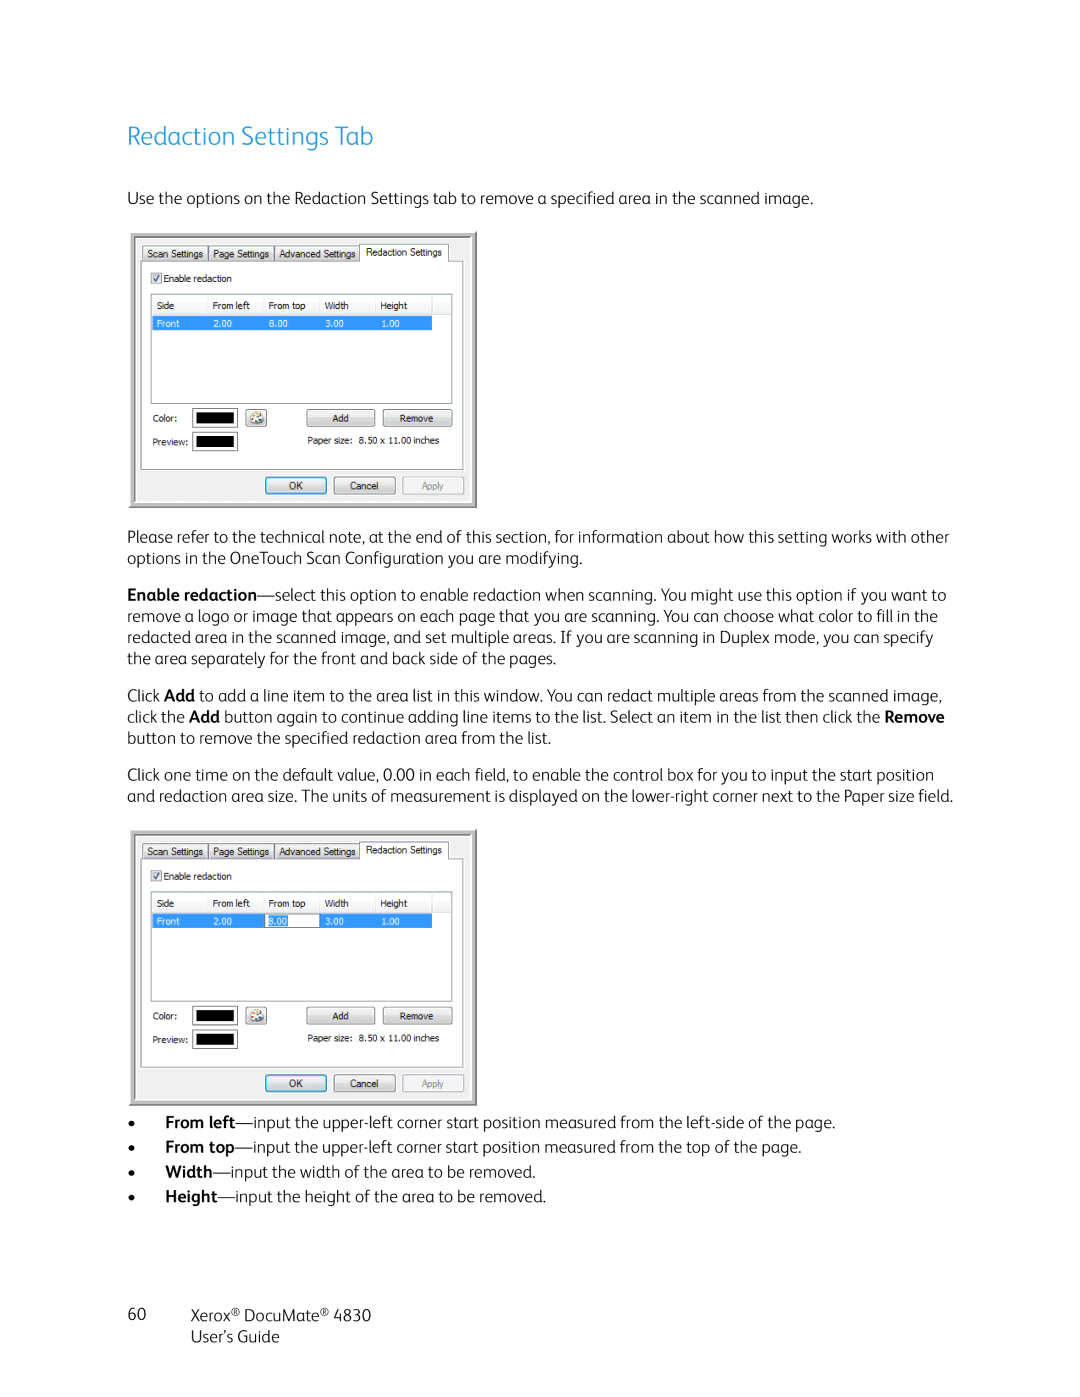
Use the options on the Redaction Settings tab to remove a specified area in the scanned image.

Please refer to the technical note, at the end of this section, for information about how this setting works with other options in the OneTouch Scan Configuration you are modifying.

Enable redaction—select this option to enable redaction when scanning. You might use this option if you want to remove a logo or image that appears on each page that you are scanning. You can choose what color to fill in the redacted area in the scanned image, and set multiple areas. If you are scanning in Duplex mode, you can specify the area separately for the front and back side of the pages.

Click Add to add a line item to the area list in this window. You can redact multiple areas from the scanned image, click the Add button again to continue adding line items to the list. Select an item in the list then click the Remove button to remove the specified redaction area from the list.

Click one time on the default value, 0.00 in each field, to enable the control box for you to input the start position and redaction area size. The units of measurement is displayed on the lower-right corner next to the Paper size field.

From left—input the upper-left corner start position measured from the left-side of the page.

From top—input the upper-left corner start position measured from the top of the page.

Width—input the width of the area to be removed.

Height—input the height of the area to be removed.

60Xerox® DocuMate® 4830 User’s Guide

Page 60
Image 60
Xerox 4830 manual Redaction Settings Tab