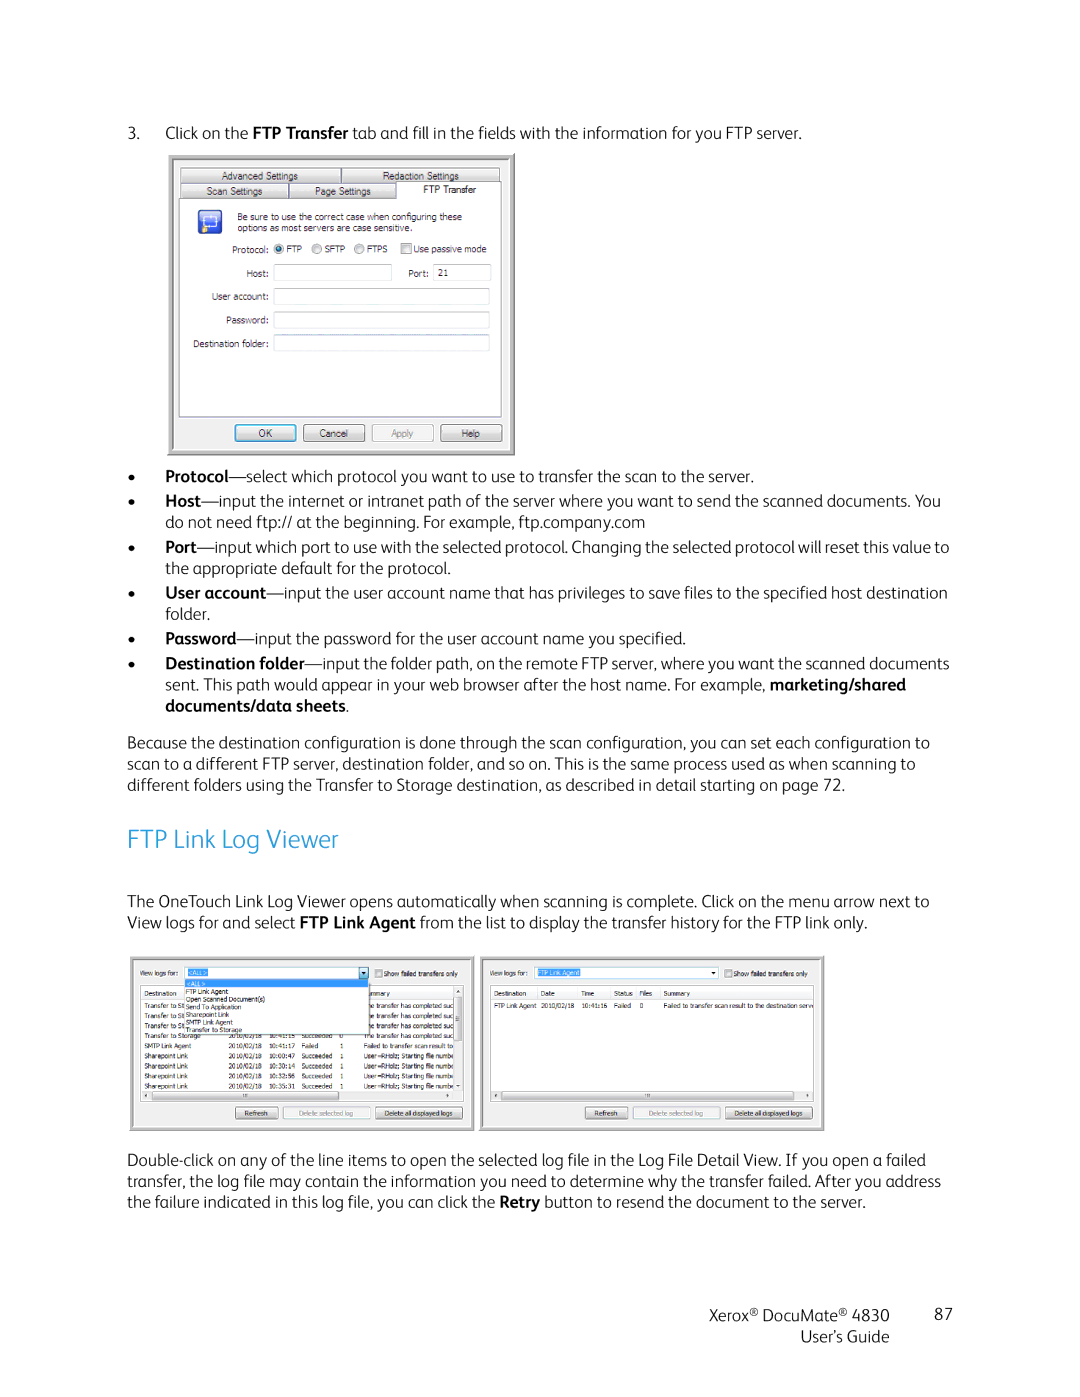
3.Click on the FTP Transfer tab and fill in the fields with the information for you FTP server.
•Protocol—select which protocol you want to use to transfer the scan to the server.
•Host—input the internet or intranet path of the server where you want to send the scanned documents. You do not need ftp:// at the beginning. For example, ftp.company.com
•Port—input which port to use with the selected protocol. Changing the selected protocol will reset this value to the appropriate default for the protocol.
•User account—input the user account name that has privileges to save files to the specified host destination folder.
•Password—input the password for the user account name you specified.
•Destination folder—input the folder path, on the remote FTP server, where you want the scanned documents sent. This path would appear in your web browser after the host name. For example, marketing/shared documents/data sheets.
Because the destination configuration is done through the scan configuration, you can set each configuration to scan to a different FTP server, destination folder, and so on. This is the same process used as when scanning to different folders using the Transfer to Storage destination, as described in detail starting on page 72.
FTP Link Log Viewer
The OneTouch Link Log Viewer opens automatically when scanning is complete. Click on the menu arrow next to View logs for and select FTP Link Agent from the list to display the transfer history for the FTP link only.
Double-click on any of the line items to open the selected log file in the Log File Detail View. If you open a failed transfer, the log file may contain the information you need to determine why the transfer failed. After you address the failure indicated in this log file, you can click the Retry button to resend the document to the server.

