50 | 4 Configuring the system |
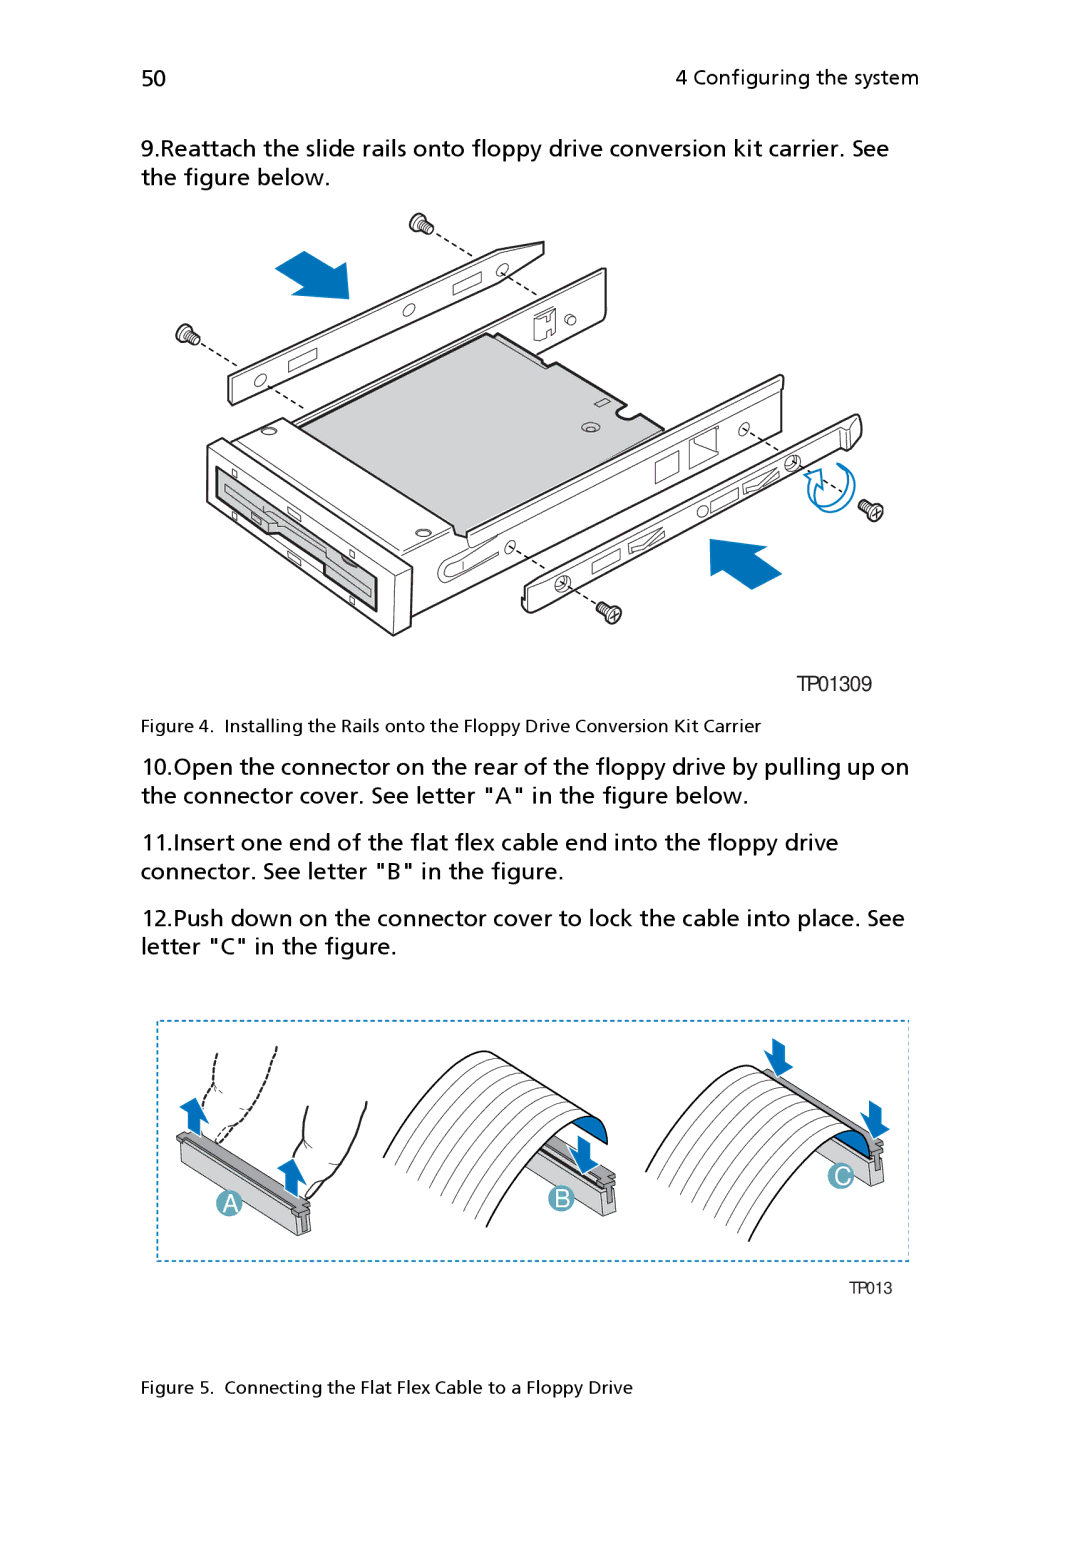
9.Reattach the slide rails onto floppy drive conversion kit carrier. See the figure below.
TP01309
Figure 4. Installing the Rails onto the Floppy Drive Conversion Kit Carrier
10.Open the connector on the rear of the floppy drive by pulling up on the connector cover. See letter "A" in the figure below.
11.Insert one end of the flat flex cable end into the floppy drive connector. See letter "B" in the figure.
12.Push down on the connector cover to lock the cable into place. See letter "C" in the figure.
C
AB
TP013